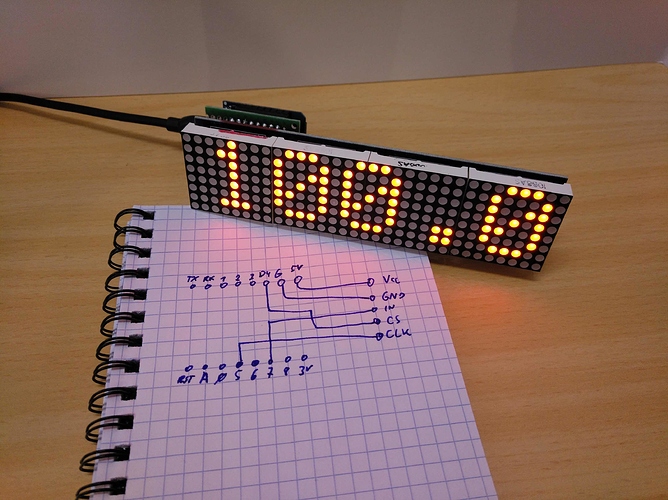
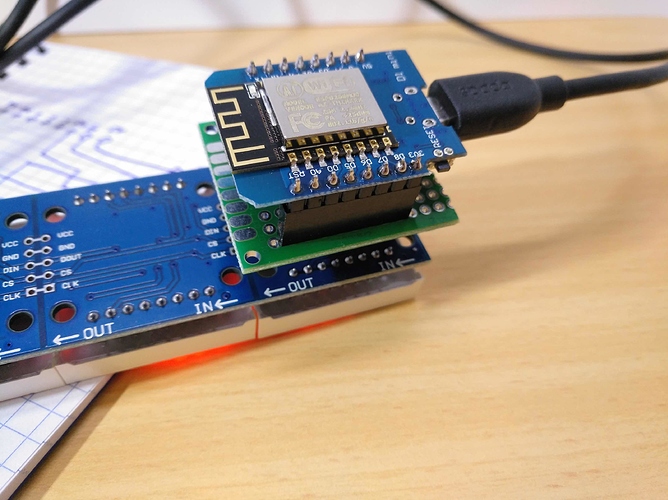
Sometimes a progress indicator that is readable across a medium-sized room is a nice thing to have. Here’s the solution that I cooked up today with cheap parts from the ’bay: it’s a Wemos D1 mini ESP8266 module and four 8x8 LED dot matrix modules, together for less than 10 euros. Programmed in Arduino, the D1 connects to my WLAN then polls the Octoprint API every 5 seconds for the current status. It parses the reply and extracts the string from just after the word "completion" to the next comma, and shows the percentage with two digits after the decimal point. That's the main reason I didn't use MQTT, because MQTT’s progress value is whole-percent only.
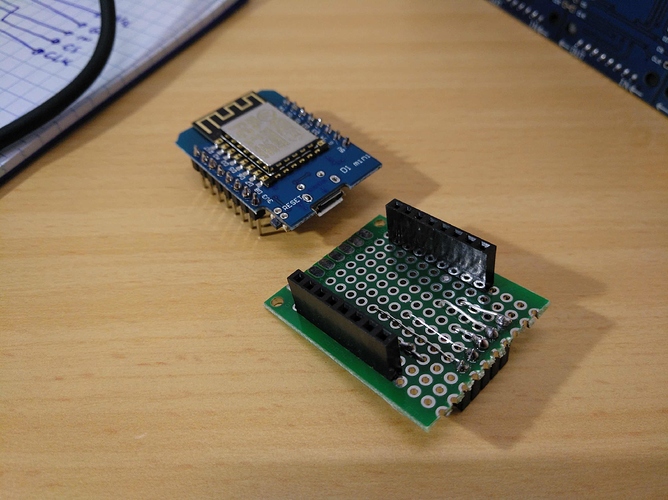
Wiring the module to the Wemos required just five wires (diagram in first picture), so it's an easy and quick project. Now I just need to cook up some 3d printed case to make it a bit less short-prone and less flimsy …
And here's the Arduino code – not my most glorious moment, also it's a mix of german and english variable names.
/*
    Fetch progress value from Octoprint API and show it on a 32x8 LED matrix display
    Wiring: Wemos D1 mini -> LED display
    5 V -> Vcc
    GND -> GND
    D4 -> CS
    D7 -> Din
    D5 -> CLK
*/

// Uses Max72XX LIBRARY FROM: https://github.com/markruys/arduino-Max72xxPanel

const char* ssid     = "Der WLAN Name";
const char* password = "Der WLAN Schlüssel";

const char* host = "IP oder Name vom Octoprint Server";
const char* apiKey = "API-Key vom Octoprint Server";


#include <SPI.h>
#include <Adafruit_GFX.h>
#include <Max72xxPanel.h>

int pinCS = D4; // Attach CS to this pin, DIN to MOSI and CLK to SCK (cf http://arduino.cc/en/Reference/SPI )
int numberOfHorizontalDisplays = 4;
int numberOfVerticalDisplays = 1;

Max72xxPanel matrix = Max72xxPanel(pinCS, numberOfHorizontalDisplays, numberOfVerticalDisplays);

int spacer = 1;
int width = 5 + spacer; // The font width is 5 pixels

byte pixtoggler = 1;

char zahlstring[50]; // for Matrix-Display (a bit long, but who cares)


#include <ESP8266WiFi.h>


void setup() {
  Serial.begin(115200);
  delay(10);

  matrix.setIntensity(1); // Use a value between 0 and 15 for brightness
  matrix.setRotation( 0, 1 );
  matrix.setRotation( 1, 1 );
  matrix.setRotation( 2, 1 );
  matrix.setRotation( 3, 1 );

  // We start by connecting to a WiFi network

  Serial.println();
  Serial.println();
  Serial.print("Connecting to ");
  Serial.println(ssid);

  /* Explicitly set the ESP8266 to be a WiFi-client, otherwise, it by default,
     would try to act as both a client and an access-point and could cause
     network-issues with your other WiFi-devices on your WiFi-network. */
  WiFi.mode(WIFI_STA);
  WiFi.begin(ssid, password);

  while (WiFi.status() != WL_CONNECTED) {

    ShowMatrix( "WiFi " );
    delay(250);
    ShowMatrix( " WiFi" );
    delay(250);
    Serial.print(".");
  }

  Serial.println("");
  Serial.println("WiFi connected");
  Serial.println("IP address: ");
  Serial.println(WiFi.localIP());
  ShowMatrix( "ONLIN" );
}


void loop() {
  delay(5000);

  Serial.print("connecting to ");
  Serial.println(host);

  // Use WiFiClient class to create TCP connections
  WiFiClient client;
  const int httpPort = 80;
  if (!client.connect(host, httpPort)) {
    Serial.println("connection failed");
    return;
  }

  // We now create a URI for the request
  String url = "/api/job";
  url += "?apikey=";
  url += apiKey;

  Serial.print("Requesting URL: ");
  Serial.println(url);

  // This will send the request to the server
  client.print(String("GET ") + url + " HTTP/1.1\r\n" +
               "Host: " + host + "\r\n" +
               "Connection: close\r\n\r\n");
  unsigned long timeout = millis();
  while (client.available() == 0) {
    if (millis() - timeout > 5000) {
      Serial.println(">>> Client Timeout !");
      client.stop();
      ShowMatrix("ERROR");
      return;
    }
  }


  // Read all the lines of the reply from server and print them to Serial
  while (client.available()) {
    matrixDotty();
    String line = client.readStringUntil('\r');
    int textanf = line.indexOf( "\"completion\":" );
    if( textanf  == -1 ) {
      continue;
    }
    int textende = line.indexOf( ",", textanf + 13 );
    if( textende == -1 ) {
      continue;
    }

    String teiltext = line.substring( textanf+13, textende );
    float percentage = teiltext.toFloat();

    zeigeProzentMatrix( percentage );

  }

}


/*
 *
 *
 *
 *
 *
 *
 *
 *
 */

 void zeigeProzentMatrix( float percentage ) {

    dtostrf( percentage, 6, 2, zahlstring );

    ShowMatrix( zahlstring );

}

void matrixDotty() {
  pixtoggler = !pixtoggler;
  matrix.drawPixel(0,0, !pixtoggler);
  matrix.write();
}

void ShowMatrix( char* freitext ) {

    strlcpy( zahlstring, freitext, 7 );

    matrix.fillScreen(LOW);

    for( int i = 0; i < 6; i++ ) {
        matrix.drawChar( 2+ (i * 6 ), 0, zahlstring[i], HIGH, LOW, 1);
      }

    matrix.write(); // Send bitmap to display

}


