Is there any way to put enclosure plugin info on the main screen rather than going off to another screen (selecting the plugin, selecting whichever relay (for example) you want to activate) and then returning back to the main screen ?
It would be nice if I could have a toggle button for the relay on the main screen sort of a label and then a button that is either red/green (for active) and white/clear for inactive.
You can edit the ~/.octoprint/config.yaml to add buttons to the Control tab, for instance. Mine looks like this:
If you knew the GPIO pin number associated with the relay, that would make this easier.
1 Like
Thanks !!!! I will give that a try ... and yes, I do know all the GPIO pins used.
For this, I used the Gcode System Commands plugin to create one OCTO-related command which corresponds to a shell script. In that shell script, you'd toggle the GPIO pin.
This went way over my head 
Okay, I have no idea which GPIO pin you're using so I'll assume 17 throughout. In theory, this should work:
- Install the Gcode Systems Commands plugin
- Restart OctoPrint
- Visit Settings -> Gcode Systems Commands
- Click on the [+] button
- Add OCTO 901 which runs something like
~/scripts/toggle17on.sh - Remote into the Raspberry using
ssh pi@octopi.localandraspberryas the default password - Run
touch ~/scripts/toggle17on.shto create a script - Run
nano ~/scripts/toggle17on.shto edit it
toggle17on.sh:
#!/bin/bash

echo "1" > /sys/class/gpio/gpio17/value
- Run
echo 17 > /sys/class/gpio/exportto tell the system that you want to set pin 17 as an output port - Make a copy of your config.yaml with
cp ~/.octoprint/config.yaml ~/scripts/config.yaml - Run
nano ~/.octoprint/config.yamlto edit the control section:
controls:
- children:
  - command: OCTO901
    name: OCTO901
    type: command
  name: Control Enclosure
  type: section
When editing a yaml file, tabs and indents are super-critical so be careful.
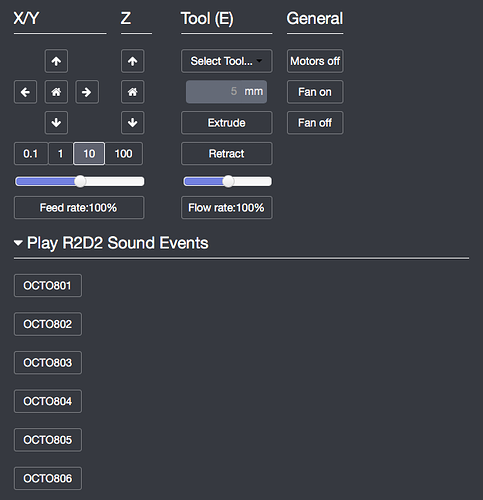
- Restart OctoPrint and visit the Control tab
Thanks for the details ! I will give that a try although it will likely be next weekend before I can dive into this thing!
There is a big empty section in the 'control' screen that I can fill uo with all manner of 'stuff' 
Wonderful and thanks for this info.
Can the same be done by adding buttons/icons to the navigation bar (like the psu flash icon)?
You could but you'd need a plugin for that. You might try going to school on the NavTemp or Pi Support plugins for inspiration.
Like branching off the psu plugin? or are there other example plugins for this purpose?
I wouldn't branch something like NavTemp. I think I do something like:
cd ~/sites       # This is where all my code lives
git clone https://github.com/somedude/somecode.git MyNewName
cd MyNewName
rm -Rf .git      # Remove the existing code history
git init
code .           # Run Visual Studio Code editor in this folder
# Then refactor like crazy, changing the names throughout
# Be careful though. The plugin ID in lowercase is seen in
# filenames as well.
Another way would be to search the documentation for the "cookiecutter" and follow those instructions. Then "go to school" on an existing plugin and bring over some of those concepts into your new plugin.
The button is only active if the printer is connected, can it always be active? Thank you
Perhaps someone else knows (I don't).
Ooook Thanks
Does anyone know why Octoprint gives me permissions error for gpio? I have a bash script that will shutdown my Geekworm x735 power management board. I works fine as pi when I ssh to it and I don't need sudo to run it. But when I create a System command in config.yaml, it creates the menu entry okay, but when it tries to run the command /usr/local/bin/x735off which is the bash script that calls the gpio commands I get permission denied in Octoprint. If I add sudo to the system command, I get an error to the affect that there is no authentication method or no way to enter a password.
@ZK36
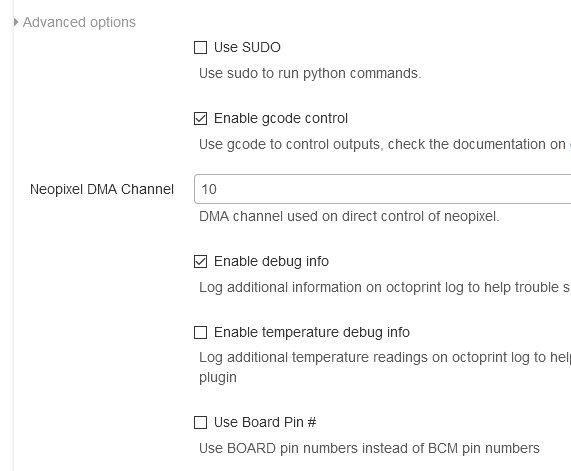
At the very end of the Enclosure Plugin settings the is Advanced Options. You may activate Use SUDO
Also check if you are using the correct ports and the proper port mode (pin numbers instead of BCM)