Finally Making Some Money

I finally have a chance to make some money from this printer. After lots of practice making replacement parts for my brother's DVD player, a wheel chair, and some motorcycle parts, I found a guy at a local computer shop who is selling RetroPi's and wants cases for them

"Sure, I can do that" I said, sure of my talents. So I made a nice, professional looking case with the Pi hidden from view, and the wires all tucked up inside, and I showed it to him

"Can you put a fan in it ?" He asked me

"Sure, I can do that" I said, and went home and made a hole in the top with a nice honey comb pattern to block the dust from getting in, and I went back and showed it to him

"That's nice", he said, while turning it in his hand, admiring it. "Think you could put my logo on it ?"

"Um, yea, I think I could do that" I said, starting to think that I might be lying

"On top, going diagonal" he added after seeing that I was okay with anything he asked for

"Sure, I can do that" I said

"In red" he added

"Sure, I can do that" I said out loud, while thinking at the same time "NO ! I CAN'T see how I could possibly pull that off with the printers that I own since neither one of them has a dual extruder. But, I went home and started brainstorming anyway

(Brainstorming is the act of asking somebody for help)

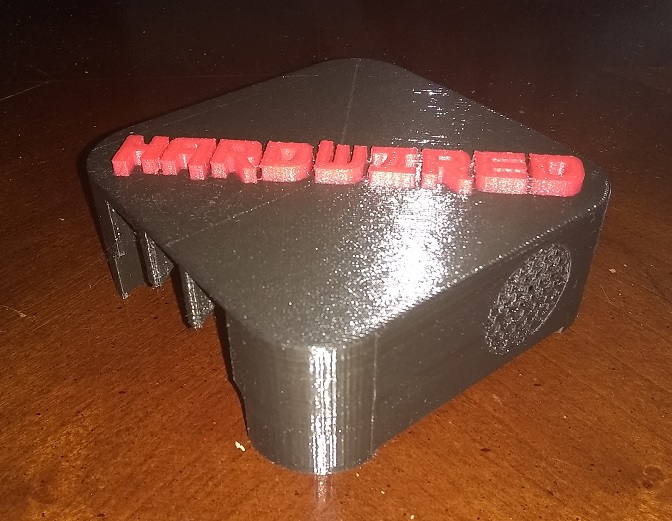
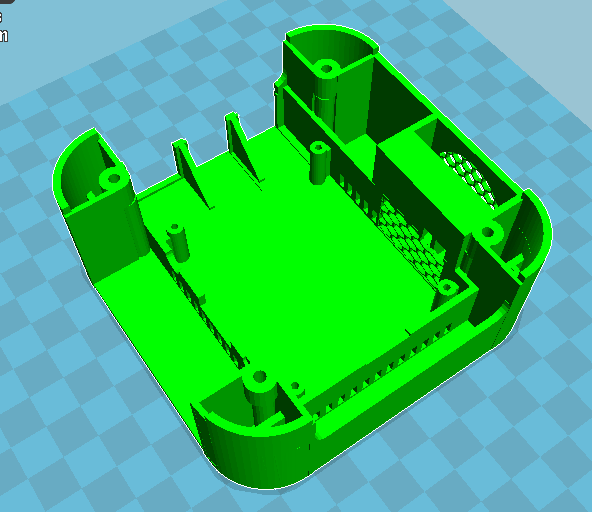
I finally had to make the case 15mm taller so that I could relocate the fan to the side of the case, adding in a little wind tunnel to focus the air to the CPU. The logo was a bit more tricky, I found a piece of software called "Inkscape" that lets you input a jpg or bmp and outputs an svg file which I then imported and added to my drawing

I printed a test copy and quickly realized that printing the thing right side up created WAY too much support material, and made the underside completely ugly, which means that I'll have to print it upside down

So... I installed the "Pause At Height" plugin .5mm above the top of the case, and put the logo on top of that. I marked where the case was when the pause happened, removed the case, turned it over, and hit continue, and the logo printed perfectly

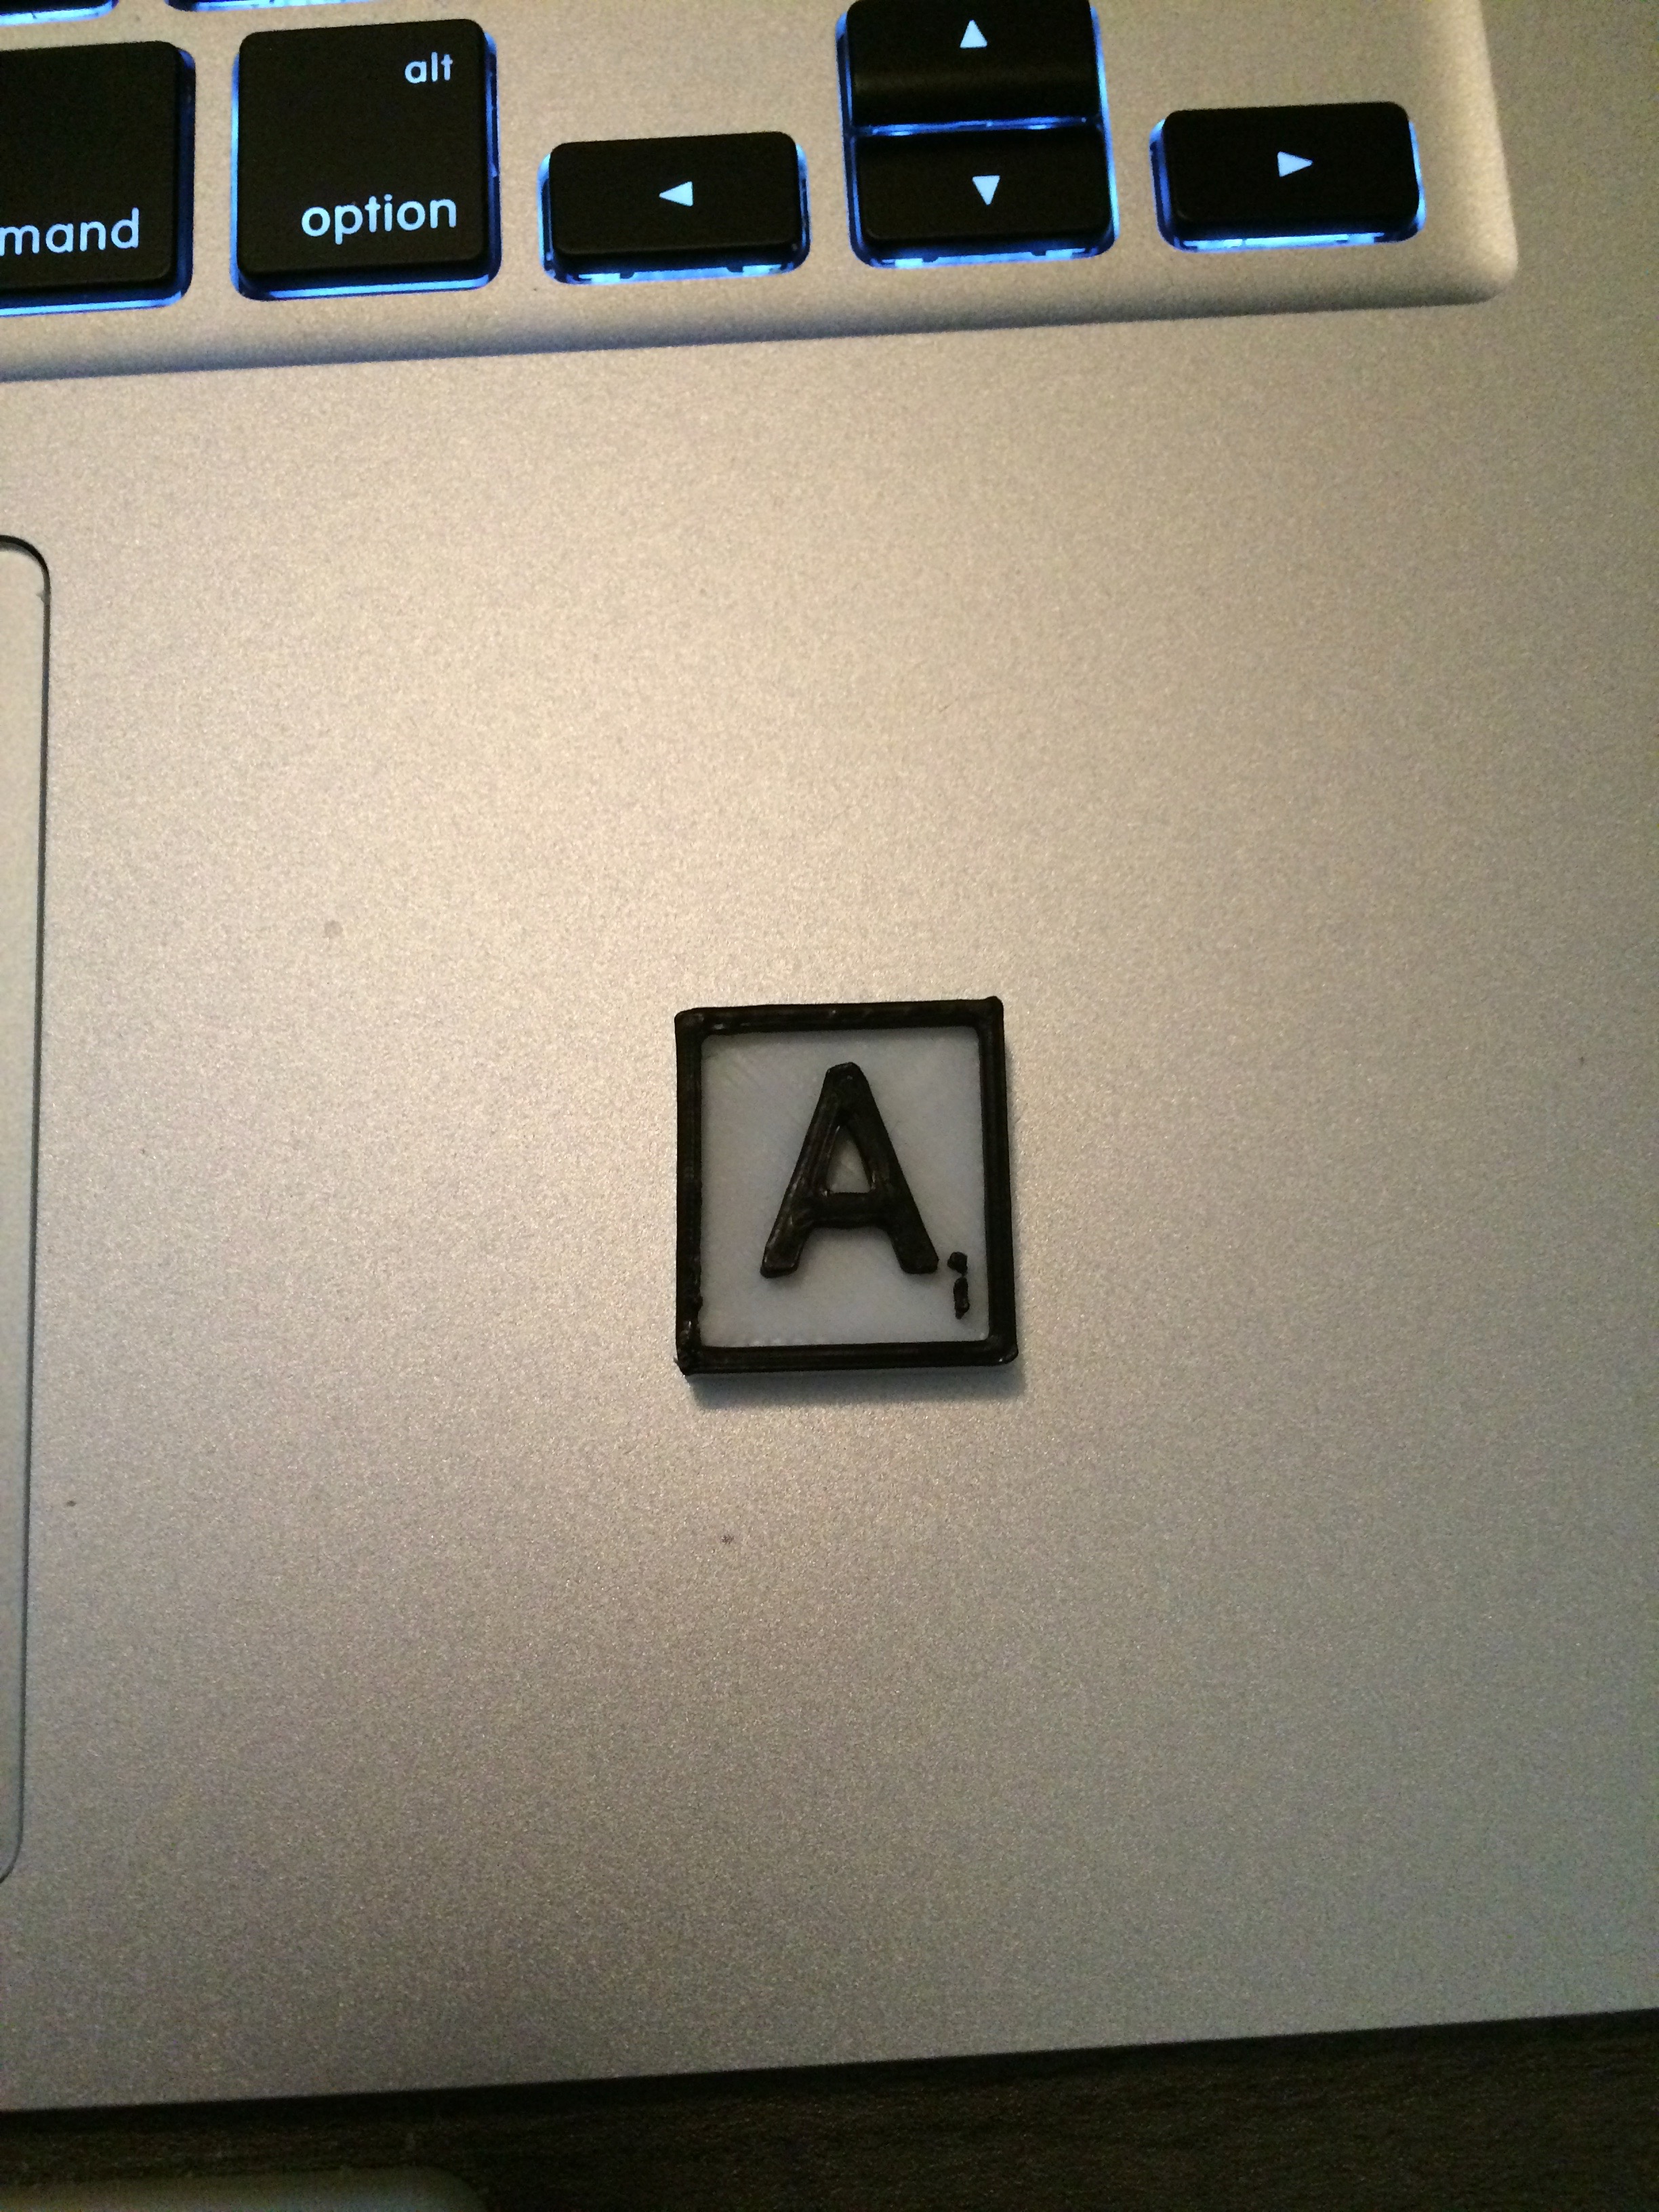
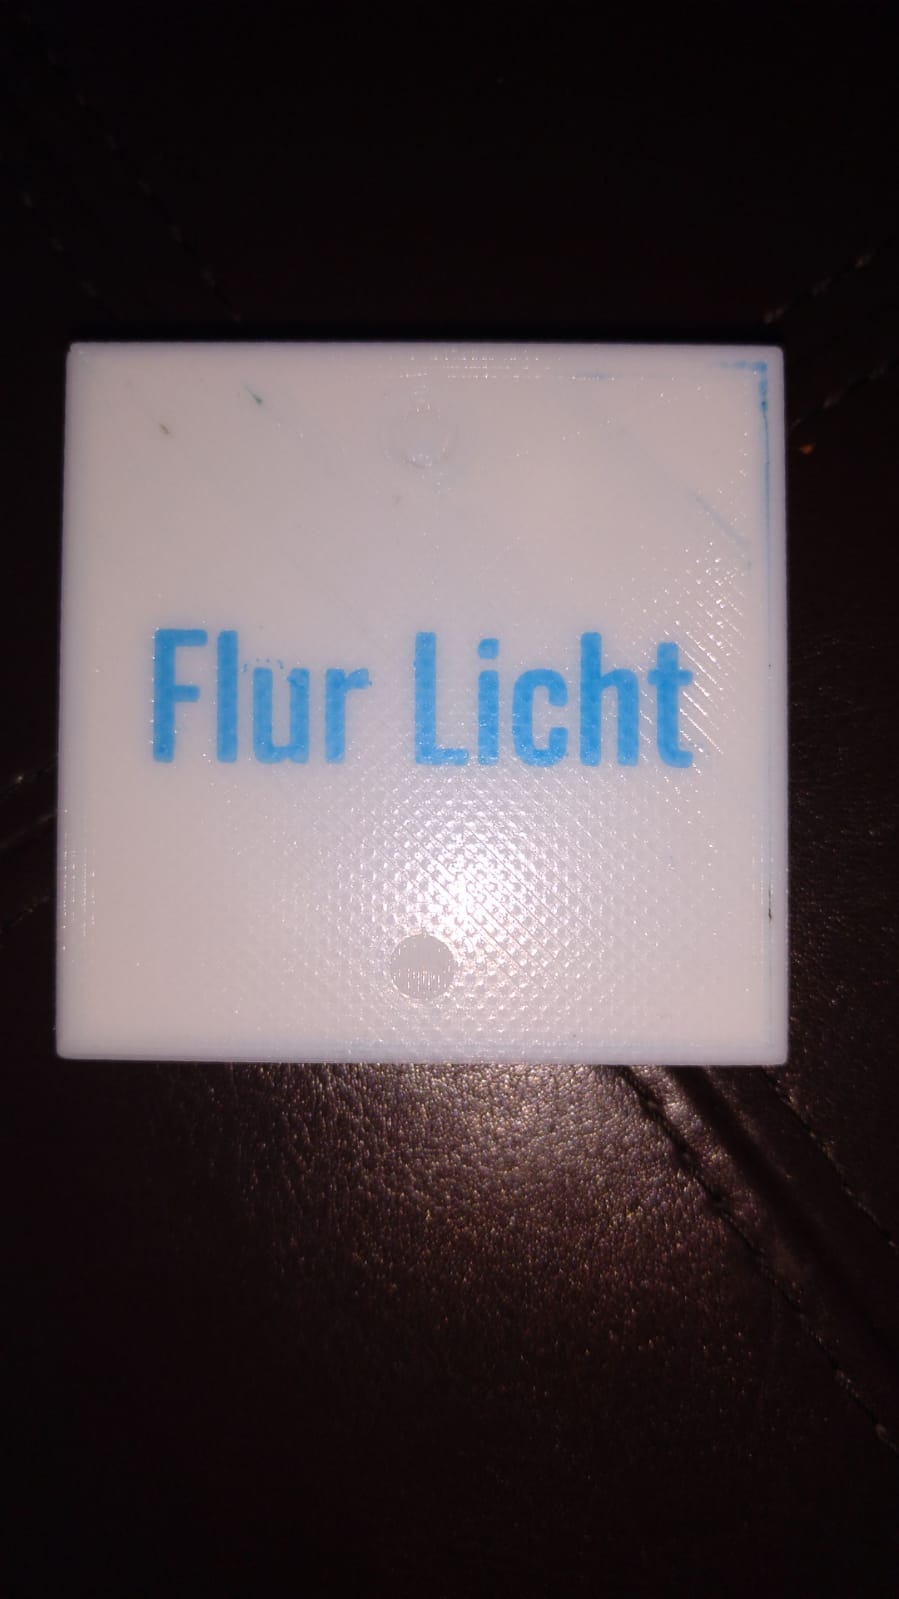
Okay, so that was step one. Step two is to make it red. I've got two printers, so I loaded the red into the other printer, and created a 1mm x 1mm 37mm tall toothpick with the pause at height, and the logo on top of that, I printed the case on one printer, and when it finished, I put it in the other printer, and finished with the logo

And here it is...

1 Like

Very nice! /Borat

I think I'd fillet all the top edges a little, if it were me and maybe about 0.8mm high or so.

Ya think the logo is a bit too tall ?

To me, yeah.

There's some embossed lettering on this part; it's facing to the right here in this photo. That's maybe 0.4mm high (maybe two printed layers thick). That's about the least you can get away with.

This one's maybe 0.8 tall in the embossing but the black-on-white contrast makes it really stand out.

I might be able to get away with maybe a millimeter or so less, but, I think maybe the red filament may have some translucent qualities to it because I could still see the black until I really poured on the red

I'll try cutting down a bit and see how it looks

And of course, show a couple of versions to the client and see what they think.

Oh yea, absolutely. I've already gone thru like 5 iterations with this thing already, so it wouldn't surprise me if he wanted yet another change

<cough> feature creep </cough>

Well, yea, but, on the upside, it's turned out to be a really nice case, if a bit overkill, but, really nice

It does look good, I'll give you that :slight_smile:

As a side note, I hope you're making something off all your time invested, though. Usually one charges for engineering these things, and since you've got an extra manual process of moving them to a second printer, make sure you upcharge for the logo in a second color on the production. Since you're 3D printing, you don't have to charge an arm and a leg, but make sure your time is valued by both yourself and your customer by charging for it (it'll seriously make the difference quite often between endless revisions and actually getting into production). It'll also save you from customers doing like 10 and then paying the tooling charge to someone in China to replicate your design and injection mold 1000 for the price you're charging him for 20 of them. Not saying this one guy will do that, but if I had a dollar for every time I've seen it happen/been told it happened to someone, I'd be retired on my own private island.

The upside is, if he does enough of these over time, it'll justify you setting up a small CNC mill for tooling and a small injection molder to pop em out for pennies on the dollar in production. Try explaining THAT to the spouse/SO/dog, though :smiley:

1 Like

I actually worked at a plastic manufacturing plant in Tennessee and we manufactured molds for roto-molding (HDPE). We charged $3,000 minimally for a mold design.

But it's the overseas injection molding that's more efficient than anything we could print here and the quality is killer. And yes, they'd charge $1,000 for that mold design just like you said.

So, an other idea for the text.
As i'm pretty new to 3D printing i have no idea if that's old garbage, but a thing that i did recently:

  • First print the text upside down, just one layer, height 0.1mm, you may wan't a skirt to be sure the text is fully readable. Set it to be on the very outside of your printbed
  • After that immediately change the filament, leave the text on the print bed, don't let it cool down
  • Flush all the old filament out, wipe the nozzle clean
  • Print the case with a first layer height of 0.2mm, check for z-hopping over unprinted areas in your slicer, and a nice skirt to get the nozzle clean.

After cooling down you have your text smooth integrated to your case.

That's a light-switch cover. Was my first try, had some of the blue filament still sticking to the nozzle. Next one was without the blue fragments in the upper right.

2 Likes

Brilliant, btw.

I followed everything you said but this. Wouldn't you want the text to be in the center of the print bed to coincide with the plate?

Indeed, the text should be centered, only set the skirt distance high so it dosen't interferr with the sencond print.

Oh... got it. Couldn't you remove the skirt before starting the second print?

I like this idea, and I'm definitely gonna put it in my toolbox, but, it doesn't apply to this project because the customer wants black cases

I do have another project coming up tho that it could work for. I'm going to have to look into clear/translucent, or really light colored filament for it

So do a light-colored text on a black case...?

How would light show thru a black background ?

I can't, my print bed ("Anycubic Ultrabase") keeps the PLA so tight it only comes off when it's cold. Will damage the printbed trying to get it off earlier. If that works for you, sure, no problem.

My Robo C2 has an unheated bed. Yep, yep...