My Anet E10, disassembled and reassembled

My first 3d printing video. Dunno if I'll keep doing it, but I wanted to show the brain and body transplant I just finished.

Things I'm working on-

  • Status screen/control module for the Pi based on the 2.2" adafruit (non-touch) LCD.
  • standalone ATTINY that will read sensors and shut off power if things go wrong (smoke, temperature, etc)
  • Installing the Stovetop Firestop
  • installing the door
  • CoreXY that need parts printed and assembled.

But mostly I'm trying to get back to consistent prints with the E10. Pulling my hair out right now with some Z backlash issues.

I don't know if this is helpful or not, but I saw this split-gear design a couple of decades ago in an old dot matrix printer (probably Epson). Basically, those two "half gears" are biased by a spring which ensures that one grabs the leading edge of the opposite gear's tooth and the other grabs the trailing edge. The result is a driving mechanism which has zero backlash.

In my particular case, my printer's bed was a diving board, essentially, and would bounce at the front end. So I designed a cantilever support for under the bed and this has worked out well for me.

You said it was having "gaps" in it. What kinds of gaps are you referring to ?

Cuz I tried swapping some parts on my Beta printer a few weeks ago so I could use a bowden setup, to get some of the mass off the rails, thinking that I'd be able to print faster if I could make Issac Newton happy, but, for some reason, all I ended up with was prints with what looked like swiss cheese holes in them

I tried turning up the flow and the feedrate (at one point, up to 300%) which did nothing, well, nothing helpful anyway, so I took out the bowden stuff, and went back to the (mostly) original setup

Somehow, something I did wasn't quite original, cuz, now the beta printer prints in CRAZY detail. It's as if I replaced the .4 nozzle with a .2 (which I didn't. I checked)

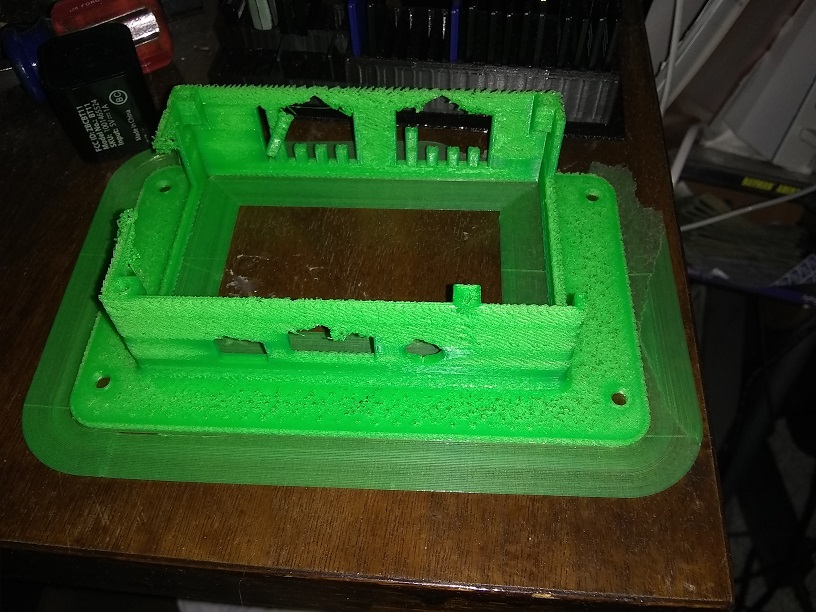
The green one here, is what I call swiss cheese

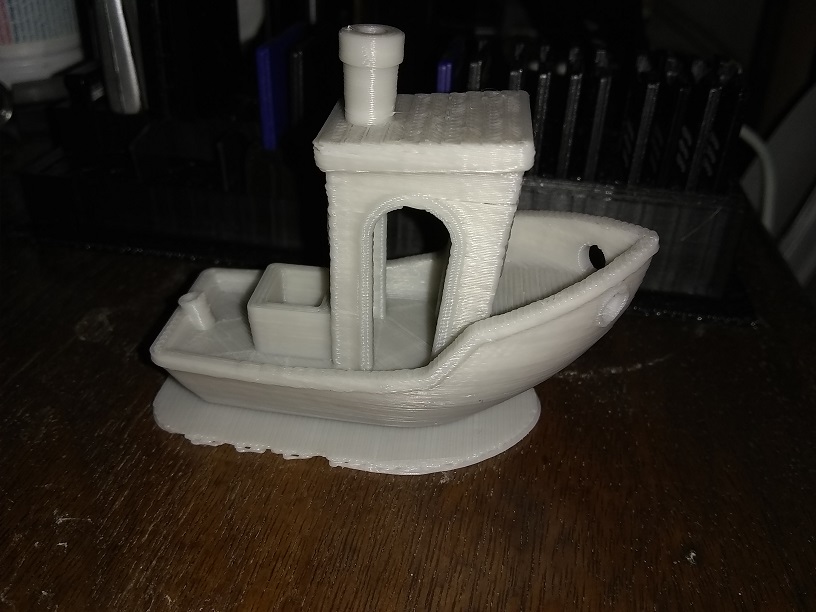
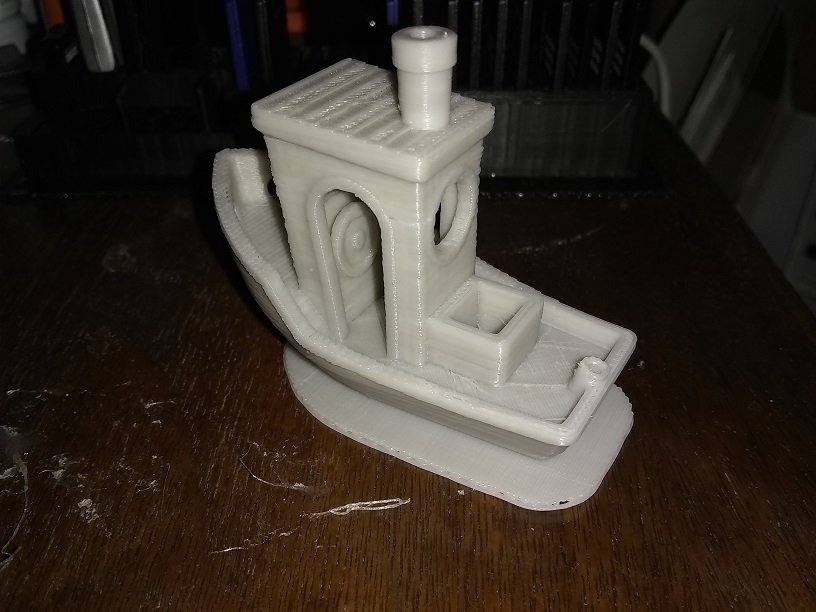
The black one is from the Alpha printer, which never tried to be a bowden, and the grey is the one that was bowden, then back to (mostly) stock Anet A8. It almost looks smooth

bkwh

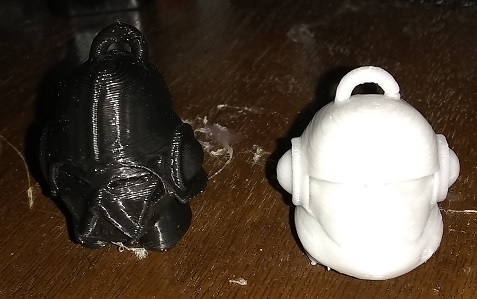
I did mostly the same upgrades to both Alpha and Beta, and the Cura settings are the same in both prints, but, the detail in Beta, as you can see, is much improved over Alpha (and no more swiss cheese)

Both of these were printed at .2 layer height, but, you would think that the grey was printed at .06 or something. I really wish I'd gotten the bowden to work that well

One big factor is internal pressure of the molten plastic in the hotend. For your original setup I take it, that driving gear is perhaps an inch above the intake of the hotend assembly. For a bowden setup, you're pushing on the filament from at least a foot away; the inner diameter of the PTFE tube then becomes a factor. What if the PTFE tube's ID is too large? This results in a loss of direct pressure to the intake of the top of the hotend, in theory at least.

You might be able to adjust your slicer settings and fine tune the extrusion percentage. Printing the outer shell after the infill and slowing down the outer shell paths can help.

Cura has a setting called Spiralize Outer Contour under Special Modes. It will lay down the outside in the same way that someone at Dairy Queen will dispense a soft-serve ice cream cone, if that makes sense... so no more layer-related blobbing. Try that one and see if it makes a difference. If it does, then this is related to hotend internal pressure.

The bowden parts I bought were, supposedly, meant, including the PTFE tubing, for 1.75MM filament. So, theoretically, they should be the right size.

I still have the parts, and could probably switch it back over in an afternoon, but, it's working so nicely right now that I'm hesitant to futz with it

I just printed this benchy on the beta printer on .2 layer settings, which is the lowest quality setting I should use, and I see only 2 artifacts in it, on that little house near the top. No spiderwebs except for in the little box on the aft deck. I'm printing one at .06 right now to have something to compare it with. But for low quality settings, this looks pretty nice for a $120 printer

I briefly considered installing the bowden on the alpha printer, but, I was leaning more toward installing the pi3b+ on that one for beta testing Octopi

so beta test octopi on the alpha :grin:

I'll get a vid of my Z problems up today, and I'll set up the mini-studio and take pics of the layer problems. The problem is the right Z screw doesn't stay parallel when the screw changes direction- and it's more than just a backlash issue, I'm finding. So I had the brilliant idea to turn off 'z hop' in my slicing, which I was using to reduce stringing.

Anyhow, more details from me on this later. I really appreciate the help from you two here- I wasn't expecting there would be people fluent in my printer issues here!

From what I can see from googling, you've got two stepper motors for the Z-axis. Before you get too far into a complicated answer, I would check to make sure that both set screws on both motors are nice and tight, and that nothing is slipping there

Maybe put a mark on the motors to make sure they're both turning the same distance at the same time

Once you've got the Z-axis leveled, both of those motors should stay 100% in sync

Yea, working on it. It's giving me a strange problem right now. I can access it locally over my LAN, but, when I try to get plugins from the repository, it tells me that it has no internet access and can't ping google, which is just plain odd. Either the network works, or it doesn't

From what I can see from googling, you've got two stepper motors for the Z-axis. Before you get too far into a complicated answer, I would check to make sure that both set screws on both motors are nice and tight, and that nothing is slipping there

Yeah, and I've tried to align the shafts at the top too.

Yea, working on it. It's giving me a strange problem right now. I can access it locally over my LAN, but, when I try to get plugins from the repository, it tells me that it has no internet access and can't ping google, which is just plain odd. Either the network works, or it doesn't

DNS problem, perhaps?

It's on the same network as everything else in the house. If I had a DNS problem, it seems like it should be everywhere, not just in one device

Sure, but if you gave it a static IP, it probably needs static DNS. Try:

nslookup octoprint.org
nslookup octoprint.org 8.8.8.8

At about 1:40 into the video, it looks to me that left/right sides of the horizontal assembly aren't parallel.

If it were me, I think I would use a carpenter's level to first level the table, then level the bed... and then I would Z-zero the assembly, loosen the set screw on the right side, use the level on top of the horizontal assembly and spin the right Z-screw until the assembly is level, partially tightening the set screw.

I'd then measure using a digital caliper the left height, locking the caliper, then go to the right side and fine-tune the right side again by hand, finally tightening that set screw.

I'd then do a G29 bed leveling with a spiral test print or something like that to reveal if it's the same line thickness laid down on left and right extremes.

@Spyder Yeah, that's awesome for a sub-$200 printer. Benchy's no cake walk. I'd say you've dialed that one in.

I think I figured it out, after stewing over it and then semi-disassembling it. Anyhow, because my new extruder/tram/carriage is different, the nozzle is a little higher, so the (horizontal) X arm needs to be lower, and it was hitting a bracket on the left side. So it kept trying to pull both sides down but only the right side would move. Hooray!

I don't think I have it quite level, but close enough that I'm printing some tests. I think that's fixing my mismatched layer problem. I'm going to need to reprint the carriage half of the extruder and move the hole pattern down; I designed it to be like the HEVO, so the extruder half is the HEVO stock part, the carriage half is my openscad design.

Agree- spyder's benchy looks pretty good.

1 Like

Well... autoleveling can only do so much, IMHO. Try to get the bed perfectly level in human terms and then let G29 do the rest.

I don't have a probe- I don't think the anet has any support for it.

If you have something of known height then you can move the assembly left/right and and use something like a gap gauge to look for differences and adjust.