There are some problems running Octolapse 0.3.1 and Octoprint 1.3.9. You might want to try upgrading to the latest pre-release version via the plugin manager by entering this URL in the '... from URL' box (current as of 10-1-2018):
Warning: You will lose any customizations you might have made to the snapshot profiles. They will be replaced with new (better) defaults. Also, this is a pre-release, so you can expect a bug or two. However, lots of bugs from 0.3.1 have been fixed too.
Do you have any official tread for this version/beta? So you don't have to give support all over the forum
I keep changing some of the settings that you have in the printer profile.
Are they only used for the high quality trigger only
I like trigger on a new layer.
@varazir, I have a feedback thread for that version here that you can use. Thanks for the suggestion!
All of the slicer speeds within the printer profile that are not required (these can be left blank) are ONLY used for the high quality trigger. If you don't want to use the high quality trigger, you don't need to update the speeds when you change them in your slicer. I probably need to highlight the required speeds, so thanks for the suggestion!
I'm not sure what you mean by this
Could I set octolaps to be triggered on ;LAYER: ?
Is that a comment? Octolapse never sees the comments from your gcode file since they are stripped by Octoprint (though I'd LOVE to be able to use them) for efficiency reasons. You can work around this by using the 'GCODE' snapshot trigger. Just add the following command to your after layer change script:
SNAP
Octolapse will prevent this code from being sent to your printer. Just make sure you are using the Gcode snapshot trigger.
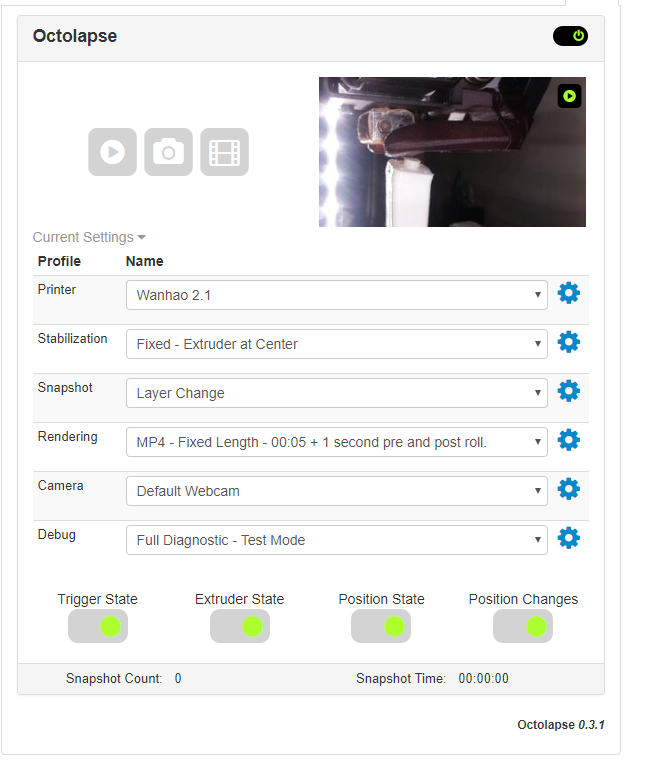
So, I already see a few problems. However, first read this wiki entry regarding configuring your camera image. At first I thought access was denied to control.htm, but it looks like you fixed that It takes some time to tweak the image preferences. As explained in the wiki entry, it's easiest if you open up a window that has your camera stream, then use another window to tweak the settings until they look good. If you want to 'revert to the defaults' for your camera, just uncheck the 'Enable And Apply Preferences Before Print' box in the camera profile and reboot your pi. However, it's totally worth it to get your camera configured to use all manual settings. I'm working on a simpler interface for adjusting the settings. Hopefully I'll find a way to query the CURRENT settings, but sadly I've not been able to figure this out yet...
Second, it looks like you have added 'G1 Z15.0 F6000' to the position altering commands in your printer profile. You should definitely remove this. However, I've never seen nor anticipated this possibility, so i'd need to have a look at your settings file to be sure. If you post your gcode file as well as your settings.json file (can be found in Octoprint Settings [wrench icon]->Octolapse, then click Download Settings), I can run it through the debugger and make sure there aren't any other issues.
Thanks for posting the log file, that was REALLY helpful!
I'll take a look, but if you can also get a log to me that would be EXTREMELY helpful. Like really really helpful. Please look at the instructions above.
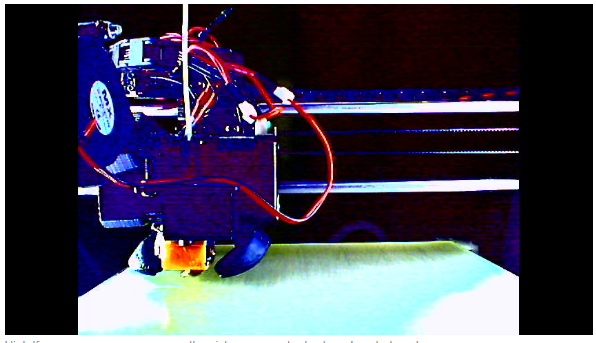
Now, regarding your image. I can tell from your photo that your gain is too high. It also looks oversaturated. Did you follow these steps from the wiki link I sent:
Start by making sure the following options are set to automatic: Auto White Balance Temperature = Checked, Exposure type = Auto, Autofocus Enabled = Checked
Click Apply Now and note the image changes in your camera stream.
Adjust the brightness, contrast, saturation and sharpness one at a time, clicking 'Apply Now' and checking the image between settings changes. The goal is not yet to get to the image perfect, just try to improve it a bit. You'll come back to these later probably.
Put an object on your 3d printer in the center of the bed and point your camera right at it. You want your object and printer bed to be in the same place you want to take a snapshot for your timelapse.
Uncheck 'Autofocus Enabled'. Set the 'Absolute Focus' to 15 and click 'apply now'. If your image is not sharp (it won't be), increment your focus by about 5 and repeat this step. Once it gets clear(ish) such that the next adjustment makes the image LESS SHARP, start reducing the focus by 1 or 2 until you are happy with the focus.
Set 'Exposure Type' to 'Manual'. Start with the gain at 0 and exposure at 3. Keep increasing exposure until you have a good image. Now bump up the gain by about 20 until the image is both bright enough and has good color. Then decrease the exposure by 10 and see if raising the gain can give you a good image. The goal here is to reduce the exposure by as much as possible without having terrible color (due to the gain).
Uncheck 'Auto White Balance Temperature' and change the 'White Balance Temperature' to 2000 and click 'Apply Now'. Increase the color temp by 500 until the colors start to look accurate. Note that the colors will shift from blueish to reddish.
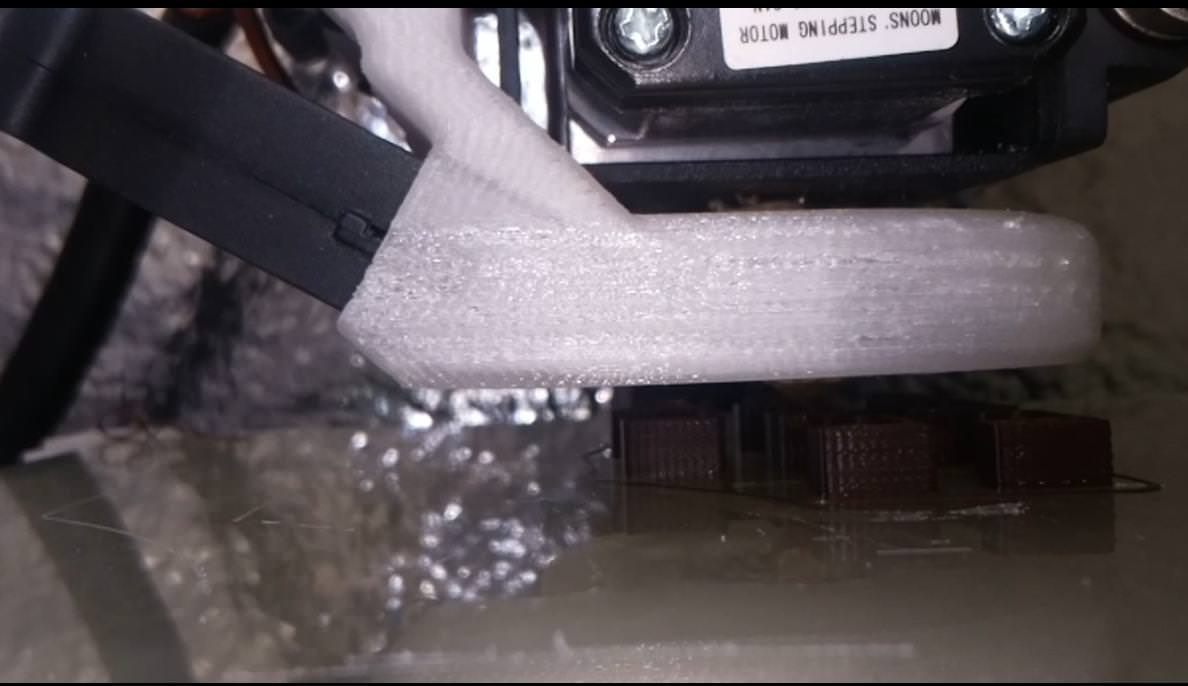
Go back to brightness/contrast/saturation and tweak some more. If you are not satisfied with the color/brightness here try going back to the exposure settings and raise the exposure if the image is too dark or lower it if it's washed out. Lower the gain/saturation if the colors are fuzzy and over-saturated.
SAVE YOUR CHANGES BEFORE EXITING YOUR PROFILE! Otherwise you'll have to go through all of this again!
I plan to make a video about this eventually, but am working currently on getting the controls cleaned up and easier to work with. If you have trouble with any step, please let me know. I need to work on the instructions anyway (they were written with extreme haste).
Ok, thanks for all that! I know it's a huge pain in the butt to get all those files together. I've figured out the problem and created an issue on the Octolapse github issues page here.
Basically the snapshot gcode command (snap) appears to be case sensitive! Whoops. I'm shocked I haven't noticed this before. Change the snapshot command to match your printer profile (snap, lower case) and it will work. OR you can change the Octolapse printer profile snapshot command to SNAP and leave the gcode alone.
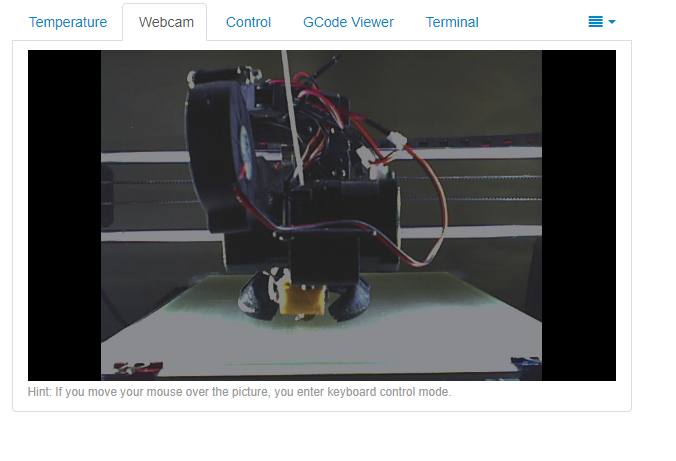
Regarding your issue, your brightness, contrast etc, looks way too low. Set them all to 128 (128 = 50%) for now. Then try raising/lowering your exposure until the image looks better. Set your gain to something like 100 or 200 until you get the exposure right.
at 128 it showed like the first photo. I have tried different settings on the exposure but nothing was good.
getting the logs etc wasn't that hard. Installed the pastebininit pkg on my raspberry pi.
I have setup Cura to add the word SNAP so it will be easy as just change the post script plugin
What kind of camera is this? Maybe I can find someone else who has already tweaked most of the settings.
Don't forget that as a last resort you can disable the custom image preferences within the Octolapse camera profile and reboot the pi. That will reset the camera settings to the defaults. Manual settings are best, but not if you can't get a good image.
Maybe a idea is to read the default settings from the webgui for the camera and populate the settings in octolaps.
From that the user can start to tweek.
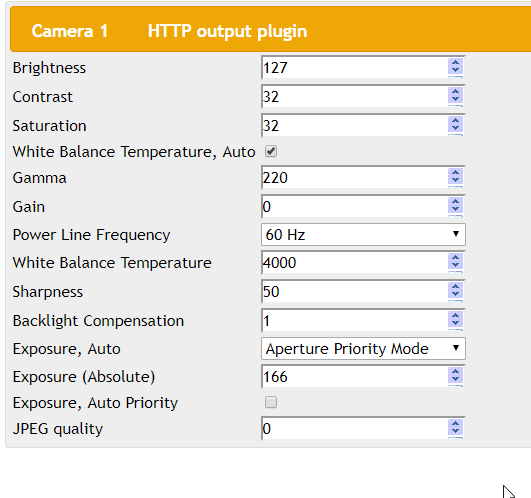
Well, glad it's not broken. I also see an option that my camera doesn't have (Gamma), so I would be interested in adding that. If you have the know-how, maybe you can open the browser debugger, switch to the network tab, change the gamma from 220 to 219 and send me the URL that shows up in the debugger?
FYI, at least on my camera the settings shown in control.htm do not represent the current camera settings nor the default values. If I configure my camera with the values shown on control.htm my image quality is unacceptable. This could just be a glitch for my camera+mjpegstreamer. I need to research this obviously.
Strange, I change the settings in Octolaps to the same in mjpegstreamer control panel and got the same result.
I'm going to change my camera later in to a raspberry camera. Connected to the rPi I'm running octoprint on or a RPi Zero.I have a setup I just going to print some good mount.
Something odd is going on, and it might be that there's something different about that camera you are using. If I had one here I could test and debug it.
If you haven't already got the raspberry camera, in general I see better results with some other cameras (the logitech 920 comes to mind), but some folks have had good results with the raspi cam too.
Also, fyi, the rpi zero might give you some troubles while streaming video. It's kind of a known thing. If you experience any stuttering with your printer, or slowing down of any kind, consider upgrading to a newer pi.