the drivers you mentioned came up with these
pi@octopi:~ $ lsmod | grep -i spi
spidev                 20480  0
spi_bcm2835            20480  0
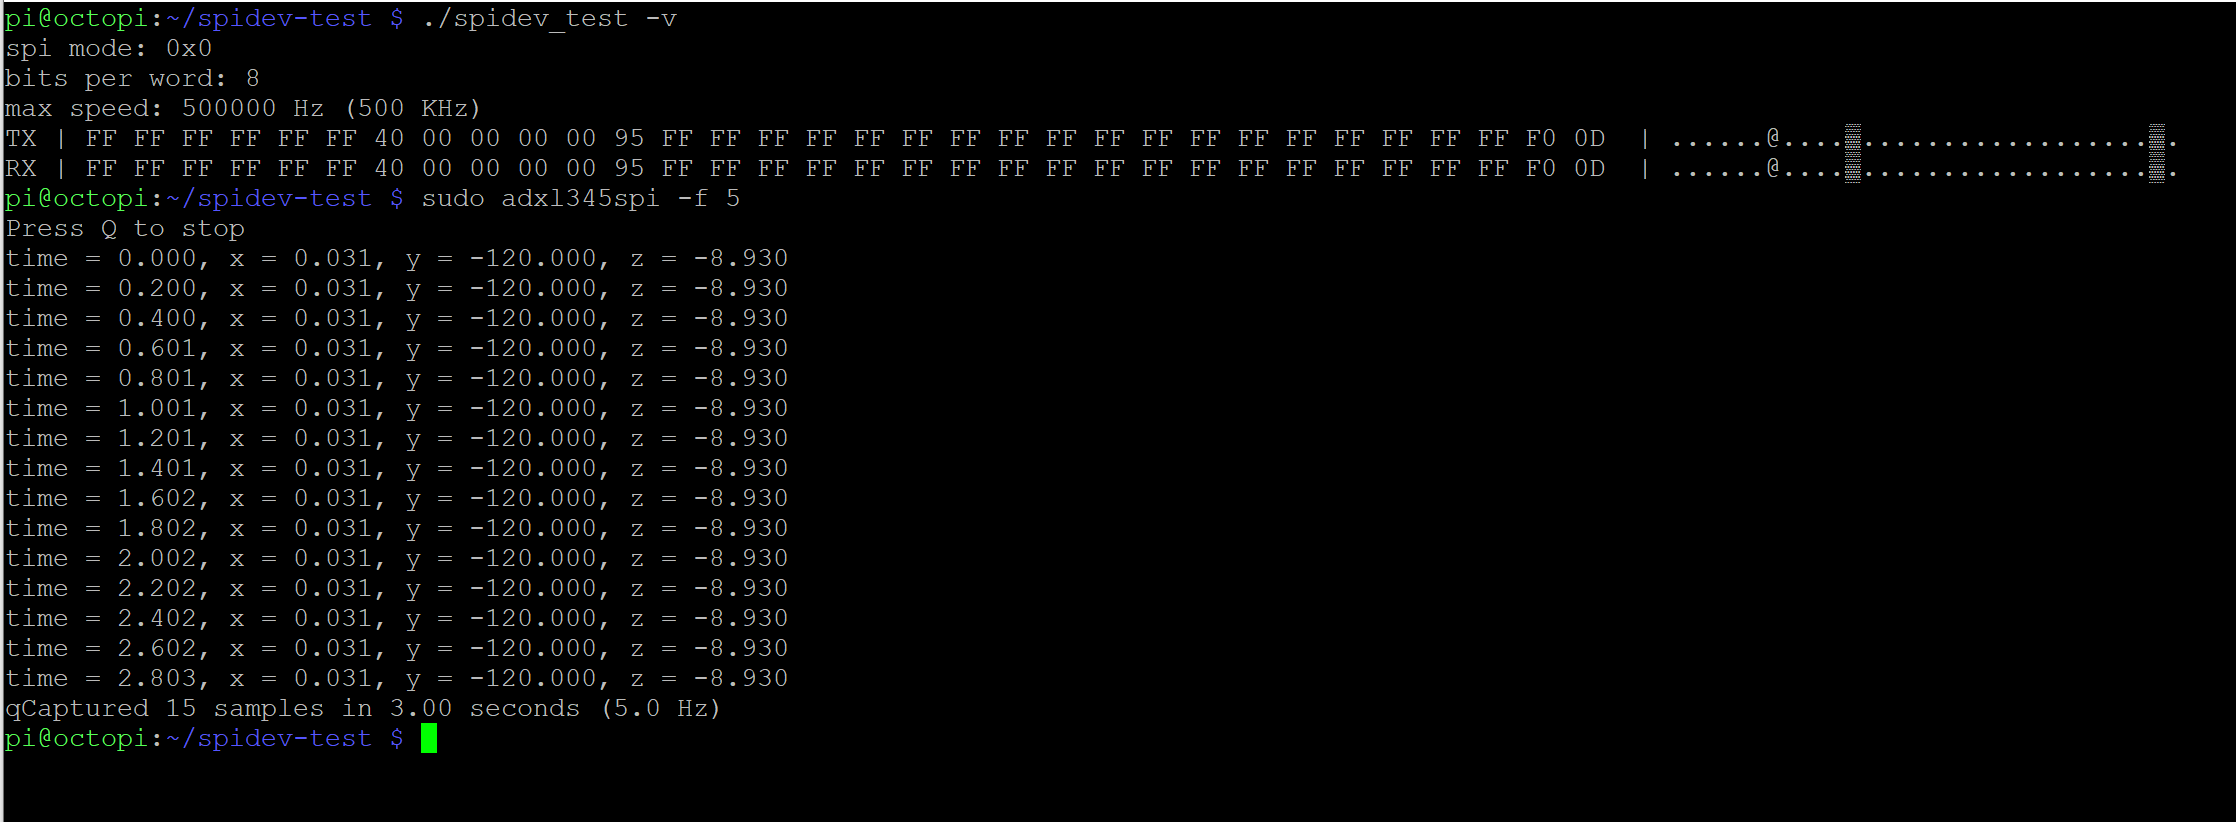
then I followed the SPIDEV_TEST steps and everything worked perfectly proving that the SPI connection is working correctly.
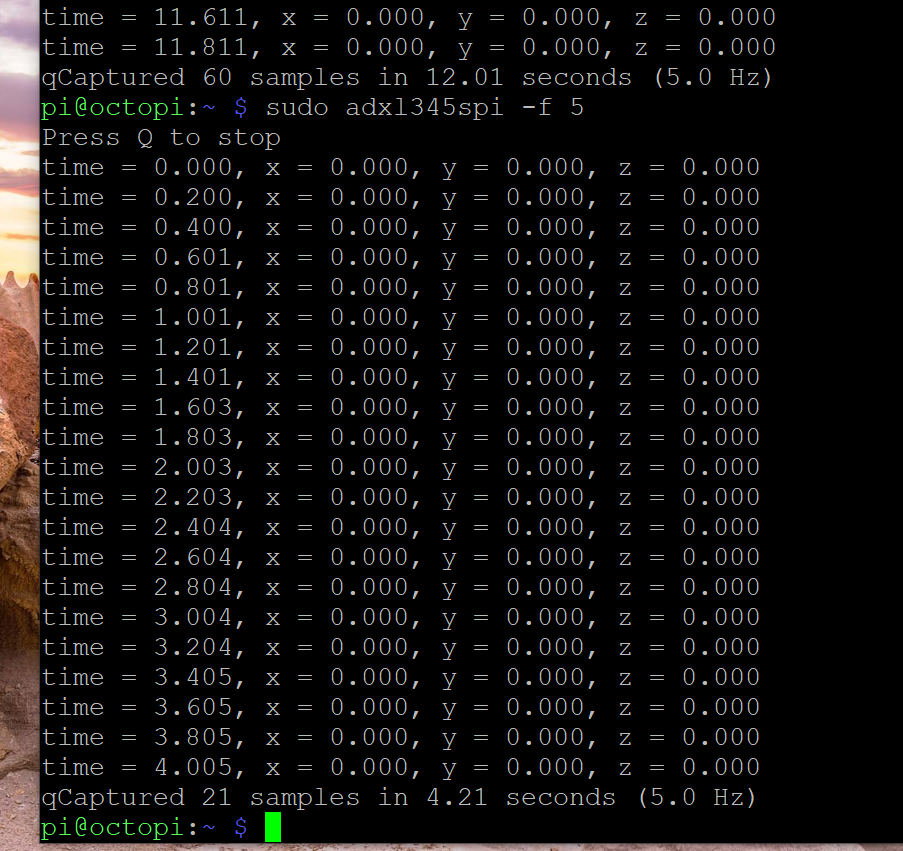
I was curious enough to try to run again
sudo adxl345spi -f 5
but only with the test connections
connect pin 19 (BCM 10 = MOSI) to pin 21 (BCM 9 = MISO)
and it worked, proving that there is no problem with the Raspberry
is from this point I will explain what happened to me to make it work:
I tried to do the reading of values but using an Arduino UNO using the SPI connection which gave me the same result as at the beginning, everything came to zero.
I am using the ADXL345 GY-291 accelerometer, I asked Chat GTP about any compatibility issues and he mentioned the following:
Quick explanation
The GY-291 has:
- A 10kΩ resistor connected between CS and VCC (3.3V).
- That means that the CS pin is always HIGH by default → forced I2C mode.
- Even if in your sketch you lower CS to LOW, the resistor pulls to HIGH, that's why the ADXL345 never switches to SPI mode.
After removing the accelerometer resistor I tried again to run the arduino sketch but I am still getting zero values.
This is when I came across the following post that mentions the problem between ADXL345 and SPI communication:
https://forum.arduino.cc/t/adxl345-gives-wiring-error-in-spi-mode/650191/7
daanvV mentions that the only way to make it work was by repositioning the CS pin and adding a 500 ms delay on the arduino.
so under that same logic I was looking in your fork that you made and the only thing I modified was a line in /ADXL345/adxl345spi/adxl345spi.c
const double coldStartDelay = 0.1;
to
const double coldStartDelay = 500;
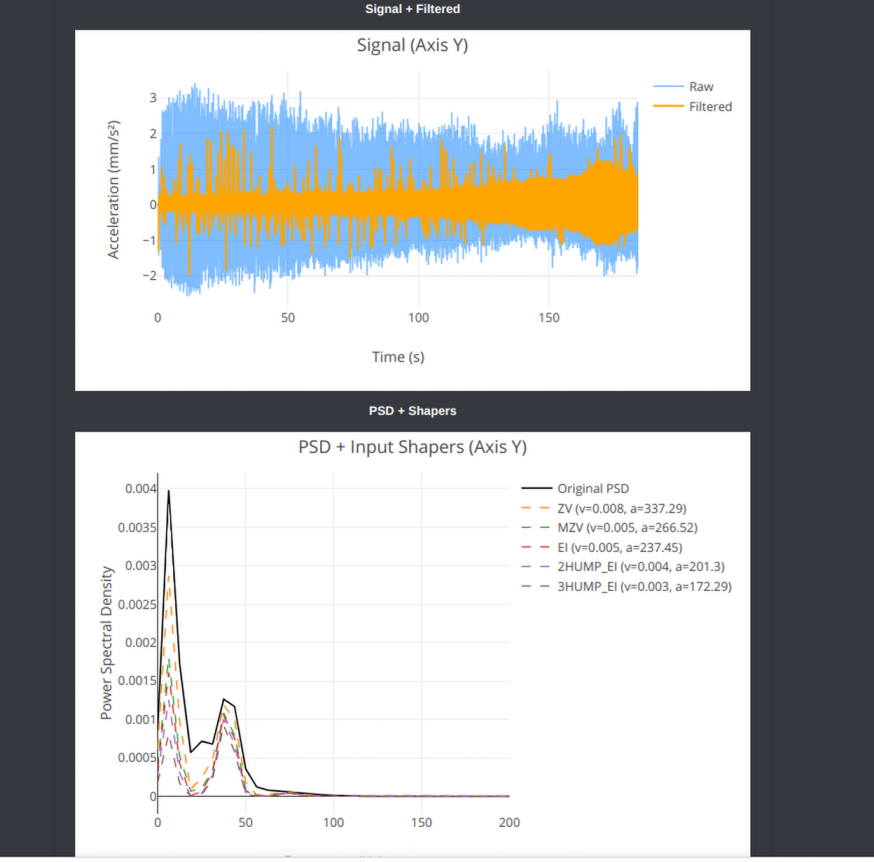
I ran sudo adxl345spi -f 5 again and this time all the axes started to arrive with the numbers I was expecting.
with that I modified the adxl345spi.c file to the way it was originally and for some strange reason it still works as it should be
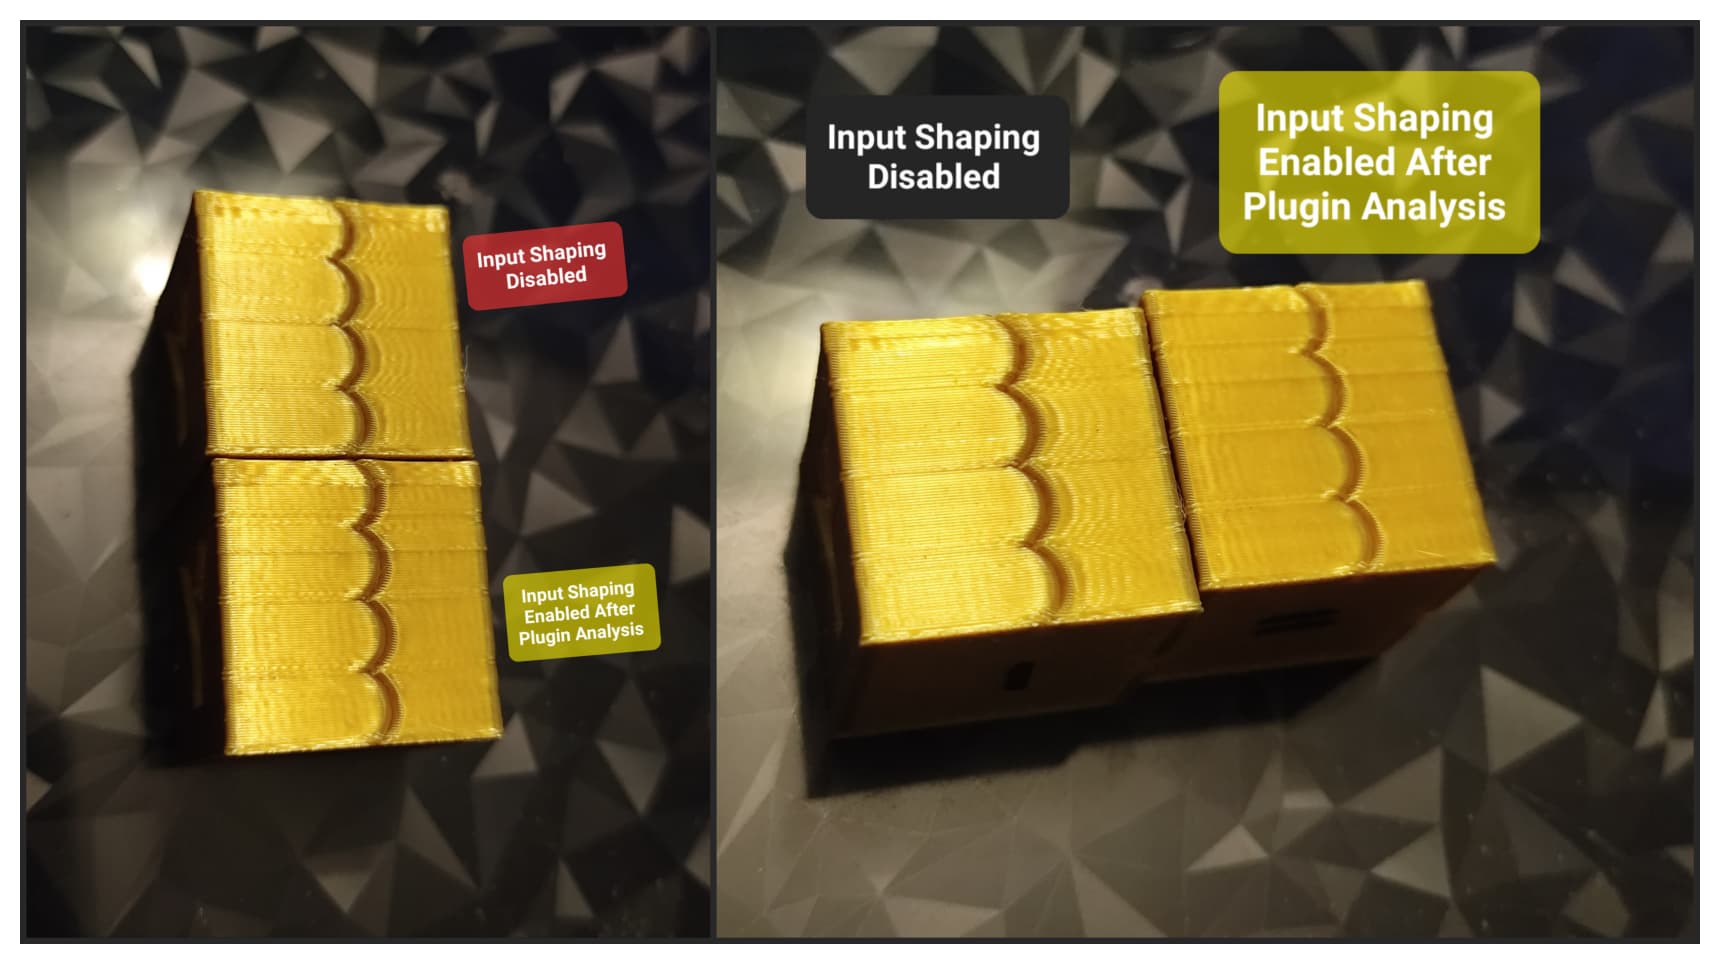
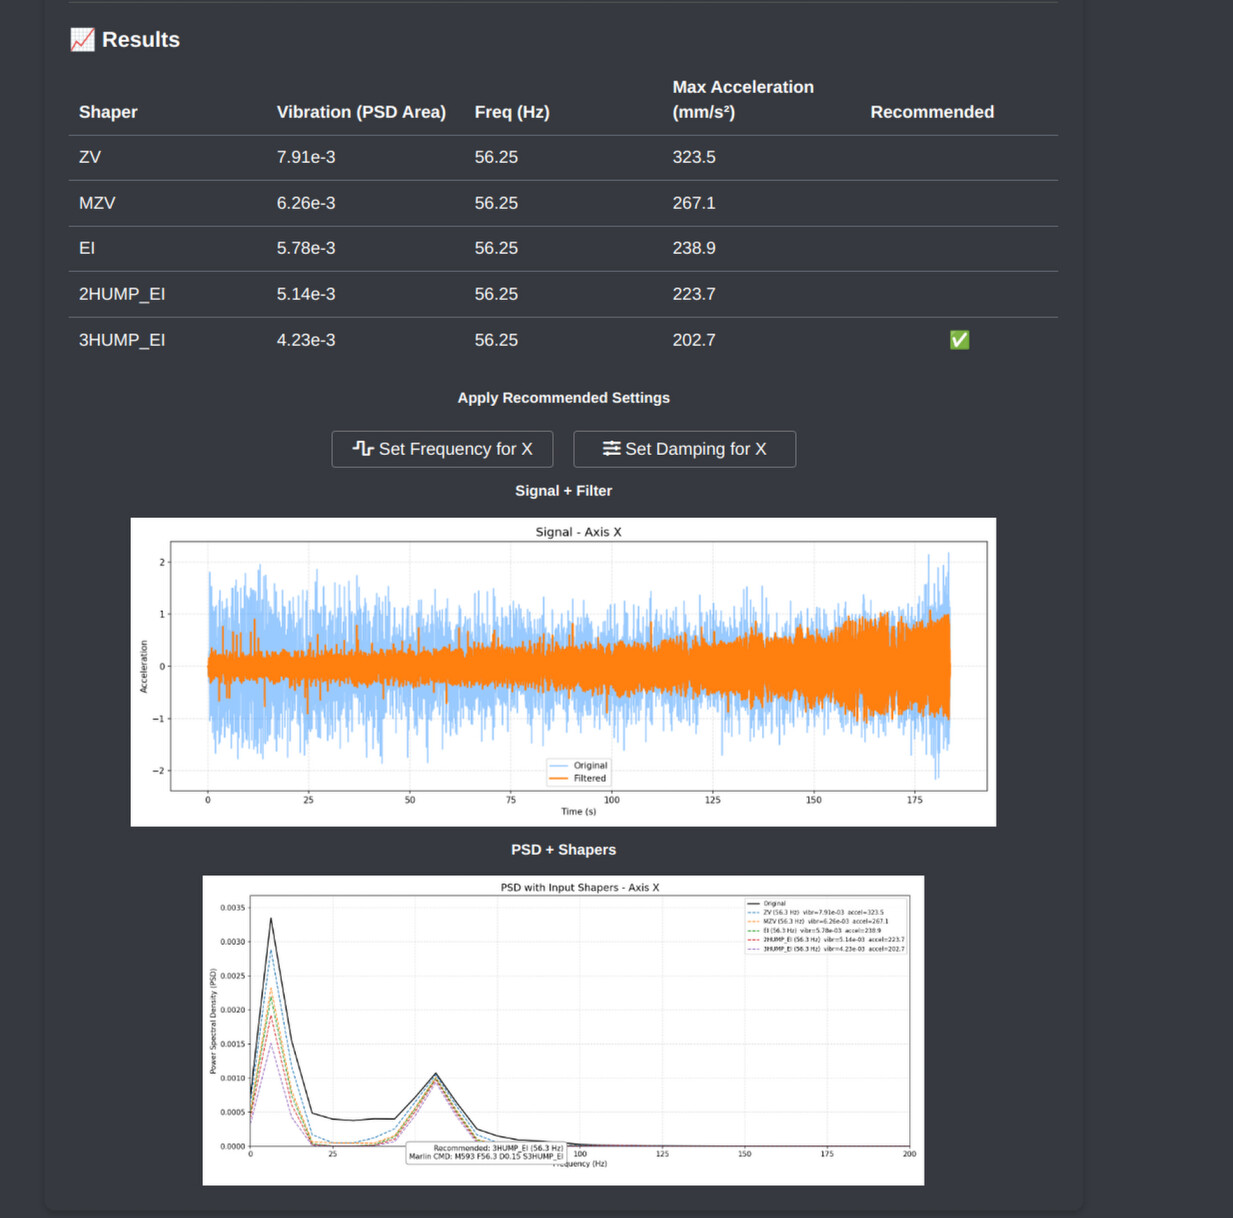
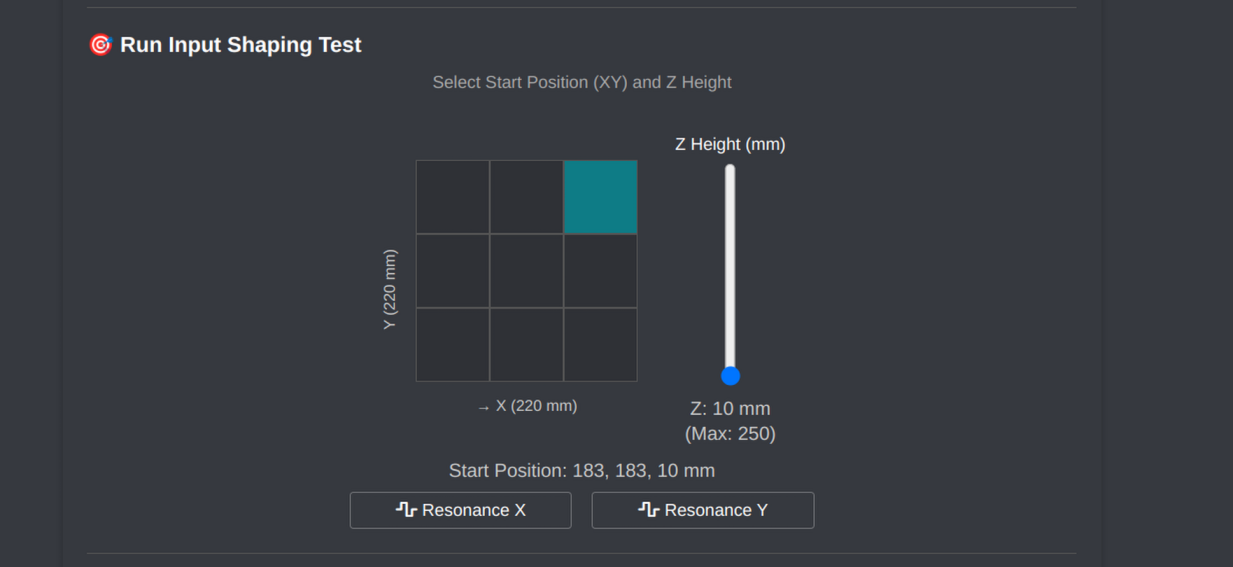
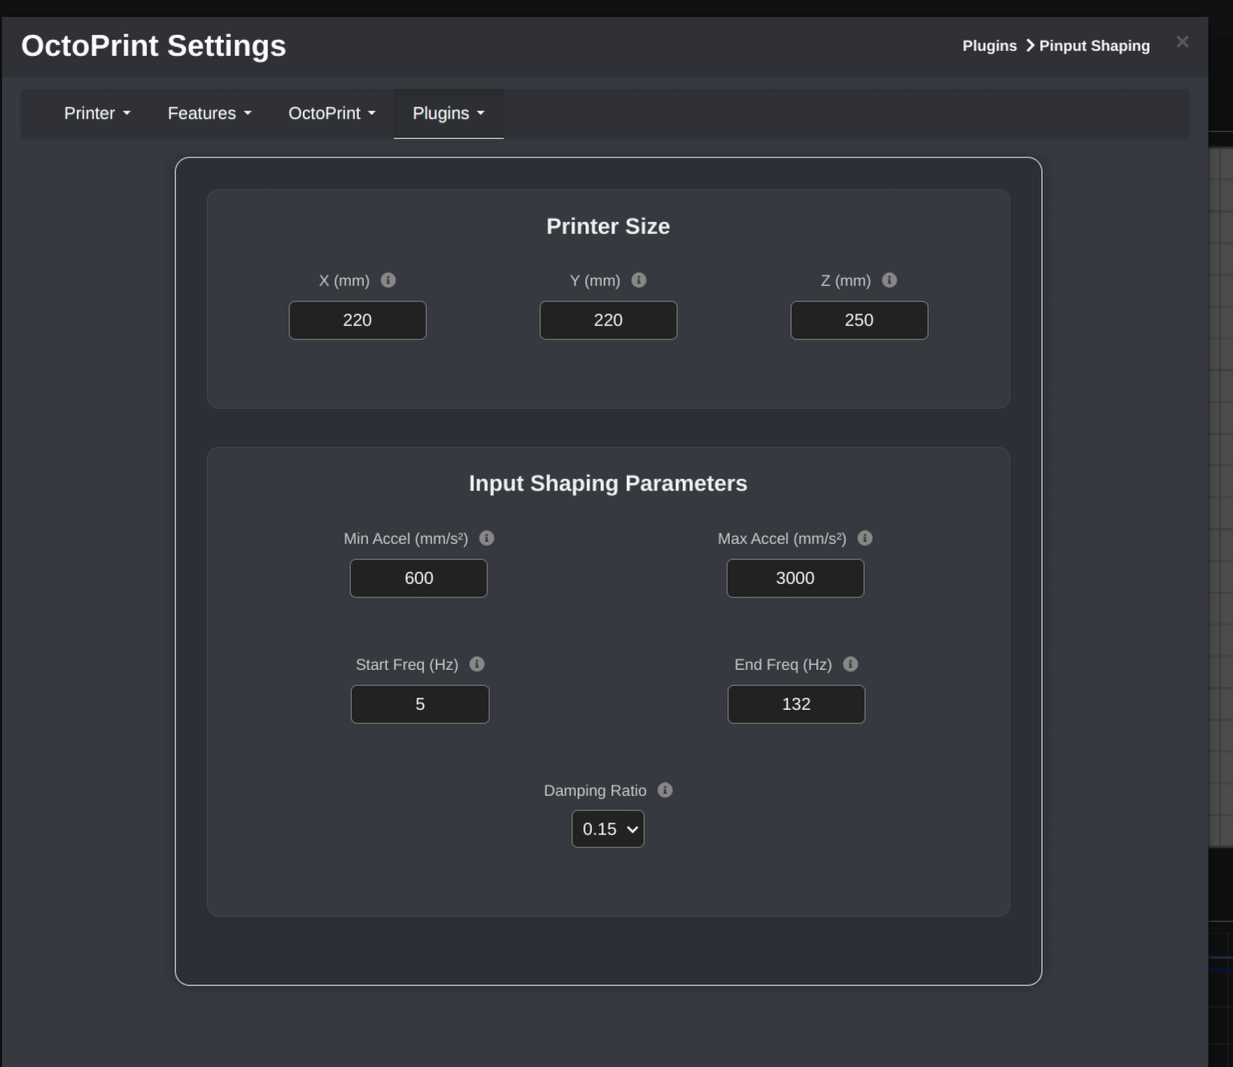
I don't know if removing the resistor helped with the solution but for now I will continue with the pluggin installation and the input shaping test.