I went though this today because I wanted to change color at a certain layer, M600 was not recognized and I didn't want to update the firmware since everything else had been running great, I was on Marlin 1.0.1 on a 4.2.2 board. So I tried using the PAUSE and RESUME feature in OctoPi (Version 0.17.0, running on Raspberry Pi 3 Model B Plus Rev 1.3) and upon resume the extruder motor seemed to actually run opposite what I should be. I thought this might be a firmware issue so I updated to Marlin 2.0.7.2. Same results, so I edited the firmware build to enable the change filament codes. Works fine from Prusa Slicer now. I don't think it is a big deal since there is a right way to do it in the gcode now but I am sure there is a bug when the RESUME function is used in OctoPi.
Unlikely to be a bug - without knowing the contents of the scripts, I can't say for sure, but it's unlikely.
The problem you probably faced is relative vs. absolute commands, if the gcode is using absolute and then the script is using the other but you don't include the right commands to switch modes, this can happen.
The slicer was Prusa, no added script. The gcode file was not modified, the commands were sent via the PAUSE and RESUME buttons in OctoPi. The process was handled strictly in the user interface of OctoPi as follows.
Paused the print, retracted, lift on Z and homed on XY, then Extract for some mm until the filament was changed color then, RESUME and the extractor then ran in reverse.
Just the slicer name isn't enough to confirm or deny @Charlie_Powell's premise. Slice a small object (1x1x1mm cube) and post the gcode output here and we probably can give you a better answer.
Any resolution to your problem? I'm having the same issue. Using Prusaslicer 2.3.1, no added script in Octoprint on an Ender 3 v2 printer.
Last night I was trying a two color print for the first time and came across this same issue. With some test prints and watching the terminal output I was able to figure out that it is a relative vs. absolute command issue like @Charlie_Powell suggested. As it turns out PrusaSlicer (2.3.1) outputs the extruder commands as relative, but the XYZ commands are absolute. From what I found OctoPrint does not track the current command state of the motors and just assumes all command states should be absolute for printing. In my testing I found if you just pause a print and restart without any motor movement there is no issue and the print resumes as normal, but if you move any motor the movement command is wrapped by commands to set the command mode to relative, do the move, then set the command mode to absolute for all motors. This method causes the extruder to be running in the incorrect command state for the remainder of the print.
FIX / WORKAROUND:
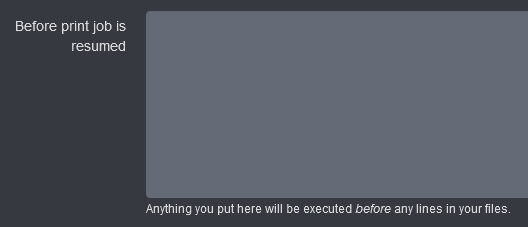
In the OctoPrint Settings -> GCODE Scripts -> Before print job is resumed
make sure the end of the resume script ends with
; relative extruder
M83
This will set the extruder back to relative and your print should resume as expected.
WARNING: If you happen to use multiple different slicer softwares and the other software uses absolute command mode for the extruder this could break prints sliced in that other software if there are pauses in the print.
Hi John,
Thanks for your post. I actually tried your recommendation and it seems like it works however, I have another problem for some reason after the print head extrudes out the new filament and returns back to print, nothing comes out from the print head on the print. It extrudes out the new color just fine.
I don't understand what's going on.
Thanks,
Jeff
Could you please enable the serial logging and share the serial.log of this event
I agree with @Ewald_Ikemann that seeing the serial log will help to diagnose this further. It would also be good to include your entire pause and resume scripts.
Here's my serial log using the Prusa Slicer pause. It pauses just fine and purges filament prior to resuming the print. Unfortunately, after it resumes nothing comes out of the hotend.
I appreciate the help!
serial.log (263.5 KB)
It seems the printer does the priming in absolute extrusion mode.
You may put a M83 in to this field in Settings -> Gcode scripts:
I already have M83 in the Before print job is resumed.
Somehow it does not appear in the serial log.
It shows up on line 198 and 592 in my serial log.
Yes, but not after the pause/resume sequence starting at 3281.
Line 198 is line 10 of the transmitted gcode file and
line 592 is line 33 of the transmitted gcode file, both very near to the start
That's weird! Not sure why.
Hello all,
I was experiencing the same issues and, after a long research time, I found applicable fixes for me.
I know this topic is old now and maybe it was resolved in other topics but if I can help someone else ![]()
My printer : Sidewinder X2
My slicer : Superslicer_2.4
I'm using Octoprint togheter with M600 Rewriter plug-in to interpreet the M600 command because the X2 does not supports it natively.
First problem : the fact that the extruder seems to go in a "reversed" way ( moving up the filament instead of moving down for extrusion )
Resolution : I first apply the solution to just add the M83 into octoprint's "Before print job is resumed
" g-codes but the problem was still there. So I decided to put the full "package" of information so I did put :
{% if pause_position.x is not none %}
G21 ; set units to millimeters
G90 ; use absolute coordinates
M83 ; use relative distances for extrusion
G1 X{{ pause_position.x }} Y{{ pause_position.y }} Z{{ pause_position.z }} F4500
{% if pause_position.f is not none %}G1 F{{ pause_position.f }}{% endif %}
{% endif %}
And it worked.
Second problem : the fact that the printhead was printing "in the air" for some seconds before suddenly going back to the correct layer.
Resolution : I found out, in the log, the G1 Z=XX code was going from Z=81.6 to Z=1.7 ( the famous 8 cm that need to be removed ) so that was the reason of the fact that suddenly the printhead was going to the correct layer. I checked a bit deeper the log and I found out that superslicer ( and I presume Pusaslicer too as it is the same base ) puts the M600 command in the middle of a layer change.So I moved the M600 command just before the layer change code and it worked also . The printhead was going back directly to the correct position after filament change as a correct Z position
I'm still trying to figure out how to fix this thing, within superslicer, without modifying my gcode everytime so if someone find a fix, I would be happy to have it ![]()
GENERATED CODE BY SUPERSLICER :
G1 X142.009 Y143.673 E0.08266 ; Solid infill
G1 X144.28 Y141.403 E0.14565 ; Solid infill
;LAYER_CHANGE
;Z:1.32
;HEIGHT:0.28
; custom gcode: before_layer_gcode
;BEFORE_LAYER_CHANGE
;1.32
G92 E0
; custom gcode end: before_layer_gcode

;WIPE_START
G1 F6240
G1 X143.361 Y142.322 E-0.95 ; wipe and retract
;WIPE_END
G1 E-0.05 F4800 ; retract
G1 Z1.32 F7800 ; move to next layer (4)
; custom gcode: layer_gcode
;AFTER_LAYER_CHANGE
;1.32
; custom gcode end: layer_gcode

;COLOR_CHANGE,T0,#0ED51F
; custom gcode: color_change_gcode
M600
; custom gcode end: color_change_gcode

G1 E-1 F4800 ; retract
; acceleration to travel
G1 X148.867 Y148.601 F7800 ; move to first Internal perimeter point (acceleration)
; decel to extrusion
M204 S800 ; adjust acceleration
G1 X150.515 Y150.48 ; move to first Internal perimeter point (deceleration)
; end travel
G1 E1 F4800 ; unretract
;TYPE:Internal perimeter
;WIDTH:0.45
G1 F1511.1324
G1 X150.645 Y150.366 E0.00788 ; Internal perimeter
G1 X150.756 Y150.297 E0.0059 ; Internal perimeter
G1 X150.836 Y150.266 E0.00391 ; Internal perimeter
MY MODIFIED CODE :
G1 X140.997 Y145.188 E0.00402 ; Solid infill
G1 X142.009 Y143.673 E0.08266 ; Solid infill
G1 X144.28 Y141.403 E0.14565 ; Solid infill

;COLOR_CHANGE,T0,#0ED51F
; custom gcode: color_change_gcode
M600
; custom gcode end: color_change_gcode

;LAYER_CHANGE
;Z:1.32
;HEIGHT:0.28
; custom gcode: before_layer_gcode
;BEFORE_LAYER_CHANGE
;1.32
G92 E0
; custom gcode end: before_layer_gcode

;WIPE_START
G1 F6240
G1 X143.361 Y142.322 E-0.95 ; wipe and retract
;WIPE_END
G1 E-0.05 F4800 ; retract
G1 Z1.32 F7800 ; move to next layer (4)
; custom gcode: layer_gcode
;AFTER_LAYER_CHANGE
;1.32
; custom gcode end: layer_gcode

G1 E-1 F4800 ; retract
; acceleration to travel
G1 X148.867 Y148.601 F7800 ; move to first Internal perimeter point (acceleration)
; decel to extrusion
M204 S800 ; adjust acceleration
G1 X150.515 Y150.48 ; move to first Internal perimeter point (deceleration)
; end travel
G1 E1 F4800 ; unretract
;TYPE:Internal perimeter
;WIDTH:0.45
G1 F1511.1324
G1 X150.645 Y150.366 E0.00788 ; Internal perimeter
G1 X150.756 Y150.297 E0.0059 ; Internal perimeter
G1 X150.836 Y150.266 E0.00391 ; Internal perimeter
Hello @triptikal !
Your code looks a bit mixed up.
Can you please put the code sippets between code braces:

It should look like this in the editor
and then:
type or paste code here
Hello @Ewald_Ikemann
Indeed, first time I'm using this forum ![]()
I just modified my post using your explaination.
Thanks for this tip.
This topic is almost two years old and refers to Prusaslicer, not Superslicer. I strongly suggest that you open a new topic with an appropriate title (for your second problem), fill in the template and provide as much detail as you can about how you add the M600 command in Superslicer.
I ask you to do this so we don't bury a solution inside of a topic with an inappropriate title that will make it hard for others who might have a similar problem to find it.