That would be awesome if you could share that! The buzzer would definitely be added peace of mind. As I’m a bit of a noob I just need to figure out how to run a script in the background but I’m sure there is plenty of information about that on the interwebs. Thanks in advance 
First of all - I am very new to Python, so the script is most likely very far from being perfect, but it works.
I am executing it from root cronjob with command:
@reboot /home/pi/add_on_scripts/shutdown_button.py &
The buzzer that I am using does not have built in oscillator, that's why the script is in charge of generating the tone.
#!/usr/bin/env python
import RPi.GPIO as GPIO
import time

Buzzer = 35      # pin-35 BCM-19/GPIO-24
Button = 11      # pin-11 BCM-17/GPIO-0

Freq = 0.00175

def setup(buzzer_pin, button_pin):
    global BuzzerPin
    global ButtonPin
    BuzzerPin = buzzer_pin
    ButtonPin = button_pin
    GPIO.setmode(GPIO.BOARD)       # Numbers GPIOs by physical location
    GPIO.setup(BuzzerPin, GPIO.OUT)
    GPIO.output(BuzzerPin, GPIO.LOW)
    GPIO.setup(ButtonPin, GPIO.IN)

def on():
    GPIO.output(BuzzerPin, GPIO.LOW)

def off():
    GPIO.output(BuzzerPin, GPIO.HIGH)

def beep(x):
    for i in range(50):
        on()
        time.sleep(x)
        off()
        time.sleep(x)

def loop():
    n = 0
    while True:
        if GPIO.input(ButtonPin):
            n = 0
        else:
            n += 1
        if n == 5:
            beep(Freq)
            from subprocess import call
            call("sudo shutdown -h now", shell=True)
            # print("Shutting down")
        time.sleep(1)

def destroy():
    GPIO.output(BuzzerPin, GPIO.LOW)
    GPIO.cleanup()             # Release resource

if __name__ == '__main__':     # Program starts here
    setup(Buzzer, Button)
    try:
        if GPIO.input(ButtonPin): # pull-up resistor is connected start infinite loop
            loop()
        destroy()
    except KeyboardInterrupt:  # When 'Ctrl+C' is pressed, the child program destroy() will be  executed.
        destroy()
1 Like
Take a look at foosel's post here and my previous script attempt before that. She's using an event_detected litmus test to lower the amount of processing time.
@OutsourcedGuru Thanks for the link. I will try event_detected, compare CPU load and report the results.
I’m wanting to shut down the pi without having to turn my desktop back on.
Yeah I finally figure that out.. just never turn off my computers so it didn't click at first.
Well, I'll show you what I made but it would be too complicated to write-up a step-by-step tutorial for it.
You don't need this to be remote so you wouldn't need 75% of the electronics I used. You simply need a button, two wires over to the GPIO pins of the Raspberry and what I discussed earlier.
And of course you'll need the Python code that lmcbmai has provided at least to start.
I managed to install a shutdown button on a raspberry pi running retropie which was a pretty easy task but unfortunately getting one on octoptint is way beyond my skill set. Im in terminal looking at pi@octopi:~ so do you navigate around the same as if you were in pi@raspberry:~ ?. I feel silly for asking but my google fu is out of order on this one.
Yes. It simply has a different hostname (octopi instead of raspberry), that is all.
One easy option is to simply download the octoprint app for a mobile device phone tablet what ever and it takes 2 seconds to shut it down with the app then just unplug it or if you have a switch on the power supply flip the switch.
1 Like
How do you do a shutdown from the OctoClient? I can’t find a shut button on the app and I can’t find the gcode for shutdown. I tried sudo shutdown-h now with no success and also I need to make the pi address static so I can actually connect to the printer without turning on the computer to access the modem ect ect. I appreciate the help but I’d like a way to turn off the printer all in its own, the old fashioned way.
what do you want to do, shut down the pi or the printer? If the printer, then just turn it off pi can keep running. Last I understood what you wanted, you wanted to shutdown the pi without using the octopi gui.
If you want to shut down the pi from the octoprint gui, top right of center is a power button icon, click it and select shutdown system count to 10 and then turn off the power to the pi and printer. Obviously you have to login to the octoprint and be a user that is setup for controlling the system..
Sorry I should’ve been more clear, when I said printer I meant printer and pi. I have the pi and printer running off the same psu so if I shutdown the pi I can then just flick the power switch on the psu and power will be cut to everything.
That's is what I thought. So you have said you can not find the button on the GUI to shut down the PI, or at least I think that is what you meant. Select shutdown system
Or am I still not understanding that what it is you can not find in the GUI?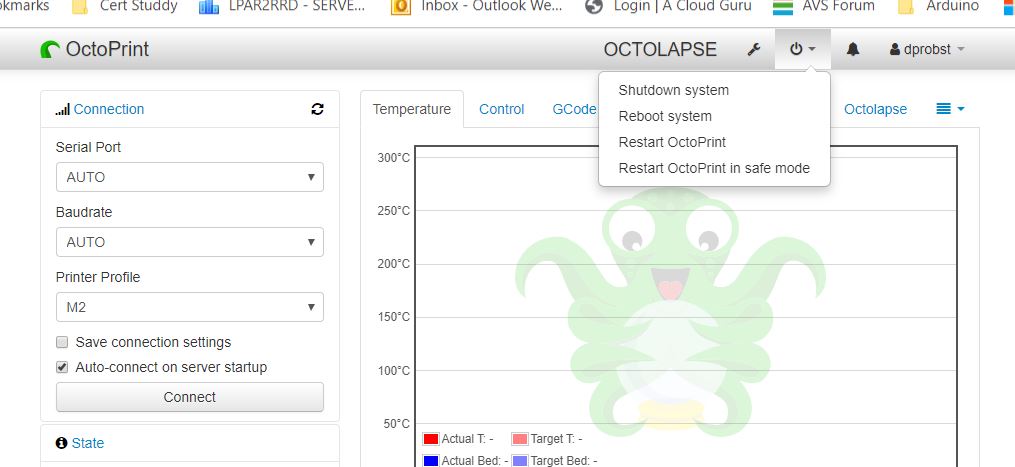
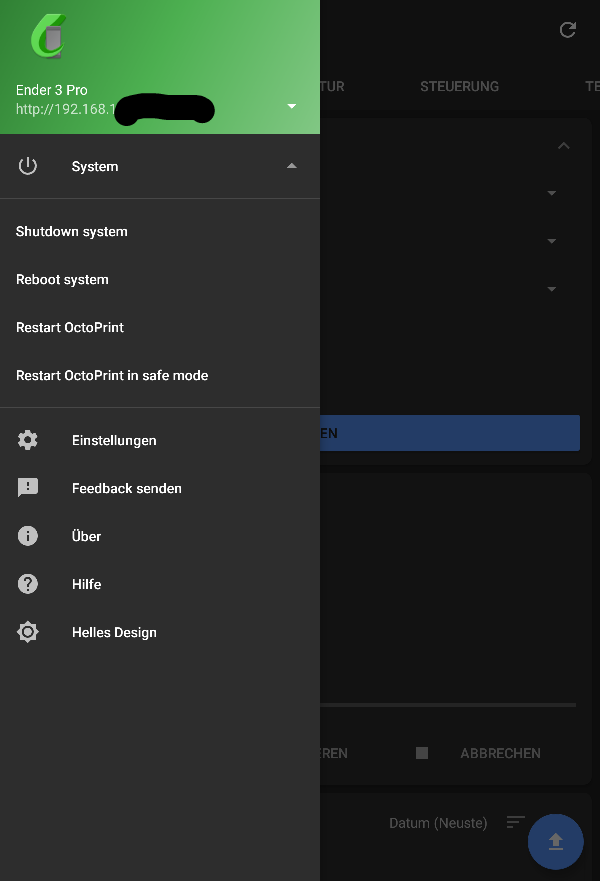
I can find the shutdown button on the GUI, it’s the OctoClient app where I can’t find the button and I tried typing “shutdown -h now” into the terminal on the app and that didn’t work.
1 Like
This is the guide I used. I'm also running my Pi off my Ender 3's PSU using a buck converter. I press the button to shut the Pi down, then I flip my printer's switch off. When the printer is turned back on, the Pi will turn on again automatically without needing to press the button again.
This is the shutdown command I use for my Octopi installs.
https://github.com/adafruit/Adafruit-GPIO-Halt.
You need to ssh to a terminal to install. Instructions are in README.md
The topic of this discussion slightly shifted, but since I've promised... Here is my (hopefully) final version of shutdown script.
#!/usr/bin/env python
import RPi.GPIO as GPIO
import time
import sys

Buzzer = 35      # pin-35 BCM-19/GPIO-24
Button = 11      # pin-11 BCM-17/GPIO-0
Freq   = 300

def setup(buzzer_pin, button_pin):
    GPIO.setmode(GPIO.BOARD)       # Numbers GPIOs by physical location
    GPIO.setup(buzzer_pin, GPIO.OUT)
    global Buzz # Assign a global variable to replace GPIO.PWM
    GPIO.setup(button_pin, GPIO.IN, pull_up_down=GPIO.PUD_UP)

def beep(buzzer_pin):
    Buzz = GPIO.PWM(buzzer_pin, Freq) # Set initial frequency
    Buzz.start(50) # Start buzzer_pin with 50% duty ratio
    time.sleep(0.25)
    Buzz.stop()

def destroy():
    GPIO.cleanup()

def loop(button_pin, buzzer_pin):
    n = 0
    beep(buzzer_pin)    # Beep once when script starts
    while True:
        # The script will stop @ GPIO.wait_for_edge waiting for button_pin to go from high to low
        GPIO.wait_for_edge(button_pin, GPIO.FALLING)
        # Starting the loop to make sure button is pressed for 5 sec
        while True:
            if GPIO.input(button_pin):
                # Button was released in less than 5 sec; going back to waiting for GPIO.FALLING
                n = 0
                break
            else:
                n += 1
            if n >= 5:
            # 5 seconds passed; shutting RPI down
                beep(buzzer_pin)
                time.sleep(1)
                from subprocess import call
                call("sudo shutdown -h now", shell=True)
                # print("Shutting down")
                destroy()
                sys.exit()
            time.sleep(1)
        time.sleep(3)

if __name__ == '__main__':     # Program starts here
    setup(Buzzer, Button)

    try:
        loop(Button, Buzzer)
    except KeyboardInterrupt:  # When 'Ctrl+C' is pressed, the child program destroy() will be  executed
        destroy()
Please note that with this revision pull-up resistor is not required.
Thanks
3 Likes
I made a new circuit / board with 2 buttons "Raspi-On-Off", a modified version of this, with addition of AC-detection from a (WLAN-)MainsSwitch. If interested, download my instructions, circuit and case here or here. It contains the original scritps and instruction from here. So with this On/Off-Circuit, switching the RasPi (model 3B+) remote and safely On/Off works like a charm! 
Att: AC-Mains-Power (here 230VAC) is deadly dangerous! Don't handle with it if you are not 100% sure of what you do! - if you copy my work/circuit/board-layout (free to download or modify) I don't take responsibility of all kind of consequences, so it's up to you to pay attention to dangerous parts, specially to insulations concerning (mains-)cables, etc.!