I've tried several type of clip but return to the Bulldog (with the folding arms) that came with the machine. Of course I could just section of 15mm strip front and back (by moving the Y stop and reducing the declared bed size by 30mm) but that limits the smallest bed dimension.
I thought perhaps I could print a template to position the clips and draw "do not use" boxes on the slicer bed. Unfortunately Cura doesn't allow a custom bed picture whereas PrusaSlice has the option of both .STL and .PNG.
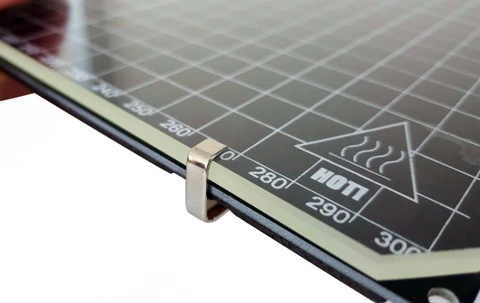
BTW I put the clips on the front and back edge because if the arms are on the side they either foul the gantry (not folded) or the underside of the bed support (folded).
I have these clips: Swiss Clips (E3D)
so there is not much need to adjust the slicer. I think the solution of a PNG with 'do not print' sections would work, but aside from that I don't know if there's anything in a slicer that would do that for you - it would be a manual thing.
Picture:
I've also seen where people use silicon mats under their glass and no clips at all. I always question this approach because it seems it would insulate the heater and not get the glass to temp as desired.
For most printers, the clips come preinstalled. So for most printers, there are "unprintable areas" defined in the printer definition. Unfortunately, there is no way to edit these unprintable areas inside Cura, but you can edit them in a text editor.
I do this.
I don't use the "kitchen silicone mat", tried and it's a crap solution. It is too thick (1mm) and comes with 2 major issues
takes too much time for glass to come to temp (insulation)
it's not really that sticky...
originally I assumed "that's that" and after I had my second XY slip as the whole glass moved I removed the darn thing and went back to swiss clips / post frame clips.
Then, my order of 0.5mm silicone pads for heat sink mounting arrived and this silicone, while thinner, have a completely different feel in your hands so I used few pads for the glass on one of my printers and WOW!!!
insulation, there's ZERO time difference of glass getting up to temp with these silicone pads (I covered the whole bed, ppl often do it in checker pattern, dunno why) and when glass is directly on the aluminium held with clips
this thing is sticky, when cold there is no freaking way you can move the glass in XY, and after the first time you heat it to 100C it behaves like double sided tape, glass is held firmly to the aluminium, when you want to remove the glass you actually need to do it slowly and using spatula to slowly release glass from the silicone pads. So removing the glass is possible, but it is not easy, takes me at least 5 minutes to remove 230x230mm glass from the printer
since I rarely replace glass this works great for me, I have printbite on top of glass that releases prints fully and there is no need for any coating of the print surface ever so the only reasons to remove the plate would be to:
put another print surface to start printing while old one is getting cold. This one I "solved" by adding 4 big 12cm fan's that I turn on to cool the plate, the print is released inside 2 minutes
put another print surface to print different material. the only thing I don't print on printbite is rubber, everything else (all the way to nylon) print great on printbite but rubber sticks too good and is not released afterwards so I print rubber on clean glass without printbite, but it is not a big deal to spend 5min to remove the plate as I don't print rubber that often
I'm not very experienced with silicone but for e.g. I have these "pads" 1.0 and 1.5mm too that I use for electronics where stuff is uneven so I use a large heatsink to touch bunch of parts and I have "kitchen silicone mat" that's 1mm and 1.5mm and while they are both called "silicone" they feel very different, also, nothing stick to neither of them and they do not fall apart / melt / burn when you touch them with 350C soldering iron tip BUT there is a huge difference in insulation property, for e.g. the 1.5mm silicone mat for kitchen I can take a piece, grab the 350C soldering iron tip with my fingers, extract from the soldering iron and place on a carrier and trough 1.5mm of silicone mat I feel it's warm but nothing serious, maybe 40C, on the other hand, if I try to do that with 1.5mm silicone pad I'd burn my fingers, you can easily melt solder on the other side of the 1.5mm silicone pad (so at least 180C)
so it's not only the thickness, there's something different in silicone in one item and silicone in other one
Google tells me " A material's thermal conductivity is the number of Watts conducted per metre thickness of the material, per degree of temperature difference between one side and the other ( W/mK)."
So I guess for this application the larger the W/mK number , the better?
Hi, a really good write up, could you post a link to the silicon pads you used. They sound like the material that is used on heatsinks. I would really like to try your method.
Thanks
yes, conductivity is "inverse" from resistivity so for insulators they talk about thermal resistance and here for heatsink pads they talk about thermal conductivity but pay attention, often they will use the "wrong" terms so
W/mK (conductivity)- you want bigger number for thermal pad, thermal paste etc.
K/W (resistivity) - you want smaller number for thermal pad, thermal paste etc.
Cmm2/W (impedance) - you want smaller ..
Kin2/W (impedance) - you want smaller ..

 .. I might got my brother to get me one from usa directly I don't have access to his account but this looks like it: