I ordered a BTT SFS 2.0 sensor and received an upgraded version with 2 modes. The standard motion detection system and, new, a filament runout switch.
Since we have both now, I had the idea to use the Smart Filament Sensor plugin AND the Filament Sensor Simplified plugin together to make full use of it on Octoprint.
This works like a charm, when I cut the filament after the sensor, the motion detection triggers, when the filament is cut before the sensor, the runout detection triggers.
This gives the opportunity to run different types of GCODE depending on the triggered instance.
Wiring is simple, just connect + to 3v3 on the pi, - to ground on the pi, and the remaining two wires for the switch and the movement detection to two unused GPIO pins.
Hopefully this is usefull to someone, questions, let me know!
Hi @Alfi66! Did you connected the SFS v2 directly to motherboard or using Raspberry Pi GPIO? I have an SFS v2 too, but it seems it doesn't work with Octoprint-Smart-Filament-Sensor plugin
HELP! I'm glad I found this post because I can't find the info I need.
I bought a BTT SFS v2.0 and I want to connect it to my Raspberry Pi 4B. Unfortunately, I'm not a techy and most of the instructions people give are too cryptic for me. I need to know exactly which of the four connectors to connect to specific GPIO pins and what to change in my firmware. I'm only using two of the GPIO pins which are connected to the fan. Since I'm not too smart with this stuff, I might need a few back and forth messages to get this right. Thanks to anyone who can help me! --David
There's no need to change the printer firmware. It's all controlled by Octoprint.
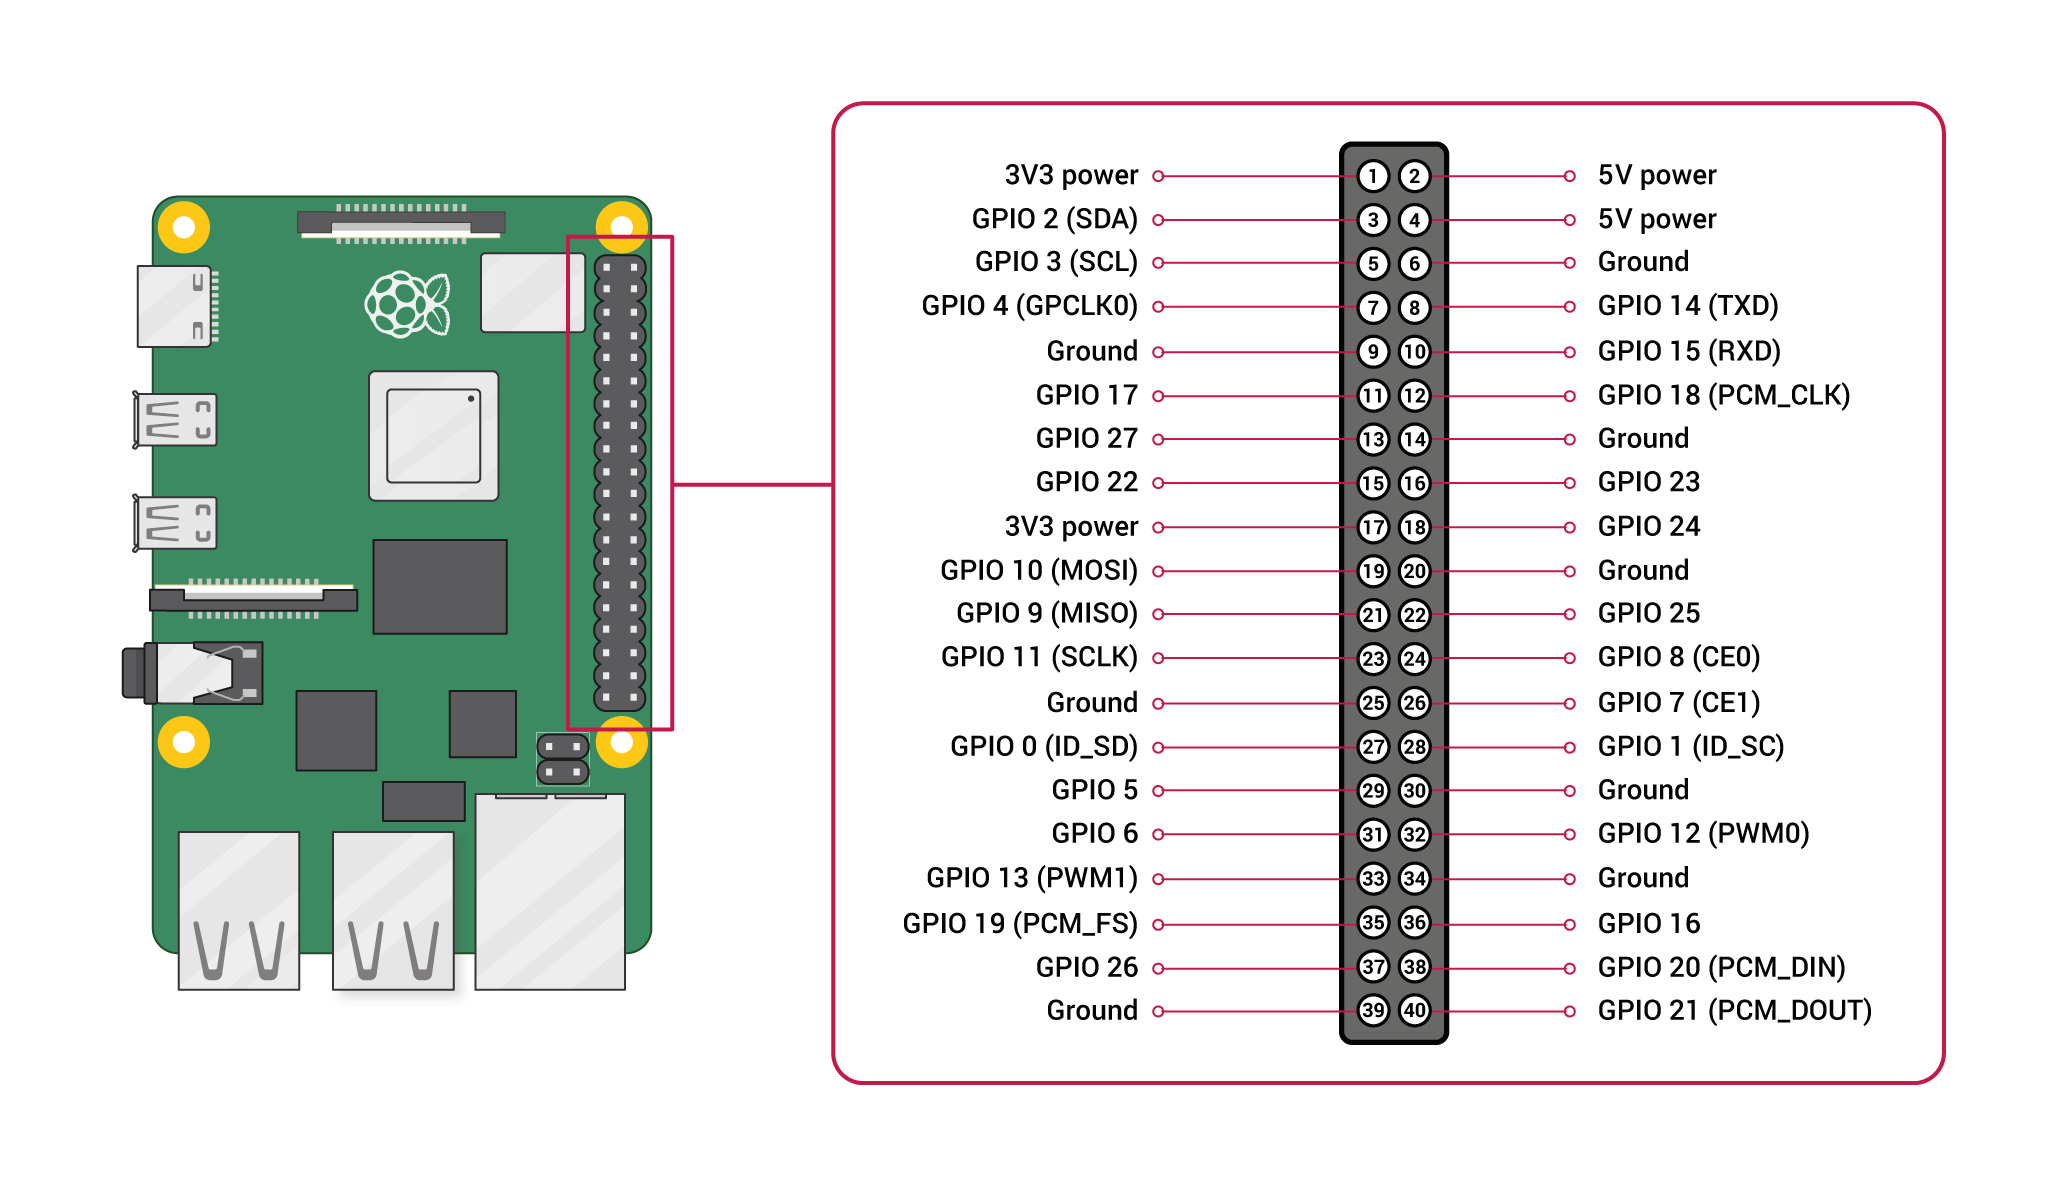
The tricky bit is to wire it up correctly, read the manual that came with the sensor and then follow below steps to connect it to the RBP and configure the plugins:
Red wire sensor (3.3V) to physical pin 1 on the RBP header.
Black wire sensor (Ground) to physical pin 9 on the RBP header.
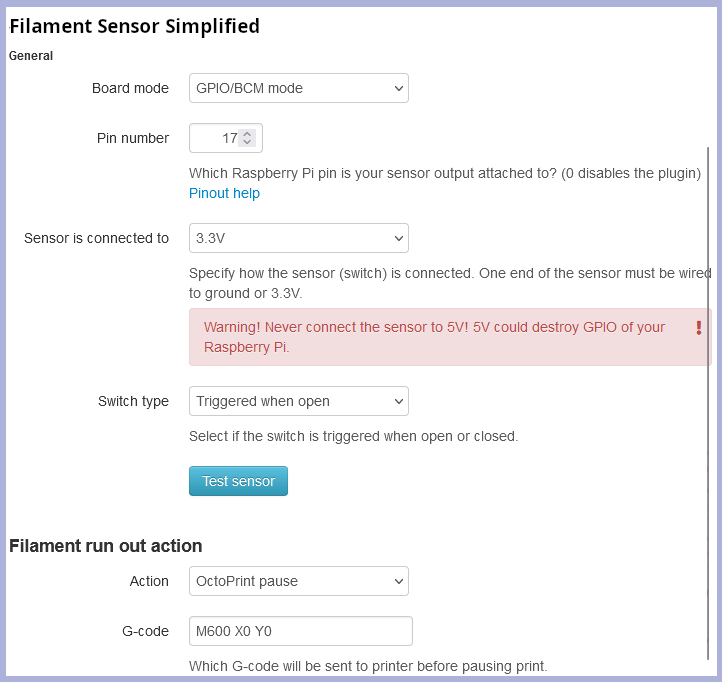
Filament Sensor Simplified plugin:
I have the runout part of the sensor configured to use GPIO 17. That's physical pin 11 on the RBP header, choose GPIO/BCM mode in the config screen of this plugin. (Green wire from the sensor)
Furthermore I have the following configuration on this plugin:
Sensor is connected to: 3v3
Switch type: Triggered when open
Filament runout action: Octoprint pause
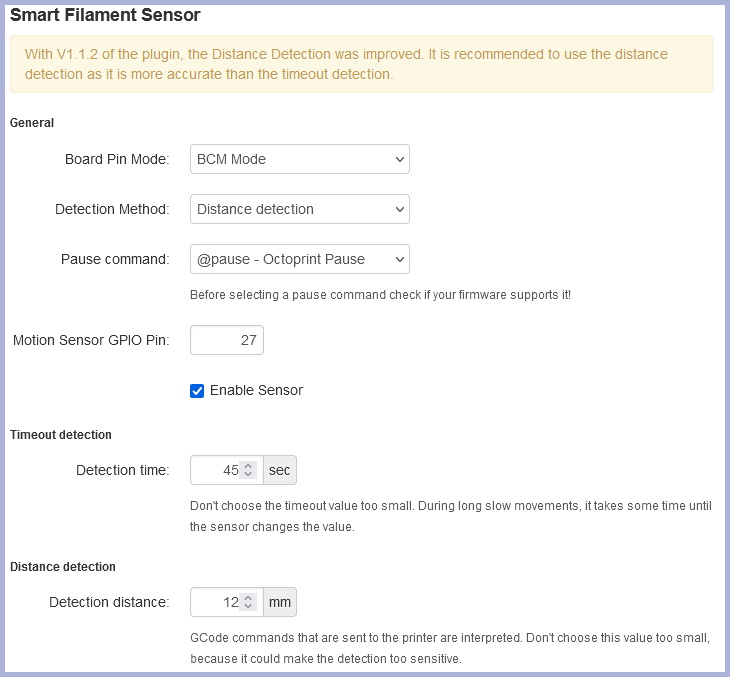
Smart Filament Sensor plugin:
I have the movement part of the sensor configured to use GPIO 27. That's physical pin 13 on the RBP header, choose BCM mode in the config screen of this plugin. (Blue wire from the sensor)
Furthermore I have the following configuration on this plugin:
Detection Method: Distance detection
Pause command: Octoprint Pause
Make sure to tick the sensor enable box
Timeout detection time: 45 seconds. (This depends on your setup, you will have to experiment)
Detection distance: 12mm. (This depends on your setup, you will have to experiment)
Finally, A straight and very clear answer on how to make this connection. Thank you, Alfi66! I guess I'll need to cut off the Pi ends of the wires and add new connectors to them to fit on the GPIO connections. Good experience for me. I'm heading to the electronics supply store for them now! Yee Ha!
And thanks to b-morgan for the pinout! It has made this all clear. I don't quite understand the use of two plugins to make this work, but I'm going on faith that it's necessary. Thanks again. ---David
I was really frustrated with this sensor until I came to your post. Everywhere you find instructions for v1 of the sensor or instructions that expect too much RPI knowledge.
One thing I noticed is that the colors that came with my sensor wires and the ones in the doc are the opposite of what you mentioned. I got blue for the switch and green for motion.
Well, I think I did everything as instructed by alfi66, but it's not working. I think my wiring is fine, but, even with no break or snag in the filament, the nozzle puts out a glob and then triggers a pause. I have tried a few different settings in the plugins, but with no luck. I don't know how to troubleshoot this.... Here are my current settings for the Filament Sensor Simplified Plugin (I'll put the other plugin image in a separate post):