[CLOSED] Who wanna try my plugin?

Hi!

So It's been already 1 year since I started programming thanks to this amazing community and I got the idea to make a plugin that will hold you hand to calibrate your 3d printer properly.
I first started by adapting it to the Teaching Tech calibration guide but I'm planning to slowly add new stuff, depending on YOUR ideas!

Currently, only the 0.4mm nozzle is available, but I'll also implement bigger/smaller ones soon.

Here is a quick overall of the tabs that should be ready:

  • First layer
  • Esteps
  • Hollow cube (flow)
  • VRef calculation
  • Retraction
  • Temperature
  • Acceleration

Even if I already tested these features, you should always be extremely careful when handling the plugin with your printer. Also, I already tester it on my fellow Ender 3, so keep in mind that some stuff could be working differently on another setup, even if it is made to work with all 3d printers on Marlin.

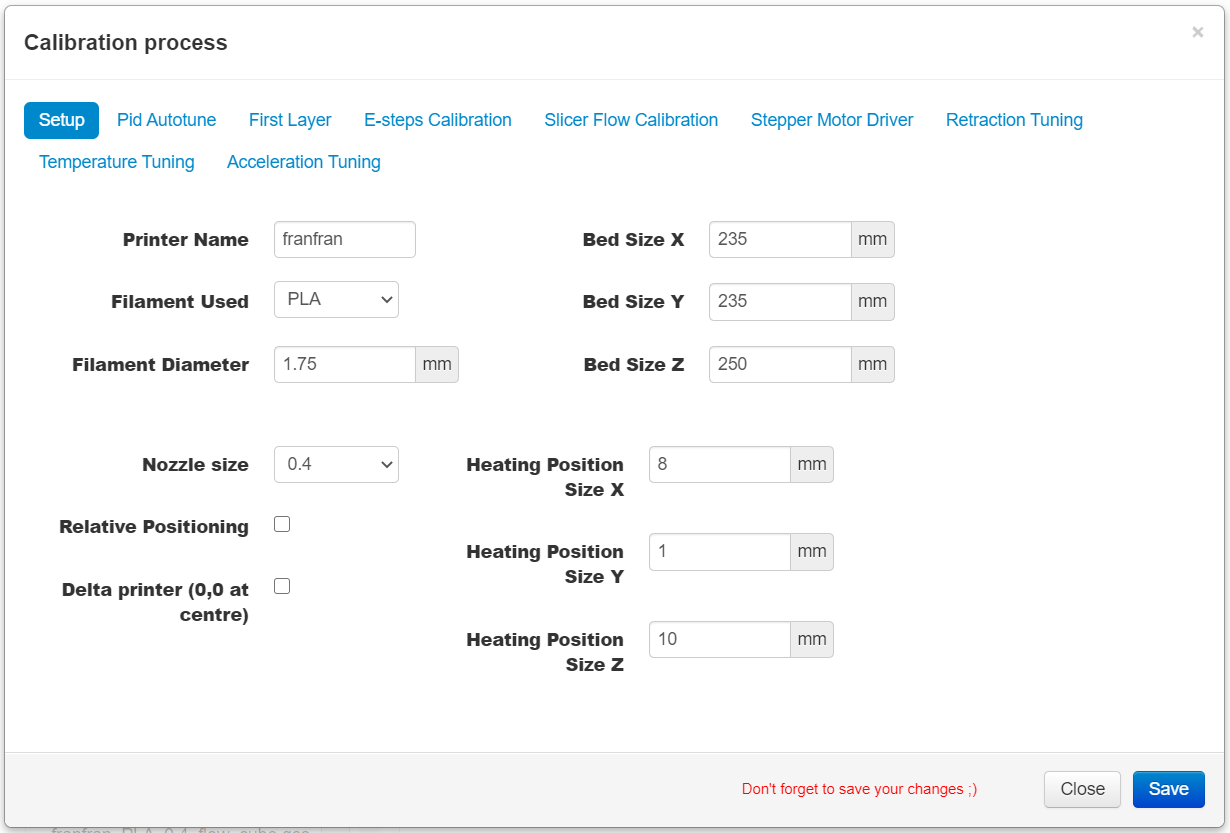
Here are some screenshots of what can do this piece of code:

Setup tab (Where you'll enter the "basic" informations)

Retraction tab


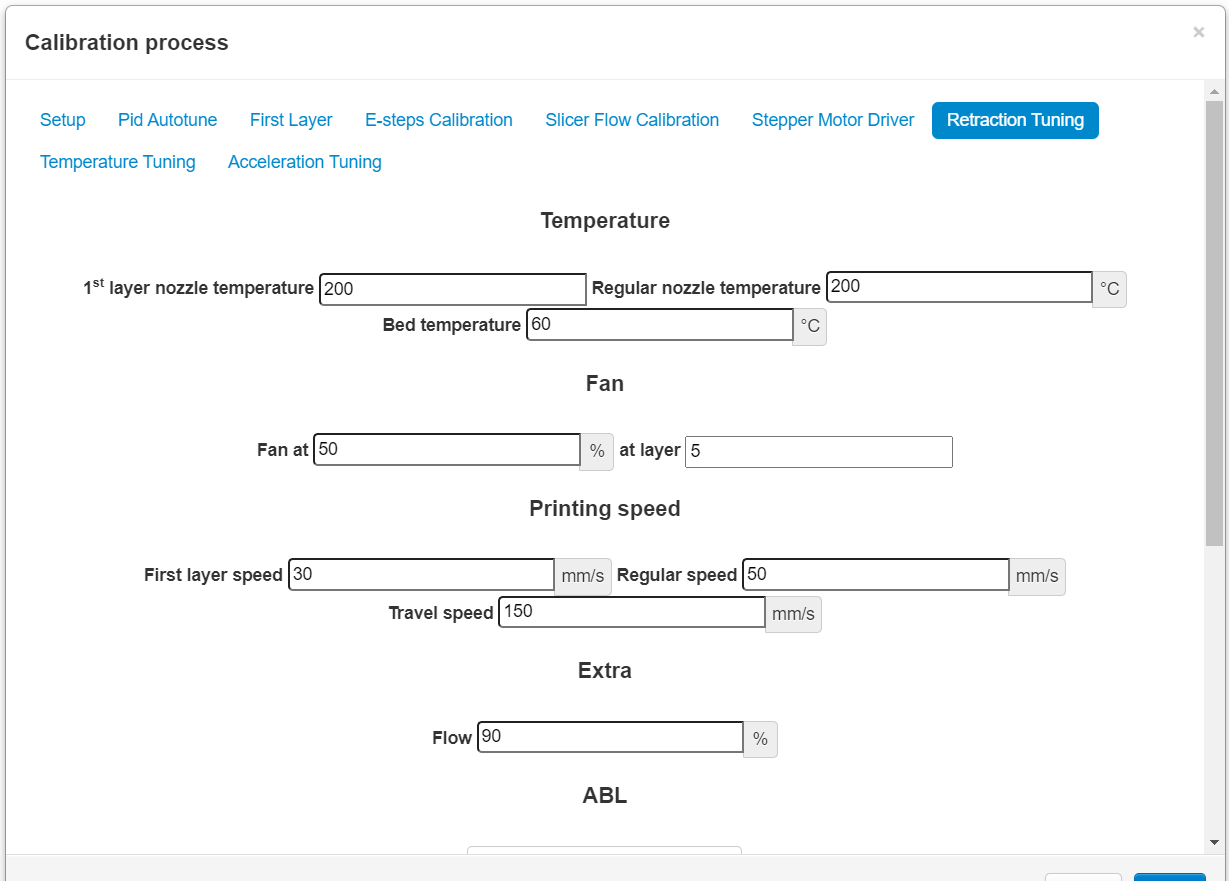
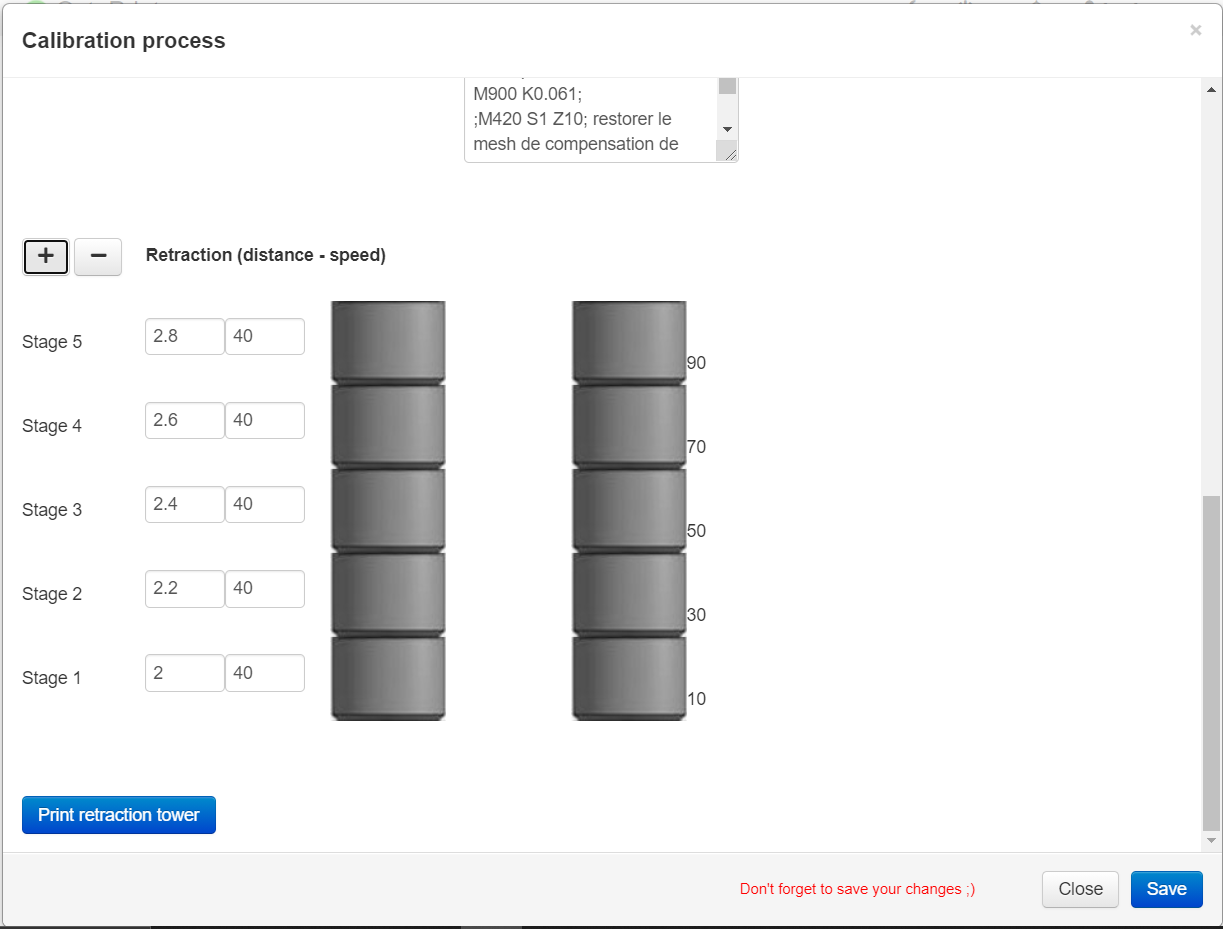
Here, I added some stages depending on my needs.
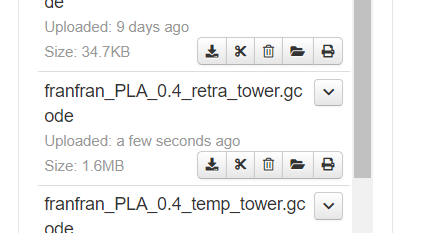
Then, hitting "Print retraction tower" button will add the file in the manager
image
Downloading it and visualizing it in Cura gives us:

This is the .zip file of the plugin:

OLD VERSION 1: OctoPrint-Ttprintercalibration.zip (175.2 KB) --> OUTDATED

04/11/2021, OLD VERSION 2 OctoPrint-Ttprintercalibration.zip (178.9 KB) --> OUTDATED

  • Better design
  • Profile available
  • Some bugs have been corrected, the code is cleaner too
  • I noticed an issue, the acceleration print it rotated at 90°, the X is the Y and the Y is the X, it'll be corrected in the next version

04/14/2021, OLD VERSION 3

  • Acceleration print have been rotated so that the X and Y are well matching

OctoPrint-Ttprintercalibration.zip (180.4 KB) --> OUTDATED

TODO:

  • 0.6, 0.8mm nozzle support
  • "Rebranding"

04/25/2021, NEW VERSION

I have added some cool features here:

  • Now, 0.4, 0.6, 0.8mm nozzles are supported
  • Some securities have been added, the textbox is higlighted in red for an error, you cannot print the model with such values. In yellow for a "dangerous" value but those value can be totally working for your printer depending on the setup.
  • The plugin is now called "Calibration Companion"
  • Some UI improvement, like the start and end gcode boxes have been moved for convenience

Here is the last version: OctoPrint-CalibrationCompanion.zip (162.0 KB)

You can download the .zip file and install the plugin from the plugin manager.

/!\ PLEASE HANDLE IT WITH CARE, I WILL NOT BE RESPONSIBLE OF ANY PHYSICAL CONSEQUENCES /!\

I am surely opened if you wanna collaborate with me, so please contact me on discord: iFrostizz#5067

Have a nice day ! :smiley:

8 Likes

sure
where can I download?

1 Like

Just edited my post :slight_smile:

1 Like

hi
I loadet and installed and my OctoPrint is still running so, Step 1 working :slight_smile:
I will test in the next days, wanna get a print done first, anyway it's a nice idea!

in first tab I need to enter Heating Position Size X Y Z, what is meand here?

"Teaching Tech 3D Printer Calibration" was new for me
please also check this:
http://retractioncalibration.com/
i made really great experience with this calibration, may you can implement it also, here you find the source: GitHub - prahjister/Calibration-Generator

Hey! Happy that you already installed it.

XYZ Heating Position are the coordinates where the nozzle will heat. If you just heat the nozzle with z safe homing, it would heat at the middle of the bed and some filament would fall on the middle of the bed, making the first layer fail sometimes.
I think that this is a temporary feature, I'm waiting to see a better alternative. Like allowing to set a gcode sequence before, and after heating to let the user almost a full control of the gcode file.

I really like the website you pointed me out. The advantage I see to use the plugin is that it is maybe a bit more visual, but that's a really great work.

Have a nice day !

ah, I understand :smiley:
my preference is a calibration line like Cura does before a print
it gives the printer some time to get smooth preasure in the nozzle and I see if my Z-Offset etc. is correct and I can remove effluent Filament

and RetractionCalibrationGenerator really saved my life as I can test a wide sprectrum of retraction and temp options within one hour

and already now I have on wish for your Plugin:
please let me create Profiles in every Tab so I can save different settings and reuse em easy

Yep! I use this same line with the plugin. Just copy/paste the line sequence from your Cura start gcode to the "start gcode" texbox as it is executed just after heating done.

This profile idea is really really good, I might add a new tab only for profiles and it would also saves a lot of time for the user because he wouldn't need to alway write again his settings trough the different tabs.

Thanks !! :slight_smile:

It's a great idea. Very nice to have all those useful tools in one place. Happy to give it a try on my CR-10 (Original).

I'm very happy to see someone else trying it !! :smiley:
In the meanwhile, I'm improving the UI and will implement the profiles soon!

It looks nice, though I haven’t done anything with it yet but hopefully I will get some time tomorrow to play with it.

Some of these tuning options, like PID tuning, need to have the new values stored in the firmware. Does your plug-in update the new values in firmware, and save the new values so they survive a power off and on?

Yes of couse,
for the PID tuning, you just need to send a M303 and save it when finished using a M500.

I should add the number of cycles as an option.
I could also store the calibrated values in the profile so you can retreive the P, I, and D constant easily, not sure if I could but maybe get the settings from the EEPROM could do it.

Trying to set up the retraction tower print, but I’m getting a message “Maximum height was reached. Please check your printer height Z”. I get the same when trying to set up the retraction tower.

Not sure what setting it’s referring to. I have my printers parameters set correctly, and have homed the printer on x,y and z. I have selected G29 under the ABL options, as that’s correct for my setup, but I have not set up any other start gcode. I also see a messagfe “Some settings were not saved”.

My printer is basic CR-10 (but converted to direct drive)

Yeah, so make sure that you filled up everything in the "setup" tab. Otherwise, the gcode will not be generated properly. For the Z height, I think that the textbox is empty. If not, I'll check on my side for a bug. The settings dialog means that in the "setup" tab, you need to click on "save" in order to save your settings. I might remove that one soon

Yep. Everything in the setup tab is entered and saved (though I still get that “not saved” message). The only fields not entered are the checkboxes for relative and delta. For my CR-10 I have X and Y sizes 300. Z I have set to 390,

Heating position I have set to X 100, Y 100 and Z 10.

I did find that the setup checkboxes are only flagged in yellow if I set them and then unset them again. I also found the same for the nozzle size. If I set 0.6 and then 0.4 I got it flagged in yellow, though that didn’t stop the message about unsaved settings. The same applies to the filament where the default value of PLA was not flagged in yellow until set to ABS and then back to PLA. All setup fields now show in yellow, but still the message about unsaved settings.

FYI, Quit from the Octoprint GUI and later re-loaded. All the settings in the setup tab were gone, though some previous values were available in a drop-down on selecting some of the fields.

That's weird, could you please share a screenshot of the dev tools please ? (F12)

The setup page?

This is the dev tools while the setup screen is displayed. I have made everything highlighted in yellow, but still doesn’t save.

It's seems like a JS issue, so there might be some errors in the "console" tab of devtools

You called it perfectly. This is the console tab.