In some slicers, we can add stop points at selected layers so that we can change filaments at those layers.
Is there a way to add stop points within the same layer? Perhaps via some kind of plugin?
For example, I want a region or two in layers 20-25 to use a filament that is different from the filament used for the remaining of the print. I don't have a MMU so I will need to unload and upload the filaments manually. I do want to have the stop points at exactly the same locations each time the print job is run. If I just stop and resume manually, I will not get consistent results.
Wouldn't it be simpler to split your model into pieces from different color that you would assemble later?
Otherwise, I'm afraid you'd have to manually edit the gcode... Find the specific location you need to change filament. Asking your driver to work with absolute coordinates would help you do that...
After slicing, by dragging the horizontal slider back and forth, I saw some numbers in the Preview. So I can find the specific locations I need to change the filament. The problem is how do I edit the gcode to make the stop points? How to ask my driver (what driver are you referring to) to work with absolute coordinate?
Thanks. I am using Super Slicer. I know this colorchange function on the vertical slider. However, I want a horizontal version of it which Prusa said their PS does not have.
So with the Multi Colors plugin, I can use different colors within the same layer? Am I right that I need to change my Octoprint from the stable 0.18 to OctoPrint (1.3.0dev, devel branch)?
When I meant manually, I really meant manually, like editing the gcode file with a text editor. Unfortunately I don't know how you would ask your slicer about absolute coordinates, you'd have to look for that in its documentation...
An attempt could be to use PrusaSlicer in MMU mode and after slicing to change the tool/color change blocks in the gcode file with a code block for manual filament change (M600).
Most slicers are using absolute mode for X and Y. Z is most likely absolute as well. E can vary and often can be changed in each slicer.
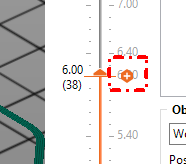
Editing gcode manually isn't as scary as it sounds. Using the slicer preview you can move the vertical slider to the layer you want and then the horizontal slider to the position you want. Read the exact X and Y from the Tool position. Now you can use a text editor to search for those coordinates in the gcode file and add your filament change code at that point. Most slicers add comments at each layer change as well.
I think you could add the layer change code using the vertical slider + and then manually move it to the correct place within the layer.
Would it not be very time consuming to keep switching filaments? We're talking 2+ swaps each layer. I know I would get very bored watching the printer and having to do this every minute.