How to still control z-adjustment during print?

What is the problem?
I've just installed Octoprint on a Raspberry Pi and just getting through usual teething problems. Have it running brilliantly on my Prusa MK3S and now trying to get it working on my CR10 Max. All seems fine except I can't seem to adjust the z-offset during prints through the control panel when using Octoprint.
This is handy obviously if I need to tweak it slightly on first layers.

What did you already try to solve it?
Googled around, but can't see anything obvious - the adjustment option is there on when I unplug the octopi and use panel manually

Question
Is there any way to adjust z offset live in Octoprint or any way to restore this menu option when plugged in?

Try to adjust it via your printers display :slight_smile:

M290 should also work via the terminal tab

Sorry - that's what I meant - there's an 'adjust' option through my CR10 Max display at the top right when I'm printing without Octoprint, but when I plug in Octoprint and run a print, this option disappears!

Hence I've got to either control z-adjust through Octoprint or get it to reappear!

Any ideas on how to get it to reappear!??

No sry :confused:
I replaced the stock firmware on my printers with my own marlin builds because of stuff like this and bugs in those firmwares.

Let's wait some time. Maybe somebody else got an idea :slight_smile:

Just wondering why you all don't properly set Z offset for your layer height using a model and digital caliper and be done.. I have no idea how you can possibly see .04mm by eye while printing, I mean I always set mine so the model is within +-.02mm of design height and never had any adhesion issues.. Something that should measure 3mm tall is not correct if is not 3mm tall.. Am too particular? Is it just that my printer is more accurate then most where I can set it and forget it until I change hot ends and nozzle? Or is the process I follow to time consuming and a little elephant foot is or taller part is ok? Sorry just have seen soo many posts in other forums about adhesion issues which are almost 100% dues to improper Z offset and lack of calibration. Tweaking while running I guess could be useful for non critical part.. but I can not think of a time I would ever use it.

Hi Airscapes - how big is your printer bed?

My printer is a Makergear M2 Build Dimensions 200 mm (8") x 250 mm (10") x 200 mm (8") nothing special, why?

Likewise - found it easy enough on my Prusa MK3S as you describe - the printer in question is a CR10 Max, so you find when you scale to 4x the size suddenly there's lots of factors that start to play a role (eg temperature of the heatbed, room etc noticeably affects it) hence keen to be able to microadjust if required for large model printing.

Totally agree with what you're saying though - definitely the right way to go, just useful to have a backup option of quick tweak (especially when a really large model can take 45 mins to lay down the first layer, so annoying when you get to a far corner and need to just tweak z-offset a little)

Thanks for the explanation Alphatester234, sounds useful when dealing with variability in hardware and environment.

Hi, first excuse my English, it's not very good.

From what I understand about your case, I think it's a bit similar to mine and I'd like to contribute some more information, in case it could help us all to find a solution.

I have a CR-10s PRO v2 printer, which I have had connected to the OctoPrint for some time now, and at the level of the system and the printer everything works apparently correctly, I have no problem sending anything to be printed from the octoprint, even through cure -> octoprint or from the APP PrintOid for Android.

However, something I was able to discover recently, thanks to a friend who also owns the same printer as me, is the following and this is where I think my case resembles yours Alphatester234:

  • When the printer proceeds to print a piece that is on the SD that is inserted into the printer. The display of the printer changes from its home screen, to a screen where you can see the detail of the part that has started printing and allows you to choose printing options that can be modified while printing. However, when I order to print any piece from OctoPrint, the printer receives the print command, does the pre-heating, and all the steps until it starts printing, but the printer display's never changes from the initial screen to the screen I mentioned before when the print comes from the SD (allways stays in the screen showed after turn on and printer has startup).

Even though all the printing is done without problems when I do it from the octoprint, the printer display behaves as if it "didn't know it was printing anything", so the display doesn't change from the start screen.

The other day, by accident, I was able to reproduce a case in which the screen does change when I send a print from the Octoprint. To do this, I did the following:

1.- I sent to print a piece from the SD of the printer.
2.- The screen changed from the initial state to the screen that allows the adjustments as I said before.
3.- The printer started printing.
4.- I cancelled the printing.
5.- After confirming that I wanted to cancel the printing, once the printer has been stopped. The display has remained on the screen where it shows the detail of the print and the settings button I said before.
6 .- Being there and with nothing being printed, I have sent to print a piece from the OctoPrint.
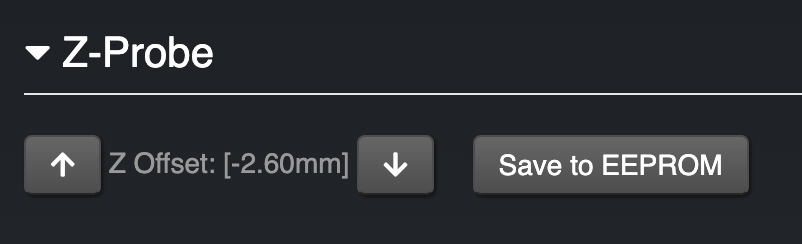
7 .- The printer receives the order for a new piece to print, the screen refreshes the data of the new piece that has begun to print and having already begun to print the new piece that comes from the octoprint and on the screen in question, I could enter the settings of the print, to modify values such as: Print speed, temperature, Z-Offset.

I thought until recently, that the fact that the printer display never changed (it only shows the current bed and hot-end temperature at the bottom of the screen) when I print something from Octoprint, was normal behaviour. However, it was because of my partner, that this is not the case... According to his printer, where he also has octoprint, the printer display should change when you print something from octoprint, just like it does when you print from the SD.

My printer is running with official firmware without any modification and OctoPrint v1.4.0

2 Likes

I had this same question. I have partially fixed it by following the instructions on this site: https://3dprintbeginner.com/octoprint-baby-stepping/

Note that you don't need Putty to connect to the Raspberry Pi terminal. On Windows 10 you can use the normal command terminal and type:

ssh pi@octopi.local

This involves editing the config.yaml file to add new entries for baby-stepping. I tested it and it does work with my Ender 3 Pro with the v1.1.5 silent main board. One oddity: I could not find any M290 references in the serial terminal when I was testing. I also did not get any response from the "Get" button. I could effectively raise and lower my nozzle for proper first layer tweaking through.

For temperature you can directly set it using the Temperature tab. That really leaves just the flowrate and fan. I haven't tested whether or not the flow percentage on the Control tab will adjust during a print. The fan percentage should adjust though.

You will need to add the following to the end of your config.yaml by opening the raspberry pi's terminal via SSH and using:

sudo nano ~/.octoprint/config.yaml

Use the arrow keys to move to the end of the file. Paste the following:

controls:
- children:
  - children:
    - command: M851
      confirm: null
      name: Get
    - command: M500
      confirm: null
      name: Save
    layout: horizontal
  - default: 'Current Z Offset: ???'
    regex: 'echo:Probe Z Offset: ([0-9.-]+)'
    template: 'Current Z Offset: {0}mm'
  - children:
    - command: M290 Z0.02
      confirm: null
      name: Babystep Up
    - command: M290 Z-0.02
      confirm: null
      name: Babystep Down
    - command: M290 Z0.01
      confirm: null
      name: Microstep Up
    - command: M290 Z-0.01
      confirm: null
      name: Microstep Down
    layout: horizontal
  layout: vertical
  name: Live-Z Probe Offset

Then use CTRL-X to exit and Y to confirm save. It will also prompt you for the filename and pre-fill it with the original name. Hitting enter will accept.
Restart your octoprint server using the SSH command below (or probably via the power button in the browser.):

sudo service octoprint restart
4 Likes

hi!, im sorry about my english.. i have the same problem, i need take control of babysteps when printing, i have an ender 3 pro 1.1.6.2 with standard firmware, i think M290 works cause i use z baby steps trough the display of the printer. But when i use this code on config.yaml do not get any response. i need some help please!

This is a great bit of information. However, I've read that baby stepping must be enabled in the Marlin firmware and that means recompiling in my case. Another workaroud is to make sure you enter the leveling screen on the printer display before you start the print. The z axis buttons on the leveling screen allow you to adjust while printing is going on. Just remember you have to be at this screen prior to asking OctoPrint to start printing. I don't know if this is a bad thing to do but it did work for me.

That's great. Adds z-adjustment to octoprint !

The regex is slightly different for Creality Ender 3 S1 printers - noted as Marlin 2.0.8.15F4 (Mar 8 2022 09:49:49).

Use this instead:

   - default: 'Current Z Offset: ???'
    regex: .*Probe Offset.* Z(-?[\d\.]+)
    template: 'Current Z Offset: {0}mm'

Also of note, if you add M851 ; get probe offset values to Octoprint Settings -> Printer -> GCode Scripts -> After serial connection to printer is established, the offset will be automatically updated when you connect to your printer.

1 Like

here's a variation I cooked up tonight. Be sure to add M851 ; get probe offset values to Octoprint Settings -> Printer -> GCode Scripts -> After serial connection to printer is established

and the source:

controls:
- children:
  - children:
    - additionalClasses: fas fa-arrow-up
      command: M290 Z0.01
      confirm: null
      default: 'Z Offset: [???]'
      regex: .*Probe Offset.* Z(-?[\d\.]+)
      template: 'Z Offset: [{0}mm]'
    - additionalClasses: fas fa-arrow-down
      command: M290 Z-0.01
    - default: ''
      defaultValue: ''
      regex: ''
      template: ''
    - default: ''
      defaultValue: ''
      regex: ''
      template: ''
    - default: ''
      defaultValue: ''
      regex: ''
      template: ''
    - default: ''
      defaultValue: ''
      regex: ''
      template: ''
    - command: M500
      confirm: This will commit all pending changes to your machine's EEPROM which is probably not a good idea if you are in the middle of a print job.
      name: Save to EEPROM
    layout: horizontal
  - children: []
    layout: horizontal
  layout: vertical
  name: Z-Probe
1 Like