I'm afraid screenshots of your screen aren't going to work for my 70yr old eyes.
Can you temporarily connect the RPi to your router with an ethernet cable? Can you access your router's web interface?
Also, please either post your octopi-wpa-supplicant.txt enclosed in a </> block or upload the actual file to a sharing site (Dropbox, Google Drive, https://www.mediafire.com/, https://easyupload.io/ and post the link here.
If you double click on my photo, it should get a lot larger. You may have to double click twice but it will get big. Do you see the copy of the file where I put in my network stuff.
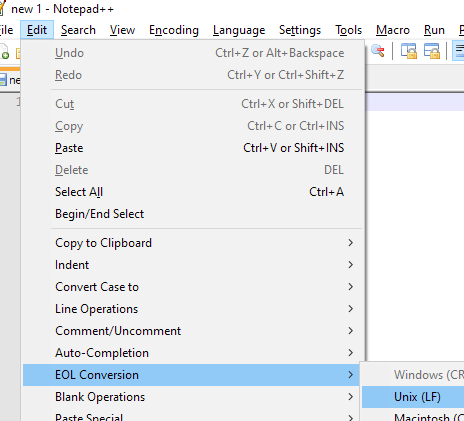
This is the WPA supplicant that I always use for all of my Raspberry Pi projects and it always works. Just make sure that you are not using Wordpad or Notepad. They will put the wrong linebreaks in the file. If you are doing this on windows machine you have to use Notepad++ and set your linebreaks to UNIX.
Also, make sure that you leave the quote marks around your SSID and PASSPHRASE. Just substitute your text leaving the quote marks there.
Yes of course the quotes are there. I hard connected with ethernet and able to l go through the setup but I still haven't figured out how to do it wirelessly.
you only need the ssh file if you install raspberrypiOS and are planning on adding octoprint later. And the ssh file (ALL LOWER CASE) goes on the boot partition. After the first boot it will dissapear, because raspberrypiOS deletes it once ssh is enabled. you don't need to put it back in the boot directory every time.
if you downloaded the image for octopi, flash it to the card. Put it in your windows machine, DO NOT FORMAT WHEN WINDOWS SAYS IT NEEDS FORMATTED. It's because windows doesn't read linux formatted partitions. on the drive labeled boot on the sd card, edit the file for your network. you can actually delete everything in it and just put in the following:
ctrl_interface=DIR=/var/run/wpa_supplicant GROUP=netdev
update_config=1
country=US # United States
Make sure to use your country code if not in the US, and put the # sign in front of any other country code lines that don't have it (Like country=GB)
Multiple country entries will keep it from enabling wifi as well.
Now, on your PC, install a SSH terminal program like Putty.
you will use that to connect to the Pi. you need to log into your router to find the IP address of the pi. Look at connected devices and one will be a raspberry pi. use that address in Putty.
When you tell it to connect (After your Pi is booted of course) it will ask if you want to connect since it is a new security key. Click yes. then you will get the login prompt. lower case pi then enter
password is raspberry, also all lower case
then you should be at the commandline (Usually a # prompt after the name of the pi)
there you can run "sudo raspi-config" and set your locale, time zone, new password for the pi user, then finish and it reboots again
now you use a web browser and put the IP address of the pi in the address bar. that will walk you thru setting up octopi.
OK...I'm able to connect using putty and configured the network, ssh, etc. I have full control while using putty and can go into octopi BUT I can't do it wirelessly without ethernet cable. I have found the name and the IP address and triple checked accuracy. It is not holding on to my network information and I've entered it three times and it's still not holding. We're getting closer and I really appreciate your help.
It seems that no matter where I attempt to put in my network information, it doesn't get saved. When I check on it, it's blank no matter how many times I've entered it and clicked on fininsh.
I think I've got it!!! After putting together the many youtube videos, I think I've got it working wirelessly. It has to do with the fact that the ip changed 4 times and I think I nailed down this one.
Thanks for your help. I really do appreciate your patience. Let's hope this holds.
Your wireless and wired connections will not have the same IP address because they are different network controllers with different MAC addresses. So, your router will give each a separate network address. However, next time, if you have already booted your pi and are able to connect with the wired connection at the same time, you can go into raspi-config (sudo raspi-config). From there you can access the available wireless networks, select yours and enter your passphrase.
That's exactly what I did!! And I can't tell you how happy that this is fixed. I've been working on it for 3 days. I haven't gotten my printer yet because I wanted to make sure this worked while it is in transit. So hopefully, I'll be able to connect to the printer right away instead of spending 3 days figuring this out while the printer sat there.
Now I just have to figure out what plugins to install. There are soooo many and I'm glad that I have the time to look and watch youtube videos on suggestions.
THANK YOU SOOO MUCH for everyone's help. I can't tell you how much better it made my horror story go. lol
Just an old man trying to follow the directions I see on Youtube and get frustrated when a, b, c, doesn't work the way it's supposed to. Again, thanks to everyone here, I got it working and hope that I can now look at plugins and research which ones will benefit me and work on the printer being delivered next month. Also, Towlerg, I can't imagine what benefit it would be to anyone to "troll" this group. But hey, you may know something I don't.
Just for the record because I see this a lot: The "directions on YouTube" aren't the official directions. There are a WHOLE TON of YouTube tutorials created by a WHOLE LOT of YouTubers over the years. Most of which are outdated now, a lot of which will become outdated at some point. That's just the nature of things. The only thing that's maintained by the project and which should be the authority on how to do things is the official install instructions on the download page.
And saying those are outdated or don't work without clarification won't make them magically improve if you don't specify issues you are having, especially not when they work just fine for thousands of people each day. So in the future, please, always keep in mind: the only official stuff is what is found on octoprint.org, everything else is thirdparty, and if there's some issue with the official stuff then clarify precisely what the problem is you are seeing so it can be fixed or you can be helped.
I get that, thanks, BUT...NOT one suggestion mentioned PUTTY. Once I got Putty installed, I was able to do what was needed and I finally got it to work. At least of the moment. I'm looking at plugins and hope that it isn't difficult to add.
I really do appreciate everyone's help.
 Do you see the copy of the file where I put in my network stuff.