Node-red control UI

Hello

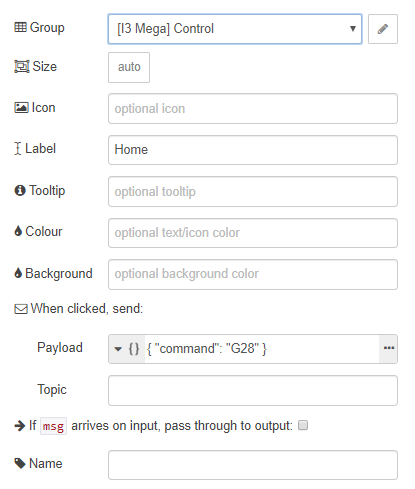
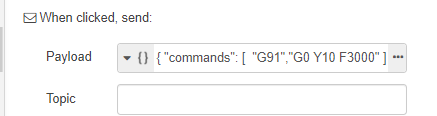
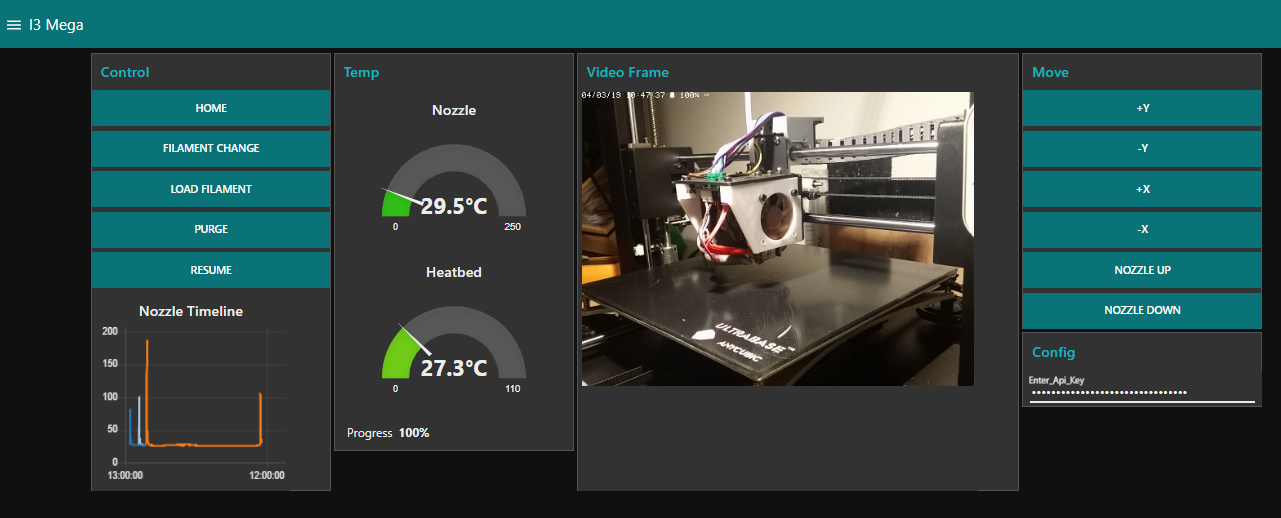
I was looking for a simple solution to quickly and easily send custom "gcode" commands to the printer.

My first attempt was an Amazon "Dashbutton". Works great but is just too inflexible. Is now my emergency stop switch.

Finally, I ended up with "node-red". Filament change again directly in front of the printer possible (smartphone). i love the Octoprint API :slight_smile:

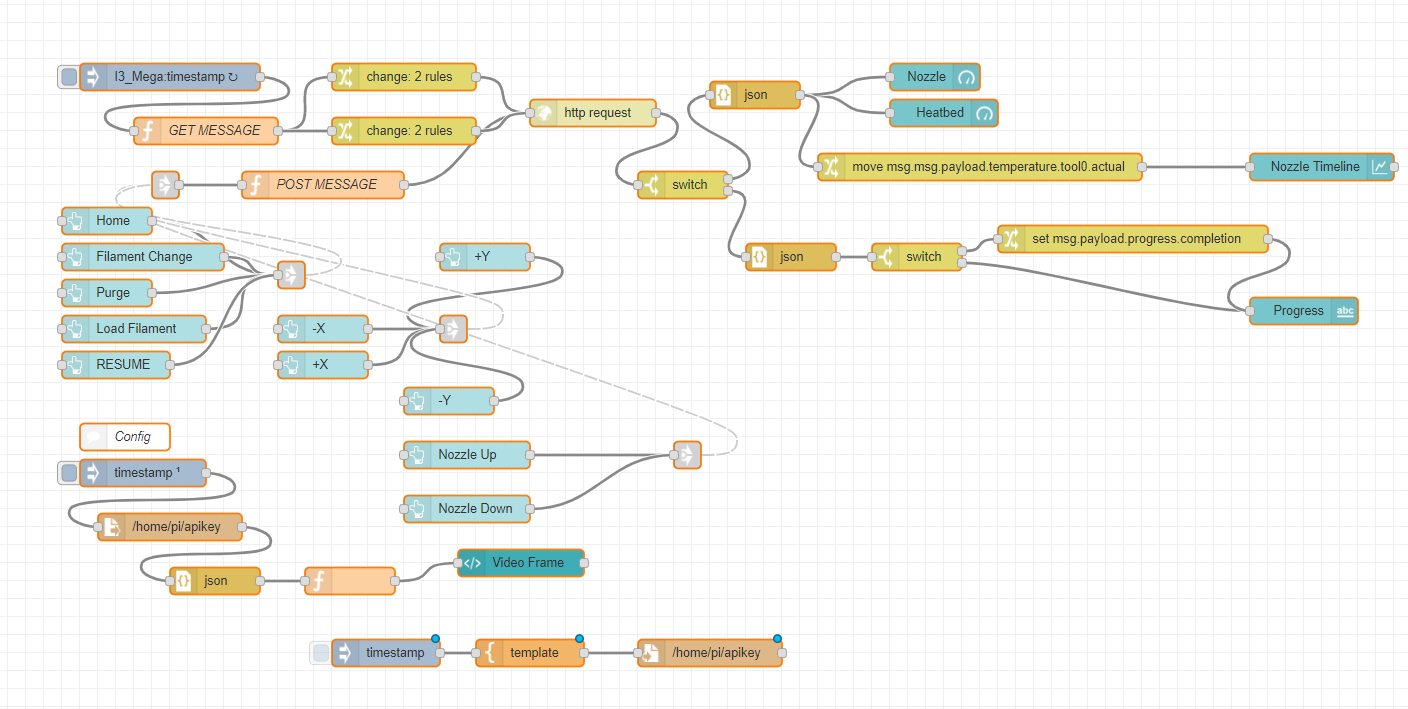
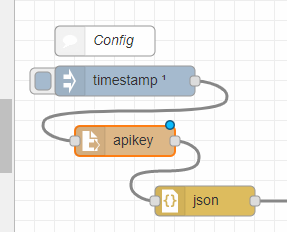
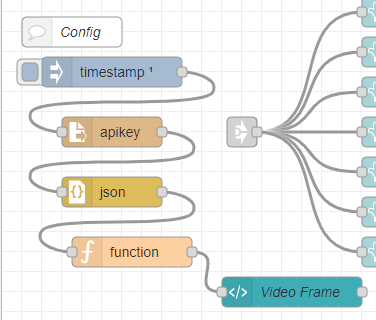
Flow: https://gist.github.com/schnello/181318891d2bc2290e32213d1029a5b3
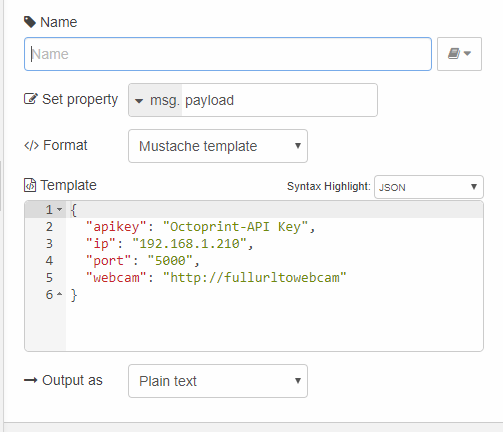
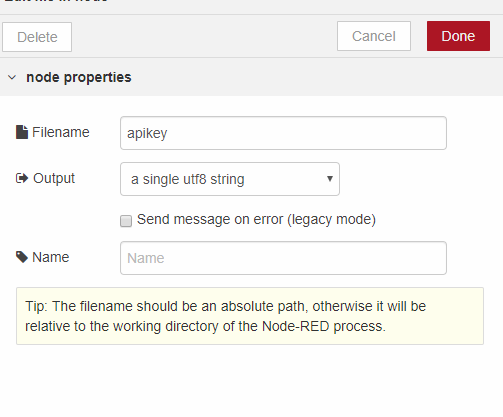
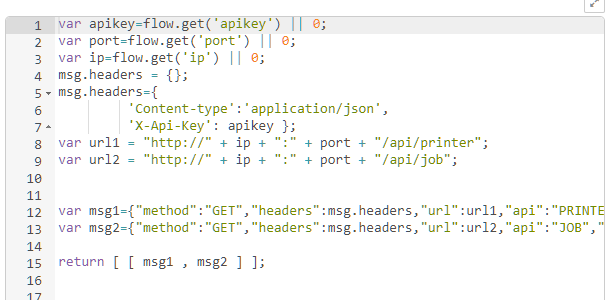
IP, Port and APIKey is get from apikey:

{
  "apikey": "Octoprint-API Key",
  "ip": "192.168.1.210",
  "port": "5000",
  "webcam": "http://fullurltowebcam"
}

3 Likes

Looks cool but we might need a little more information here.

Node-RED is a (ladder-based) programming interface which is sort of an adult-oriented (and NodeJS/JavaScript) version of Scratch (using Python), if you will.

So... did you develop your own Node-RED smartphone app, did you download a prebuilt app from one of the stores or what? Which API do you love (Node-RED itself, some API which is presented from the prebuilt app...)?

So... did you develop your own Node-RED smartphone app, did you download a prebuilt app from one of the stores or what? Which API do you love (Node-RED itself, some API which is presented from the prebuilt app...)?

Iam sorry. I thought node-red is actually widely known.
Node-red provides an easy interface to process data from different sources. A simple node is: Input > Process > Output. There are a lot of prebuildes nodes and flows... and you can also write your own flows and share it. In my case the output is the node-red-dashboard and input: FHEM (controll of my home devices, electric meter (current consumption) and Octoprint (send and receive data). This dashboard is simply called via the browser on any device.

Greetings,
Christian

Last year I was a software development instructor so I reasonably know what Node-RED is. That Input > Process > Output is standard ladder programming (a.k.a. ladder logic), btw. It gets the name because each of these looks like a rung on a pair of vertical lines. In electronics terms, the line on the left might indicate the 5V supply, for example, and the line on the right might indicate Gnd. The "obstruction" below indicates a NOT condition for the sake of comparison.

5V                                                    Gnd
|                                                     |
|------[ ]--------------[ ]----------------( )--------|
|  Key switch 1      Key switch 2       Door motor    |
|                                                     |
|------[ ]--------------[\]----------------( )--------|
|  Key switch 3      Obstruction     Other door motor |
|                                                     |

For decades this was the way you'd see schematics in large Honeywell-controlled manufacturing devices. It's just interesting to see this now as implemented in NodeJS and freely available to everyone.

Node-RED isn't actually widely known yet. I'm constantly telling people about it and you're one of the few who appears to know what it is. It's also brilliant for building a NodeJS website with each rung as a REST API endpoint.

In my mind it's widely known among home automation people :slight_smile:

I love Node-Red but mainly use it for home automation, I am only a beginner when it comes to Node-Red tho, any chance you could do a run down on how you did this with a little more detail for us noobs? TIA

Hello @Drak41 1

any chance you could do a run down on how you did this with a little more detail for us noobs?

Sure.

  • First install the packet "node-red-dashboard"
  • Import the flow (you found the flow code in the first post)
  • create a file "apikey" under /home/pi/ with the config as json:
    File content:
{
  "apikey": "Octoprint-API Key",
  "ip": "192.168.1.210",
  "port": "5000",
  "webcam": "http://fullurltowebcam"
}

You can now modify the flow as you want. If you dont need the webcam delete the ui-template
image

Commands are set via the payload of the buttons (command):
image

If you want send more commands with one button:
image

Modify the dashboard as you need it:

If anything else is unclear just ask.
Christian

Blockquote
create a file "apikey" under /home/pi/ with the config as json:

I take it this is on the PI that Octoprint is running on and I can call it "apikey" ?
any file permissions I need to worry about?

I run Node-red on my Synology NAS box in a docker container just in case that makes any difference
Thanks for the more detail :slight_smile:

Hello.

I take it this is on the PI that Octoprint is running on and I can call it "apikey" ?

This files is required on the system that execudes node-red.

Easy way:
Import this nodes:
image

[{"id":"42743e77.9ce29","type":"template","z":"16446ae6.4f4515","name":"","field":"payload","fieldType":"msg","format":"json","syntax":"mustache","template":"{\n  \"apikey\": \"Octoprint-API Key\",\n  \"ip\": \"192.168.1.210\",\n  \"port\": \"5000\",\n  \"webcam\": \"http://fullurltowebcam\"\n}","output":"str","x":300,"y":740,"wires":[["4584efe6.699b6"]]},{"id":"cb9852f0.48032","type":"inject","z":"16446ae6.4f4515","name":"","topic":"","payload":"","payloadType":"date","repeat":"","crontab":"","once":false,"onceDelay":0.1,"x":140,"y":740,"wires":[["42743e77.9ce29"]]},{"id":"4584efe6.699b6","type":"file","z":"16446ae6.4f4515","name":"","filename":"apikey","appendNewline":true,"createDir":false,"overwriteFile":"true","x":470,"y":740,"wires":[[]]}]

Edit the template to your values.
image

Initiate the inject and change the filepath in the main flow to an relative path.
image

image

Greetings,
Christian

@Drak41

Did the flow solve your problem?

Thanks @Schnello that's what I needed :slight_smile:

Hi Schnello
Kann ich dich Irgendwo kontaktieren? Hab da ein paar fragen

Lg

Just a quick question about this, are you 'polling' the Octoprint API every X seconds, or are you using the MQTT plugin to get info from Octoprint to NodeRED?

Hi.

Its only a http request.

Hi

This was a really good flow. Thanks for that! :smiley:

Do you have any good commands for canceling the print. Ive tried to add a bunch of gcodes to a command button.
And the printer responds, but continiues after it have "cancelled" it.

The commands is:
{"commands":["G91","G1 E-2 F2700","G1 E-2 Z0.2 F2400","G1 X5 Y5 F3000","G1 Z10","G90","G1 X0 Y{machine_depth}","M106 S0","M104 S0","M140 S0"]}

I have put it at the same place as filament change, as i just want tp cancel if something is printing...

Hey. I guess the best way is:
http://docs.octoprint.org/en/master/features/action_commands.html

Yes! Thank you!

I've got it to work with the command " { "command": "M118//action:cancel" } " from node-red

:smiley:

Hello!
I have a question about your flow, which http request are you using?
When I import the your flow the field of the http request is blank and I don't know what to do...

Sorry for the late response:

I have a question about your flow, which http request are you using?
When I import the your flow the field of the http request is blank and I don't know what to do...

The config ist loaded from the file "apikey":
image

File Content:
{
"apikey": "Octoprint-API Key",
"ip": "192.168.1.210",
"port": "5000",
"webcam": "http://fullurltowebcam"
}

and is used in this function:

image

Greetings

Hello! New to Red Node and Octoprint and I would like to get this running on my mac vs pi. I've followed the discussion but get Unexpected token < in JSON at position 0 for the json nodes after the switch. I also tried http://localhost:5000/#term for the http request URL but get some warning messages. Any suggestions on the api / http settings for working off a mac? Thanks in advance!