Guys, this is my first post so please give me some head start ![]()
Caution
You can damage your printer by doing any modifications. This is only for educational purposes. Anything you do is your responsibility and I'm not responsible for results of any unsuccessful modifications. You have been warned.
Description
The thing is to have the Octoprint working without a dedicated PC (Raspberry or other) that is connected to your 3D printer just for dealing with Octoprint. For some of us it can be waste of such good piece of hardware. So this can help you or you can treat it as a fun fact.
In this approach we will use serial connection (UART) over the WiFi (the same way applies for the Ethernet). We will use cheap and small ESP8266 board that will be connected directly to our 3D printer. Also, you need some kind of PC that will anyway run the Octoprint on it, but maybe you already have some PC (Raspberry Pi?) working all the time and you want to make use of it. On host side we will run Octoprint in a docker container.
This guide has been succesfully tested on following setup:
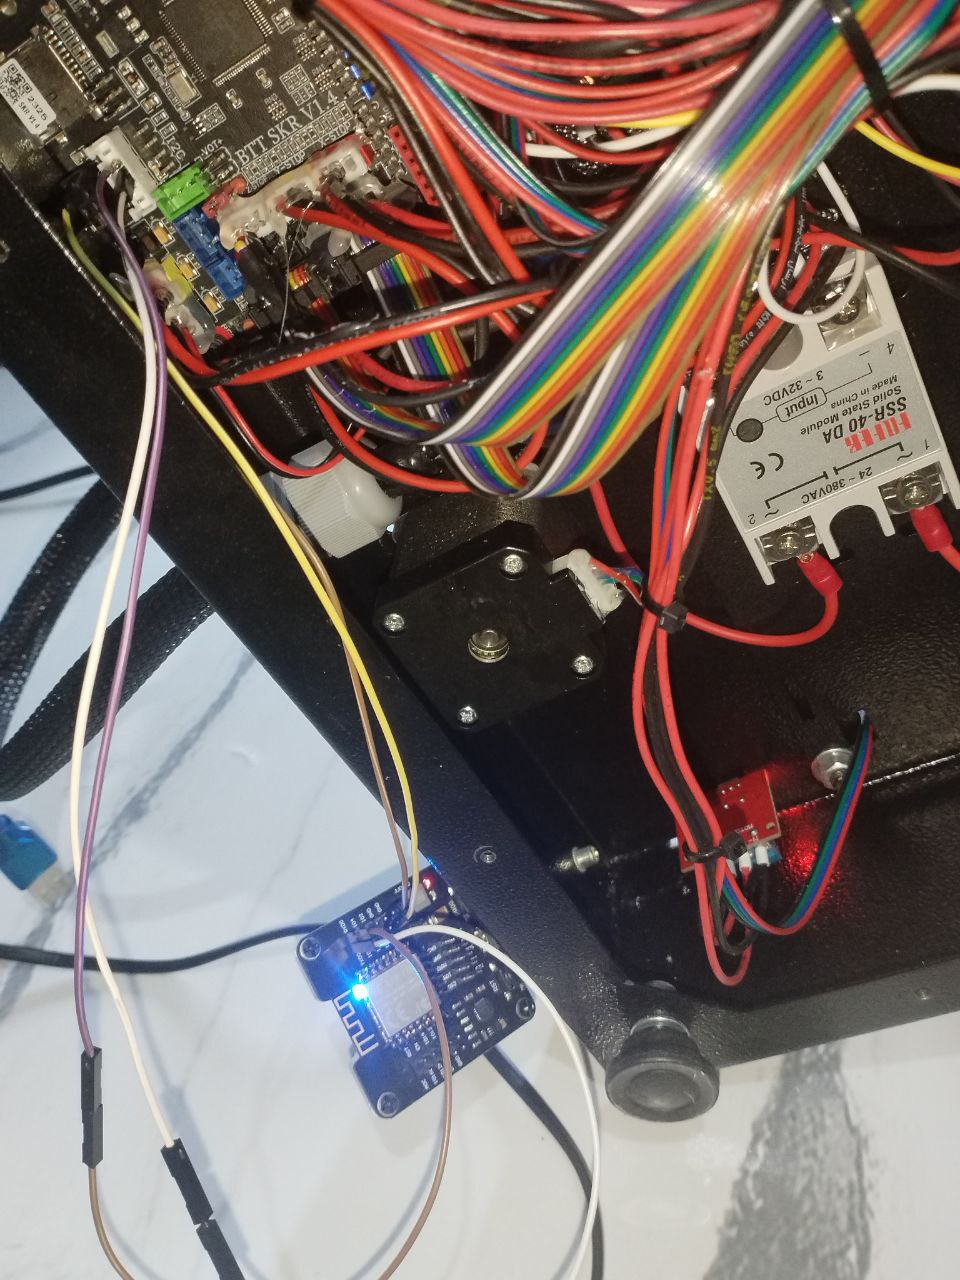
- Ender 3 S1 3D printer,
- ESP8266 nodeMCU board,
- Raspberry Pi 3 (host PC) with docker.
For the ESP's side it works on every device that can be flashed with EasyESP and has UART pins accessible.
Advantages
- no more wasting the Raspberry Pi only for Octoprint,
- your 3D printer can be accessed remotely through WiFi,
- optionally, you can use with camera with ESP32 (with camera module).
Disadvantages
- TCP packets can be lost during connection,
- you need to solder cables directly to the Rx and Tx of your printer (not USB),
- you need to have host PC for Octoprint,
- installation is a bit tricky.
Software description
EasyESP firmware is beautiful piece of software that has a serial2net capability which helps us to achieve our goal. It can send the whole UART through the Ethernet (in our case WiFi) and it can be used bi-directionally - sounds great, isn't it? Also, you can always connect to your printer via telnet and you will speak to each other like with normal serial connection! With our approach neither printer nor octoprint will have no idea that the conversation is going through WiFi.
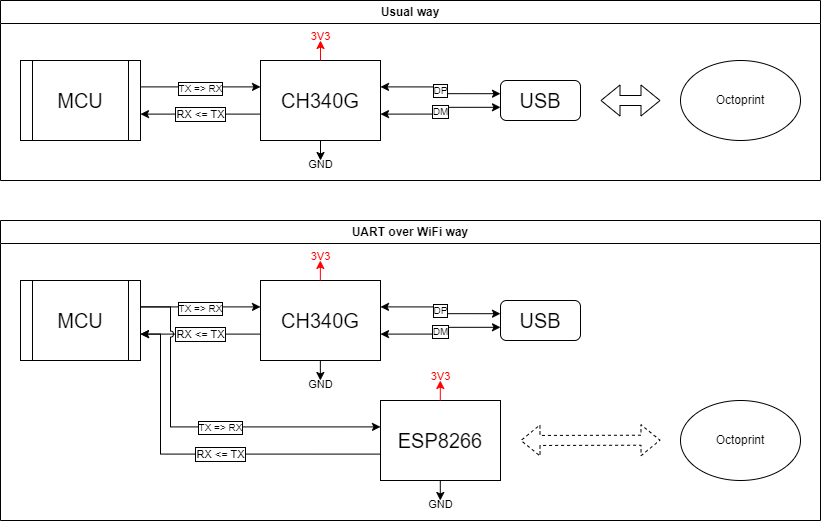
Electrical description
You need to connect your ESP board directly to your 3D printer's motherboard. If you have possibility to connect your printer to the PC it's highly possible that there is some UART-to-USB converter on printer's motherboard. In my case it was CH340G that is widely used in many various devices. Just connect both Rx and Tx, 3V3 and GND to your ESP board and you're ready to go. Take a look at the basic schematic below:
How to connect ESP8266
You can solder cables directly to the pins of the CH340G, or (in nicer way IMHO) to these test-points on the printer's motherboard:
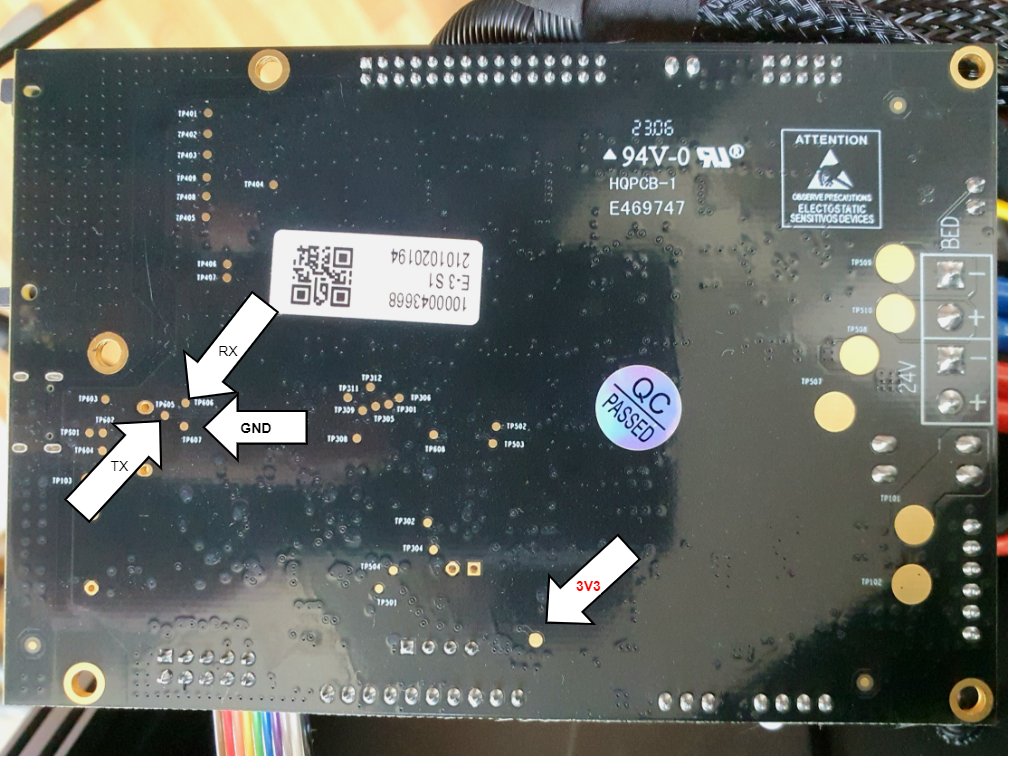
Don't forget to glue the cables with some hot-glue gun - this will avoid cables and test-points to be ripped off!
What you need
- nodeMCU (ESP8266) with EasyESP installed,
- another PC (host) that can handle Octoprint instance, connected to the same LAN network togheter with ESP8266 board,
- docker installed on host PC and, of course octoprint container running,
- some Linux experience.
Installation
Software
on EasyESP side
- Go to Devices > Communication - Serial Server.
- Disable Serial port in Tools > Advanced.
- Set TCP port to 23 (usually telnet) or whatever port you like.
on host side
- Connect to your octoprint container's console.
- Install
socatwithapt install socatcommand.
Usage
- On host, go to the console and execute
sudo socat pty,link=/dev/ESP0,raw tcp:192.168.0.100:23&
which:
| parameter | description |
|---|---|
/dev/ESP0 |
virtual port handle, use whatever you like |
192.168.0.100 |
your EasyESP board IP address |
23 |
virtual port you have set before at EasyESP installation |
The virtual serial port will be created with /dev/ESP0/ handle, that you can use in your Octoprint.
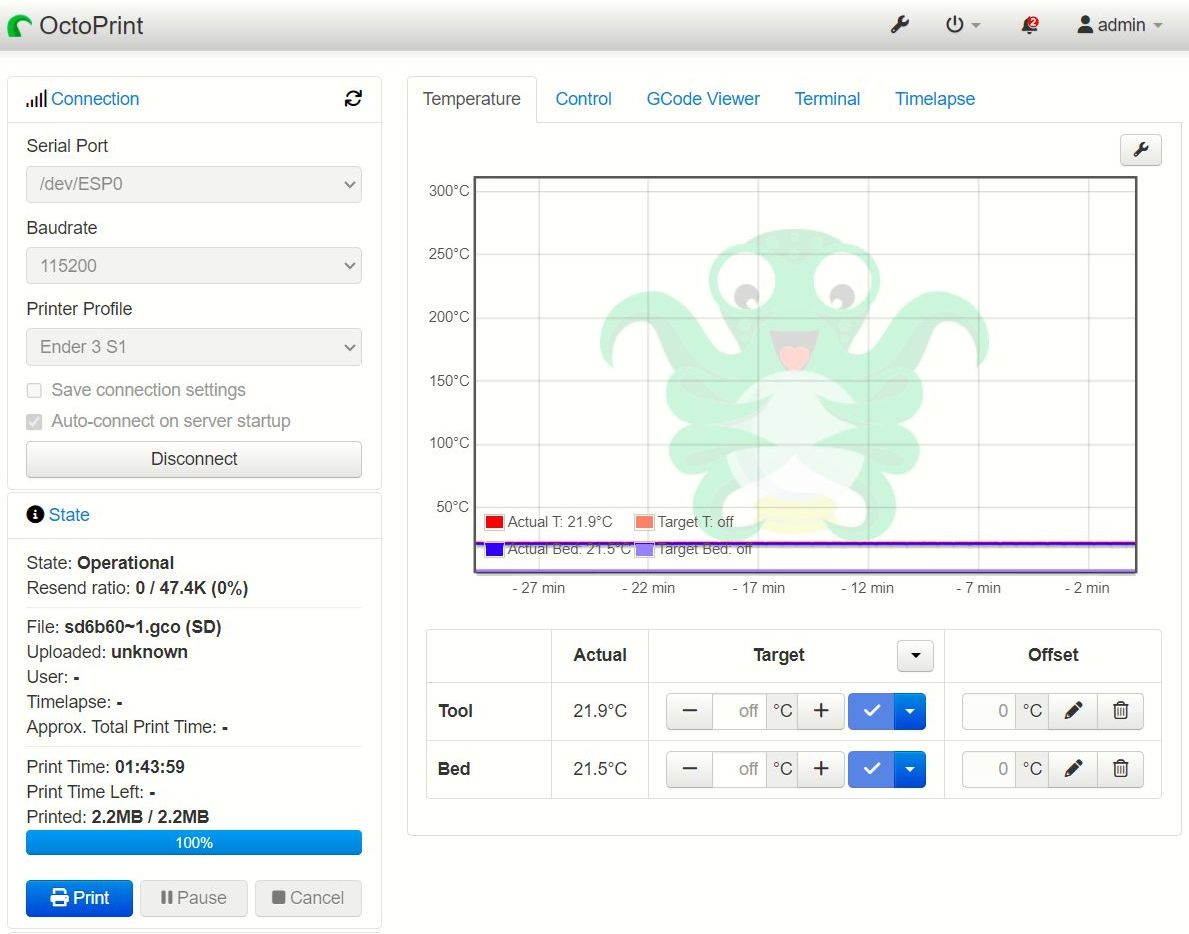
- Open Octoprint, go to Settings > Serial Connection > Connection and add /dev/ESP0 into Additional serial ports window.
- Save and click Connect - it should connect now with your printer!