The 3280x2464 resolution would likely severely impact your IO bandwidth, so I would recommend you don't use it even if you could get it to work.
That field of view stuff seems to be a limitation of the Raspicam, unfortunately. It's got a very nice price, but I find (some) traditional usb webcams to be more flexible and easier to use.
Thanks for the response. I had no idea. I was under the impression the Raspberry Pi cam was the best choice for Octoprint. What camera would give me the best quality?
'Best Quality' is a whole can of worms It's not just about quality, either (though a high percentage). You want a camera with the following features:
Good resolution - too high will lead to issues if you are streaming and printing from a raspberry pi. Obviously something like a 3B+ will do better than a Zero, and Lan works better than wifi, so you have to take your current setup into account. Remember, if you double the resolution (say 1080P to 4K) you actually increase the number of pixels by 4X. For a PI the information from the camera has to move from the camera to the pi, then back out through the wifi or lan. Since the PI shares IO bandwidth for all devices, this can quickly gobble up available IO.
Flexible positioning - Most people will move their cameras around, so it's nice to have a cable that's decently long with good mounting options (standard mounting screw is usually great!)
Built-in compression - You want the camera itself to perform compression, else your pi will have to do it.
Ample Camera Configuration Settings - Some cameras support auto and manual focus (huge if you want a sharp image), zoom/pan/tilt (sometimes software based, sometimes mechanical), auto/manual white balance, etc.. For Octoprint you may sometimes want automatic settings (ease of use) and sometimes manual (full control, e.g. for timelapses)
Image Quality - Beyond pure resolution image quality is a concern. Some cameras work better in lower light conditions. Some have better color accuracy. A lot of this is just 'matter of taste' stuff, some is a function of the camera itself.
You might even consider a camera that can stream natively. Some cameras (foscam) have built in streaming servers, and some include actual pan/tilt/zoom, which would be pretty nice. This could be pretty useful since you won't even need mjpgstreamer at all in this case. However, IOT devices should always be treated as insecure devices, ESPECIALLY cameras. Lots have known vulnerabilities. Another option is to buy a pi that is ONLY for streaming and use it as your streaming camera server. You need to make sure there is a direct URL for streaming and for still frames if you want to be able to both monitor and take snapshots.
A good middle-of-the-road camera is the Logitech C920. I got mine on-sale for 35$, but they usually run 50$ or so (the MSRP is $99, but I've never seen one cost that much). I've seen some stunning image quality from the Brio (super duper expensive, that's why I've only seen it and don't have one). There are lots of other great cameras out there, and I bet there are entire forums available to compare and contrast the different features.
I hope that helps somewhat. No matter what you do, keep your pi cam. It will come in handy even if you get a new webcam. It might be nice to have more than one camera angle, or a low res stream for some situations and a higher res stream for another.
Nice. Thank-you so much for the highly detailed response. The C920 looks fantastic but I am concerned about the auto-focus. Especially with the camera being so close to the bed.
FYI: I subscribed to you on YouTube. The " Octolapse Tutorial - Create and Customize Your Printer Profile" video you created was FANTASTIC!
The C920 allows both auto and manual focus. It can focus quite close up too. I don't recommend using the auto-focus at all for timelapse videos since it's nearly impossible to get a crisp video that way.
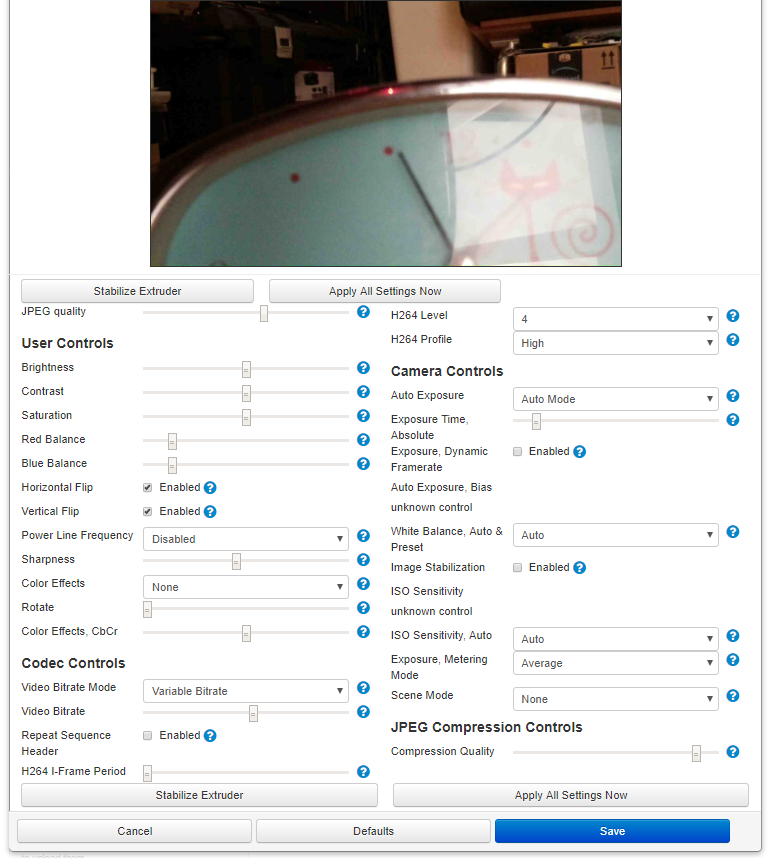
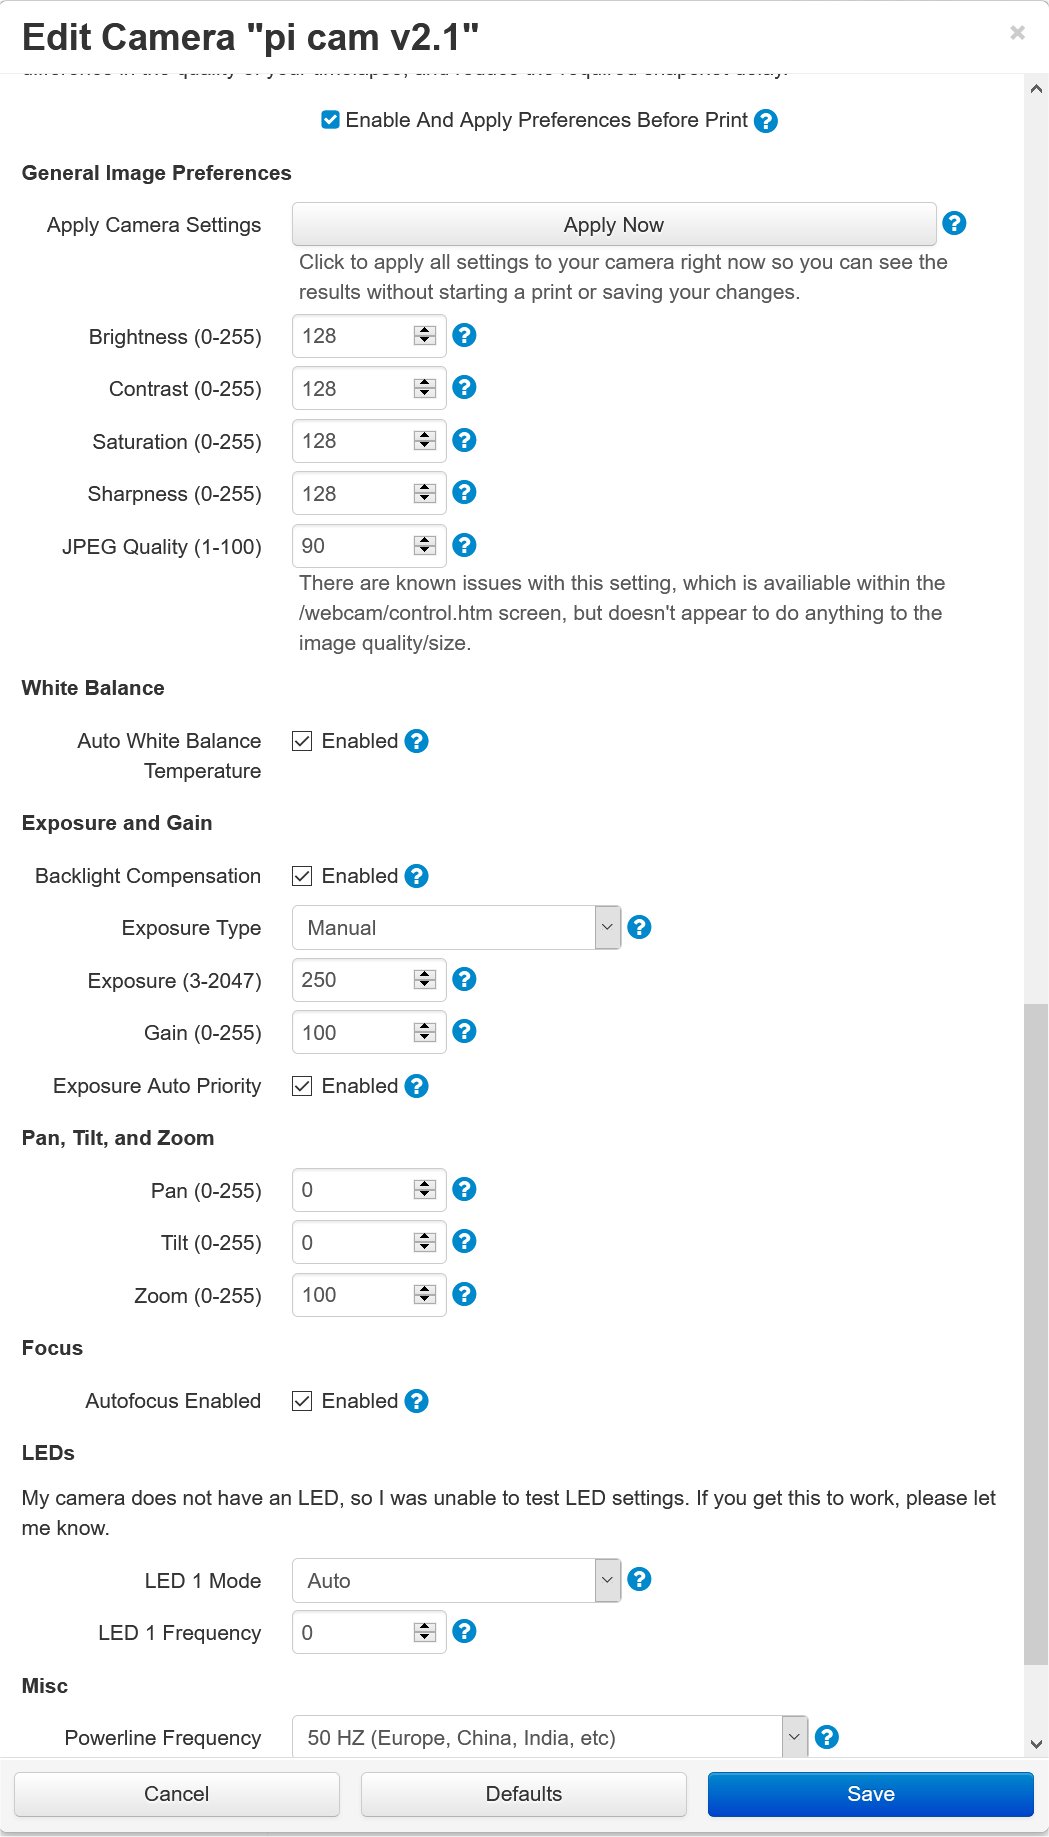
Could be that you have image stabilization enabled. Here are all of the settings that the camera supports (I think), at least when using the official driver:
It looks like a TON of the raspi camera control settings are interconnected, and some need to be applied in the correct order even. I've been pulling my hair out trying to figure out how all of the settings work. I've been using the mjpg-streamer control.htm file using the UVC input module. I'm not sure how control is implemented behind the scenes for this.
Here's what I've discovered so far:
Image stabilization cannot be turned off once it is turned on without rotating or flipping the camera. This could explain at least some fraction of the 'why is my camera zoomed in' issue lots of people seem to be having. I'm fairly certain this is a bug, since disabling and enabling auto focus causes the image to zoom out ever so briefly.
The 'Color Effect' and 'CbCr' setting is interlinked, but only for SOME of the color effects. If one chooses 'Aqua', 'Black and White' or 'Sepia', the CbCr setting will at first be ignored, but any later changes to the value of CbCr WILL affect the Color Effect. For the 'Set CB/CR' option, the CBCR setting of 0 will be used at first after selecting this option(no matter what the CbCr setting actually is), then any subsequent changes to CbCr will change the effect. Geesh!!!
Red and Blue balance will only affect the image if White Balance, Auto & Preset is set to manual. That makes sense.
JPEG Compression and JPEG Quality don't seem to do anything, but Video Bitrate setting definitely has a dramatic effect.
H264 settings don't affect mjpg-streamer, at least as far as I can tell, and that is sort of expected.
Auto Exposure setting only has an affect if Scene is set to none.
Absolute exposure time only has an affect is Scene is none and auto exposure is set to manual.
Exposure dynamic framerate does not seem to do anything. It's possible that my framerate is locked somehow (-f parameter??). Not sure how this works otherwise.
Auto Exposure Bias only has an affect if the Scene setting != none OR auto exposure = Auto. Makes sense.
Iso Sensitivity Auto (drop down box) only has an affect if scene != none or auto exposure = auto.
Iso Sensitivity (slider) only has an affect if Scene setting != none OR auto exposure = Auto AND Iso Sensitivity Auto is set to manual.
Whoa boy, I'm sure there are other rules I don't know. What a crazy can of worms. The official documentation mentions that some of these settings only apply in some cases, but they never go into detail. If anyone is willing to confirm my findings I would be most appreciative.
I have modified octopi.txt so that camera="raspi" and camera_raspi_options="-x 1280 -y 720 -fps 15 -quality 85". I then run "service webcamd restart" followed by "service webcamd status". The status looks like things are set properly, showing resolution of 1280 x 720.
However, OctoPrint still shows the zoomed in video feed.
This was working perfectly before I did the last updates.
Raspi cam has different cominations for modes, Field of views, aspect ratios and binning. Take a look at the pictures... this might clear up the situation
At the end was able to restore a older version and reset to system.
One hint for setup/activation of the infrared leds you have add a line to the /boot/conifg.txt with disable_camera_led=1.
hi guys, sorry to jump on an old thread but i thought it was wise and of the same kinda problem
anyways
i have just today had delivered a pi4b
the 3a psu
raspi v2.1 camera
i think i got it all setup ok, i can view the camera in the control tab
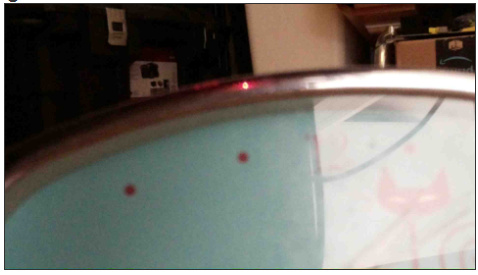
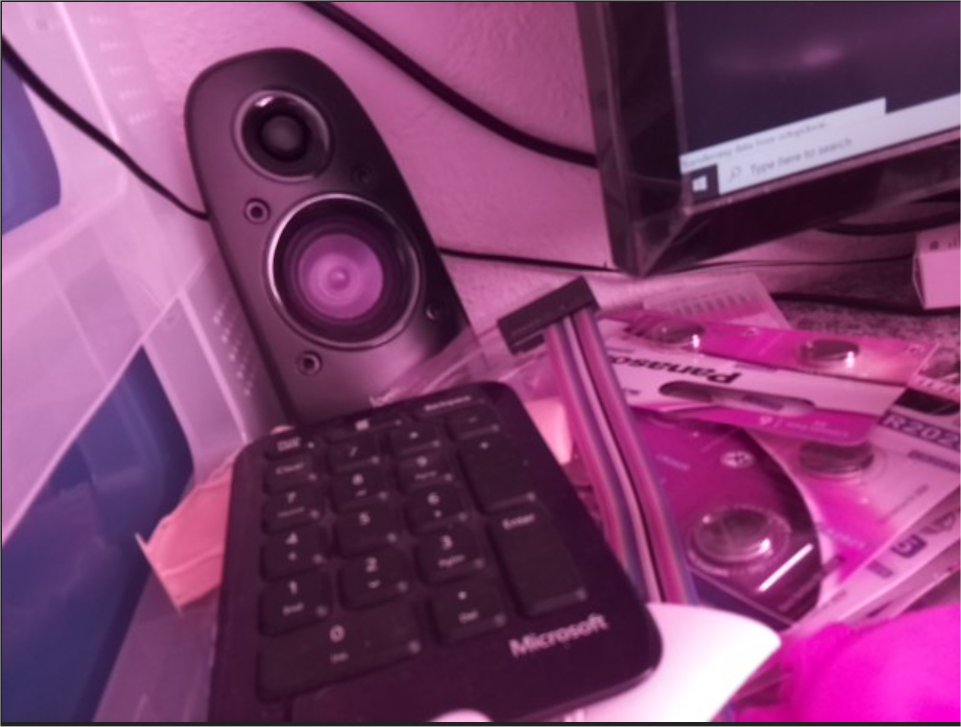
but my picture has a red haze covering it, ive re-seated cables etc
tried altering settings etc etc, but this red haze will not shift
is the camera and or ribbon faulty !!??
ps b4 you ask i did take the lense protector off heheh
If you look inside the box of the typical Raspberry Pi NoIR V2 camera and inspect the board itself you'll see:
The top of the camera's opening has a thin filter applied with a green tab (you should leave this on)
The box should include a square blue filter
The "NoIR" means that the camera does not block infrared, meaning that it's good for infrared (night) photography. But out-of-the-box, the image appears red-shifted. Add the blue filter to your setup and it will be shifted back where it should be blue-filtered, meaning it's better for infrared photography.
 It's not just about quality, either (though a high percentage). You want a camera with the following features: