According to official documentation the correct parameters, if octoprint uses raspistill/raspivid (likely) are -h and -w
more here https://www.raspberrypi.org/documentation/raspbian/applications/camera.md
According to official documentation the correct parameters, if octoprint uses raspistill/raspivid (likely) are -h and -w
more here https://www.raspberrypi.org/documentation/raspbian/applications/camera.md
Did you ever find a solution to the fov issue when using the raspicam and 1080p? i have exactly the same issue.
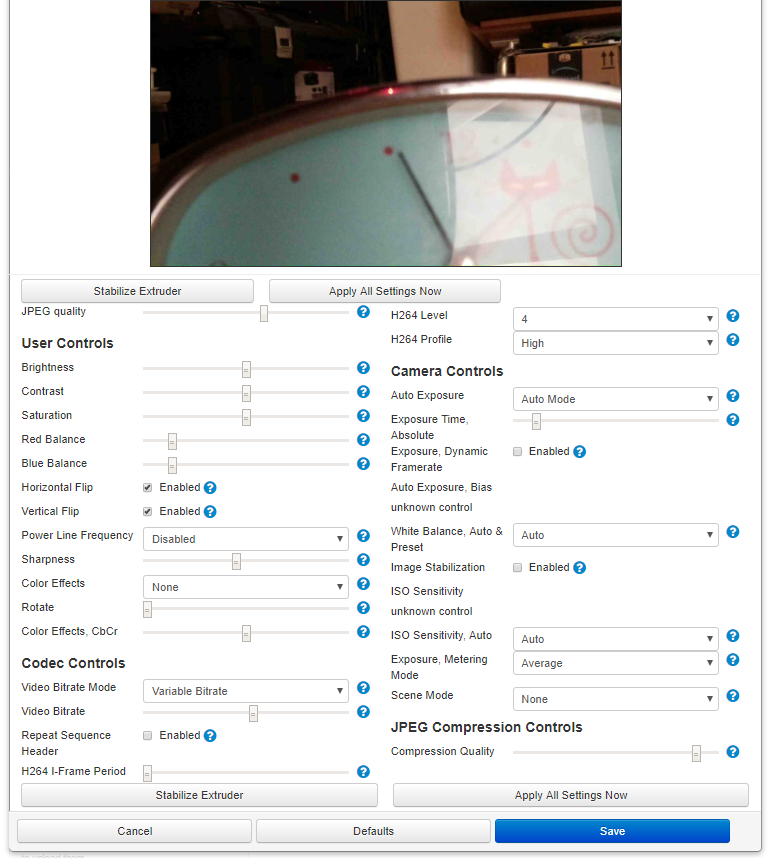
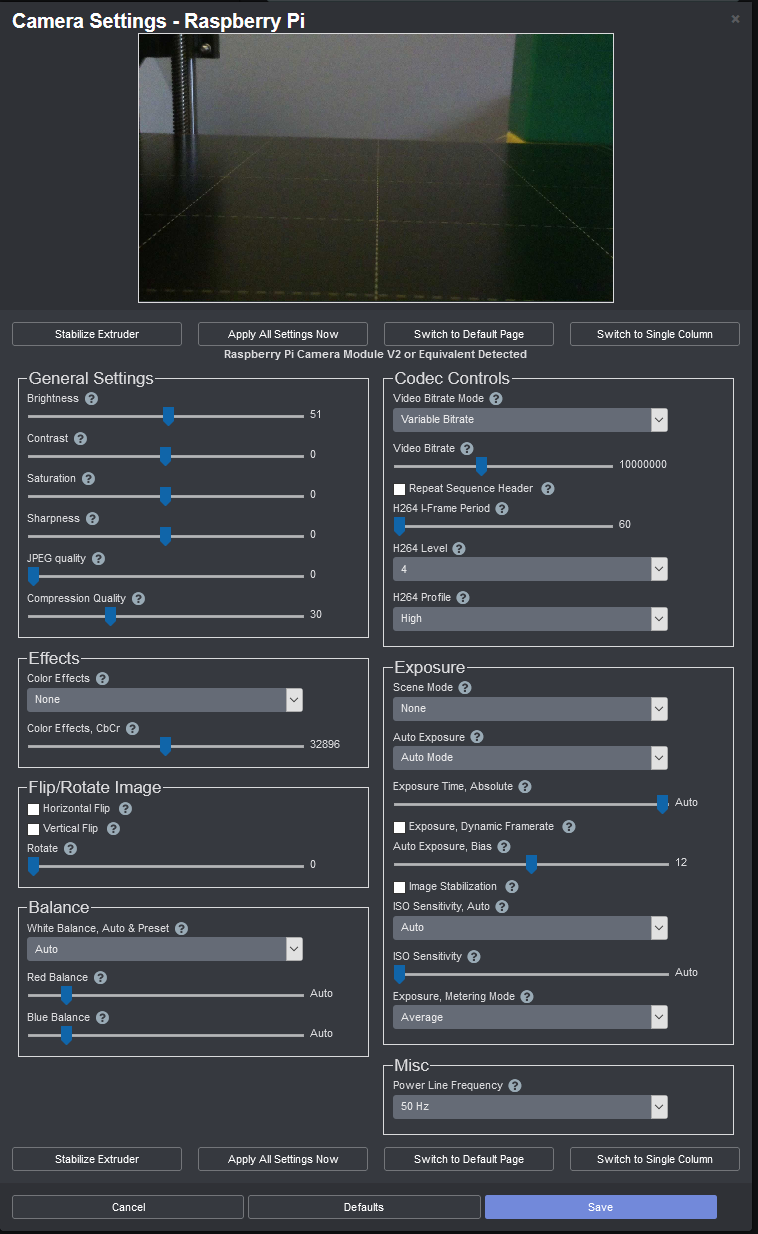
Could be that you have image stabilization enabled. Here are all of the settings that the camera supports (I think), at least when using the official driver:
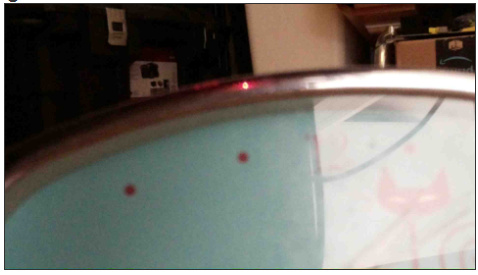
When I enable image stabilization, it definitely zooms in. Here is an image of the stream with stabilization enabled (it's clearly zoomed in):
It looks like a TON of the raspi camera control settings are interconnected, and some need to be applied in the correct order even. I've been pulling my hair out trying to figure out how all of the settings work. I've been using the mjpg-streamer control.htm file using the UVC input module. I'm not sure how control is implemented behind the scenes for this.
Here's what I've discovered so far:
Whoa boy, I'm sure there are other rules I don't know. What a crazy can of worms. The official documentation mentions that some of these settings only apply in some cases, but they never go into detail. If anyone is willing to confirm my findings I would be most appreciative.
Edits: Fix typos
I have modified octopi.txt so that camera="raspi" and camera_raspi_options="-x 1280 -y 720 -fps 15 -quality 85". I then run "service webcamd restart" followed by "service webcamd status". The status looks like things are set properly, showing resolution of 1280 x 720.
However, OctoPrint still shows the zoomed in video feed.
This was working perfectly before I did the last updates.
Thanks.
Anyone figure this out? Tried my first timelapse last night the the top 3" are cut off cause it's zoomed in to far.
i found an explanation here:
https://picamera.readthedocs.io/en/release-1.13/fov.html#sensor-modes
Raspi cam has different cominations for modes, Field of views, aspect ratios and binning. Take a look at the pictures... this might clear up the situation
thanks for the good link.
At the end was able to restore a older version and reset to system.
One hint for setup/activation of the infrared leds you have add a line to the /boot/conifg.txt with disable_camera_led=1.
According to the link posted by Speedi, this setting gave full FoV and best quality that a raspi v1 could get
camera_raspi_options="--width 1296 --height 730 -fps 30 -quality 100 -ex auto -awb auto"
hi guys, sorry to jump on an old thread but i thought it was wise and of the same kinda problem
anyways
i have just today had delivered a pi4b
the 3a psu
raspi v2.1 camera
i think i got it all setup ok, i can view the camera in the control tab
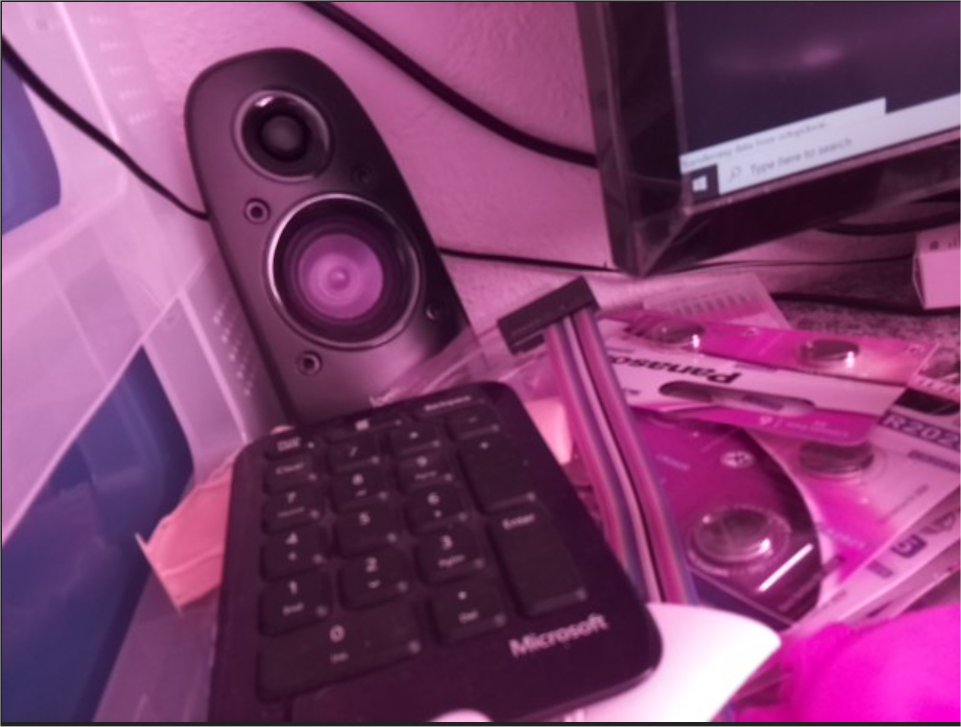
but my picture has a red haze covering it, ive re-seated cables etc
tried altering settings etc etc, but this red haze will not shift
is the camera and or ribbon faulty !!??
ps b4 you ask i did take the lense protector off heheh
any help here id be greatly appreciative
thanks
dave
If you look inside the box of the typical Raspberry Pi NoIR V2 camera and inspect the board itself you'll see:
The "NoIR" means that the camera does not block infrared, meaning that it's good for infrared (night) photography. But out-of-the-box, the image appears red-shifted. Add the blue filter to your setup and it will be shifted back where it should be blue-filtered, meaning it's better for infrared photography.
Dave,
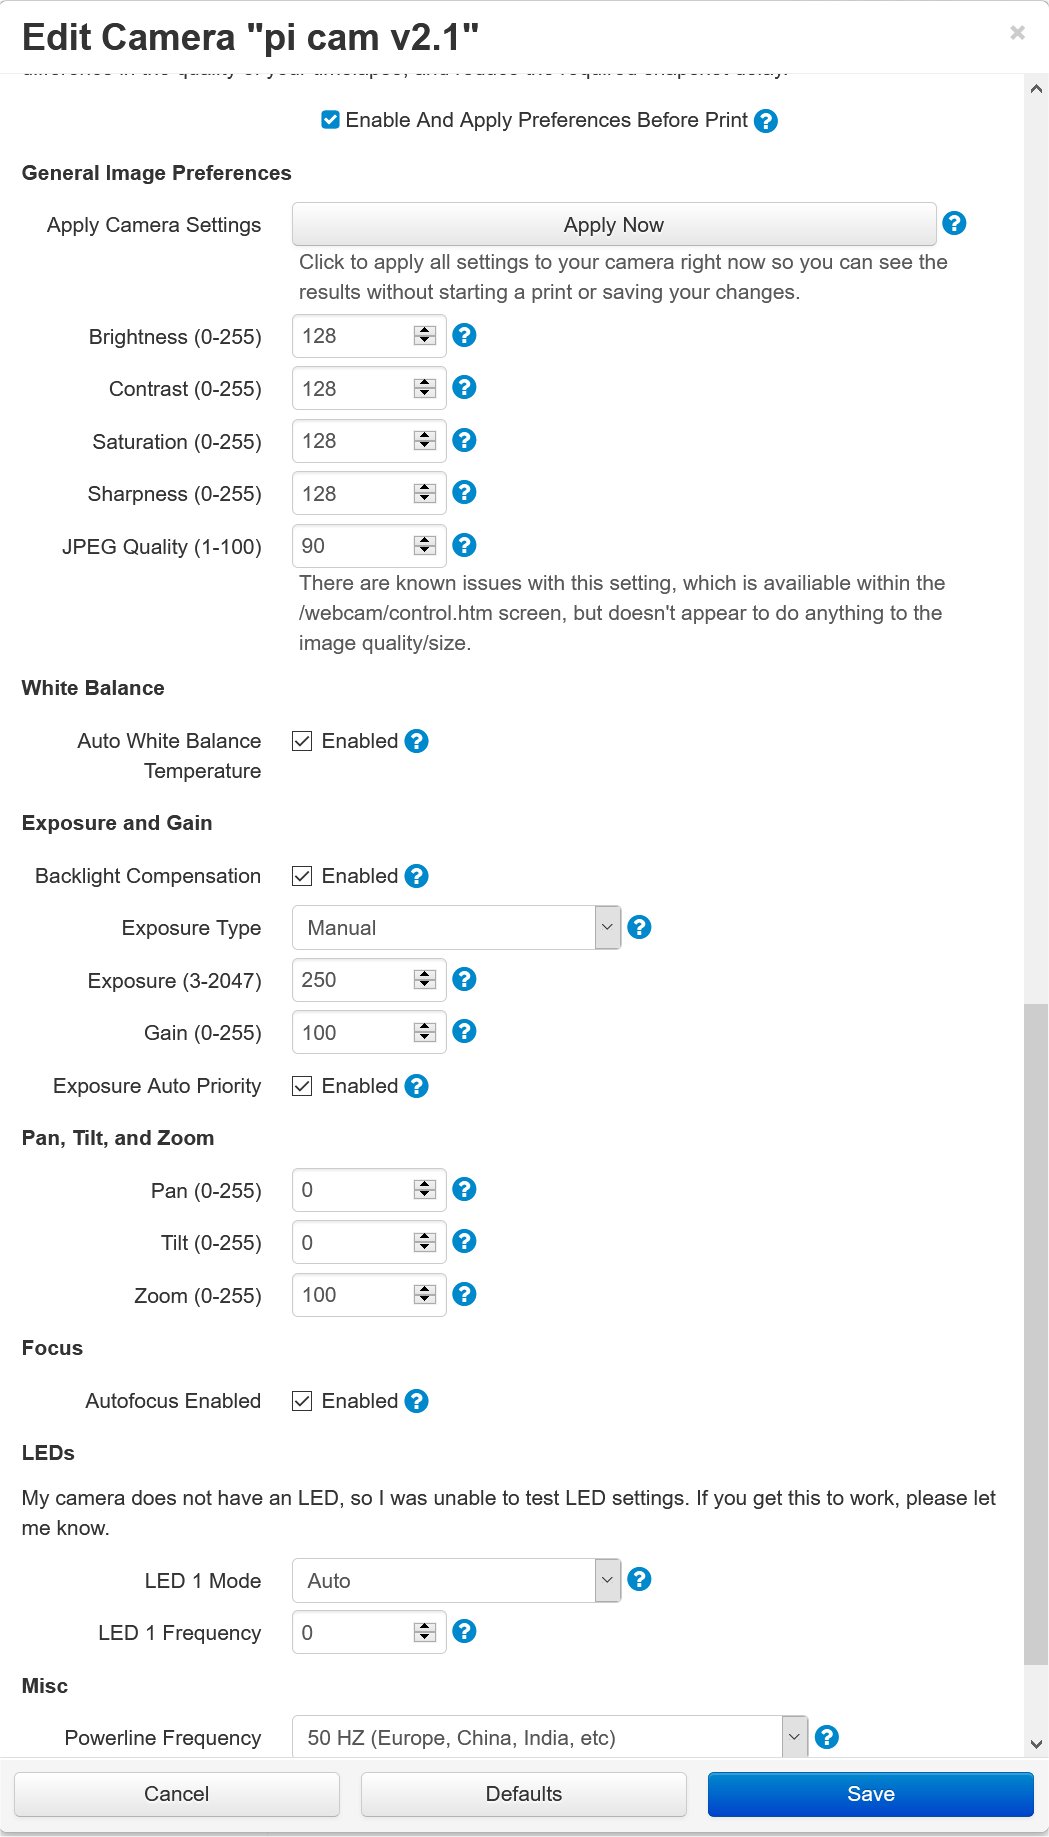
This is the red/blue balance. Octolapse V0.4.0rc1 supports controlling the picam image. Here is the new settings screen for the picam:
oh damn i thought this was the lense protector, damn n i cant find it now arggggghhh lol
ill try putting the blue filter over it
thanks
dave
My gut tells me that the original applied filter was green, for what it's worth.
ahh cool, i think i updated all stuff as of today, will i have this new version ? or do i have to do something special to install it ?
im not a big buff on linux just know what ive been told etc etc
thanks
dave
Note that @OutsourcedGuru may well be correct, so check that too.
To install the new version, follow these steps AFTER reading this guide:
Make sure you also follow the steps for enabling the raspberry pi camera after you install and reboot. It takes a bit of effort, but I have outlined all the steps in the guide. Definitely also look into enabling automatic slicer settings, it is well worth the effort and may work out-of-the-box depending on your slicer (see special setup for Cura and PrusaSlicer/Slic3r variants).
Of course I'm correct. ha
But he threw away his primary filter so he's going to need your plugin for this.
hahahah
scouring my desktop as we speak
i recall pulling it off, but where did i put it argghhh
on a side note @FormerLurker
i followed that guide on my previous install, do i need to red it ?
as the camera is showing up now 
dave
You only need to follow the guide once