Has anyone come across there problem described below and can offer an explanation for it.
My 3D printer is an Ender 3, I use FreeCAD 0.20 for design and Cura 5.3.0 as my Slicer programme to go from .stl to .gcode files. I control my printer via Octoprint running on a Raspberry Pi 2 so that I can upload and monitor the progress of my prints remotely on my MacBook Pro laptop. I recently designed and printed a replacement knob for an old radio which is essentially a truncated conical section with “gripper” bars at approximately 45 degree intervals around the outer conical surface of the knob and with a diameter between 20 and 30 mm. The initial attempts at this knob all showed a problem with the outer surface between the gripper bars, which are about 2mm high and 2mm wide, having a surface like coarse sandpaper. My first instinct was to try a different extrusion temperature (220 deg instead of 200 deg) and a different filament supplier but to no avail. Having run out of ideas and as a last resort I uploaded the .gcode file directly on to the SD card in the printer, effectively bypassing all the Octoprint involvement. This solved my problem with the surface now prints as smooth as expected!!! Any thoughts as to why would be gratefully received.
Could you please upload a picture of the print with the issue.
I think I know what the problem is, but I just want to be sure
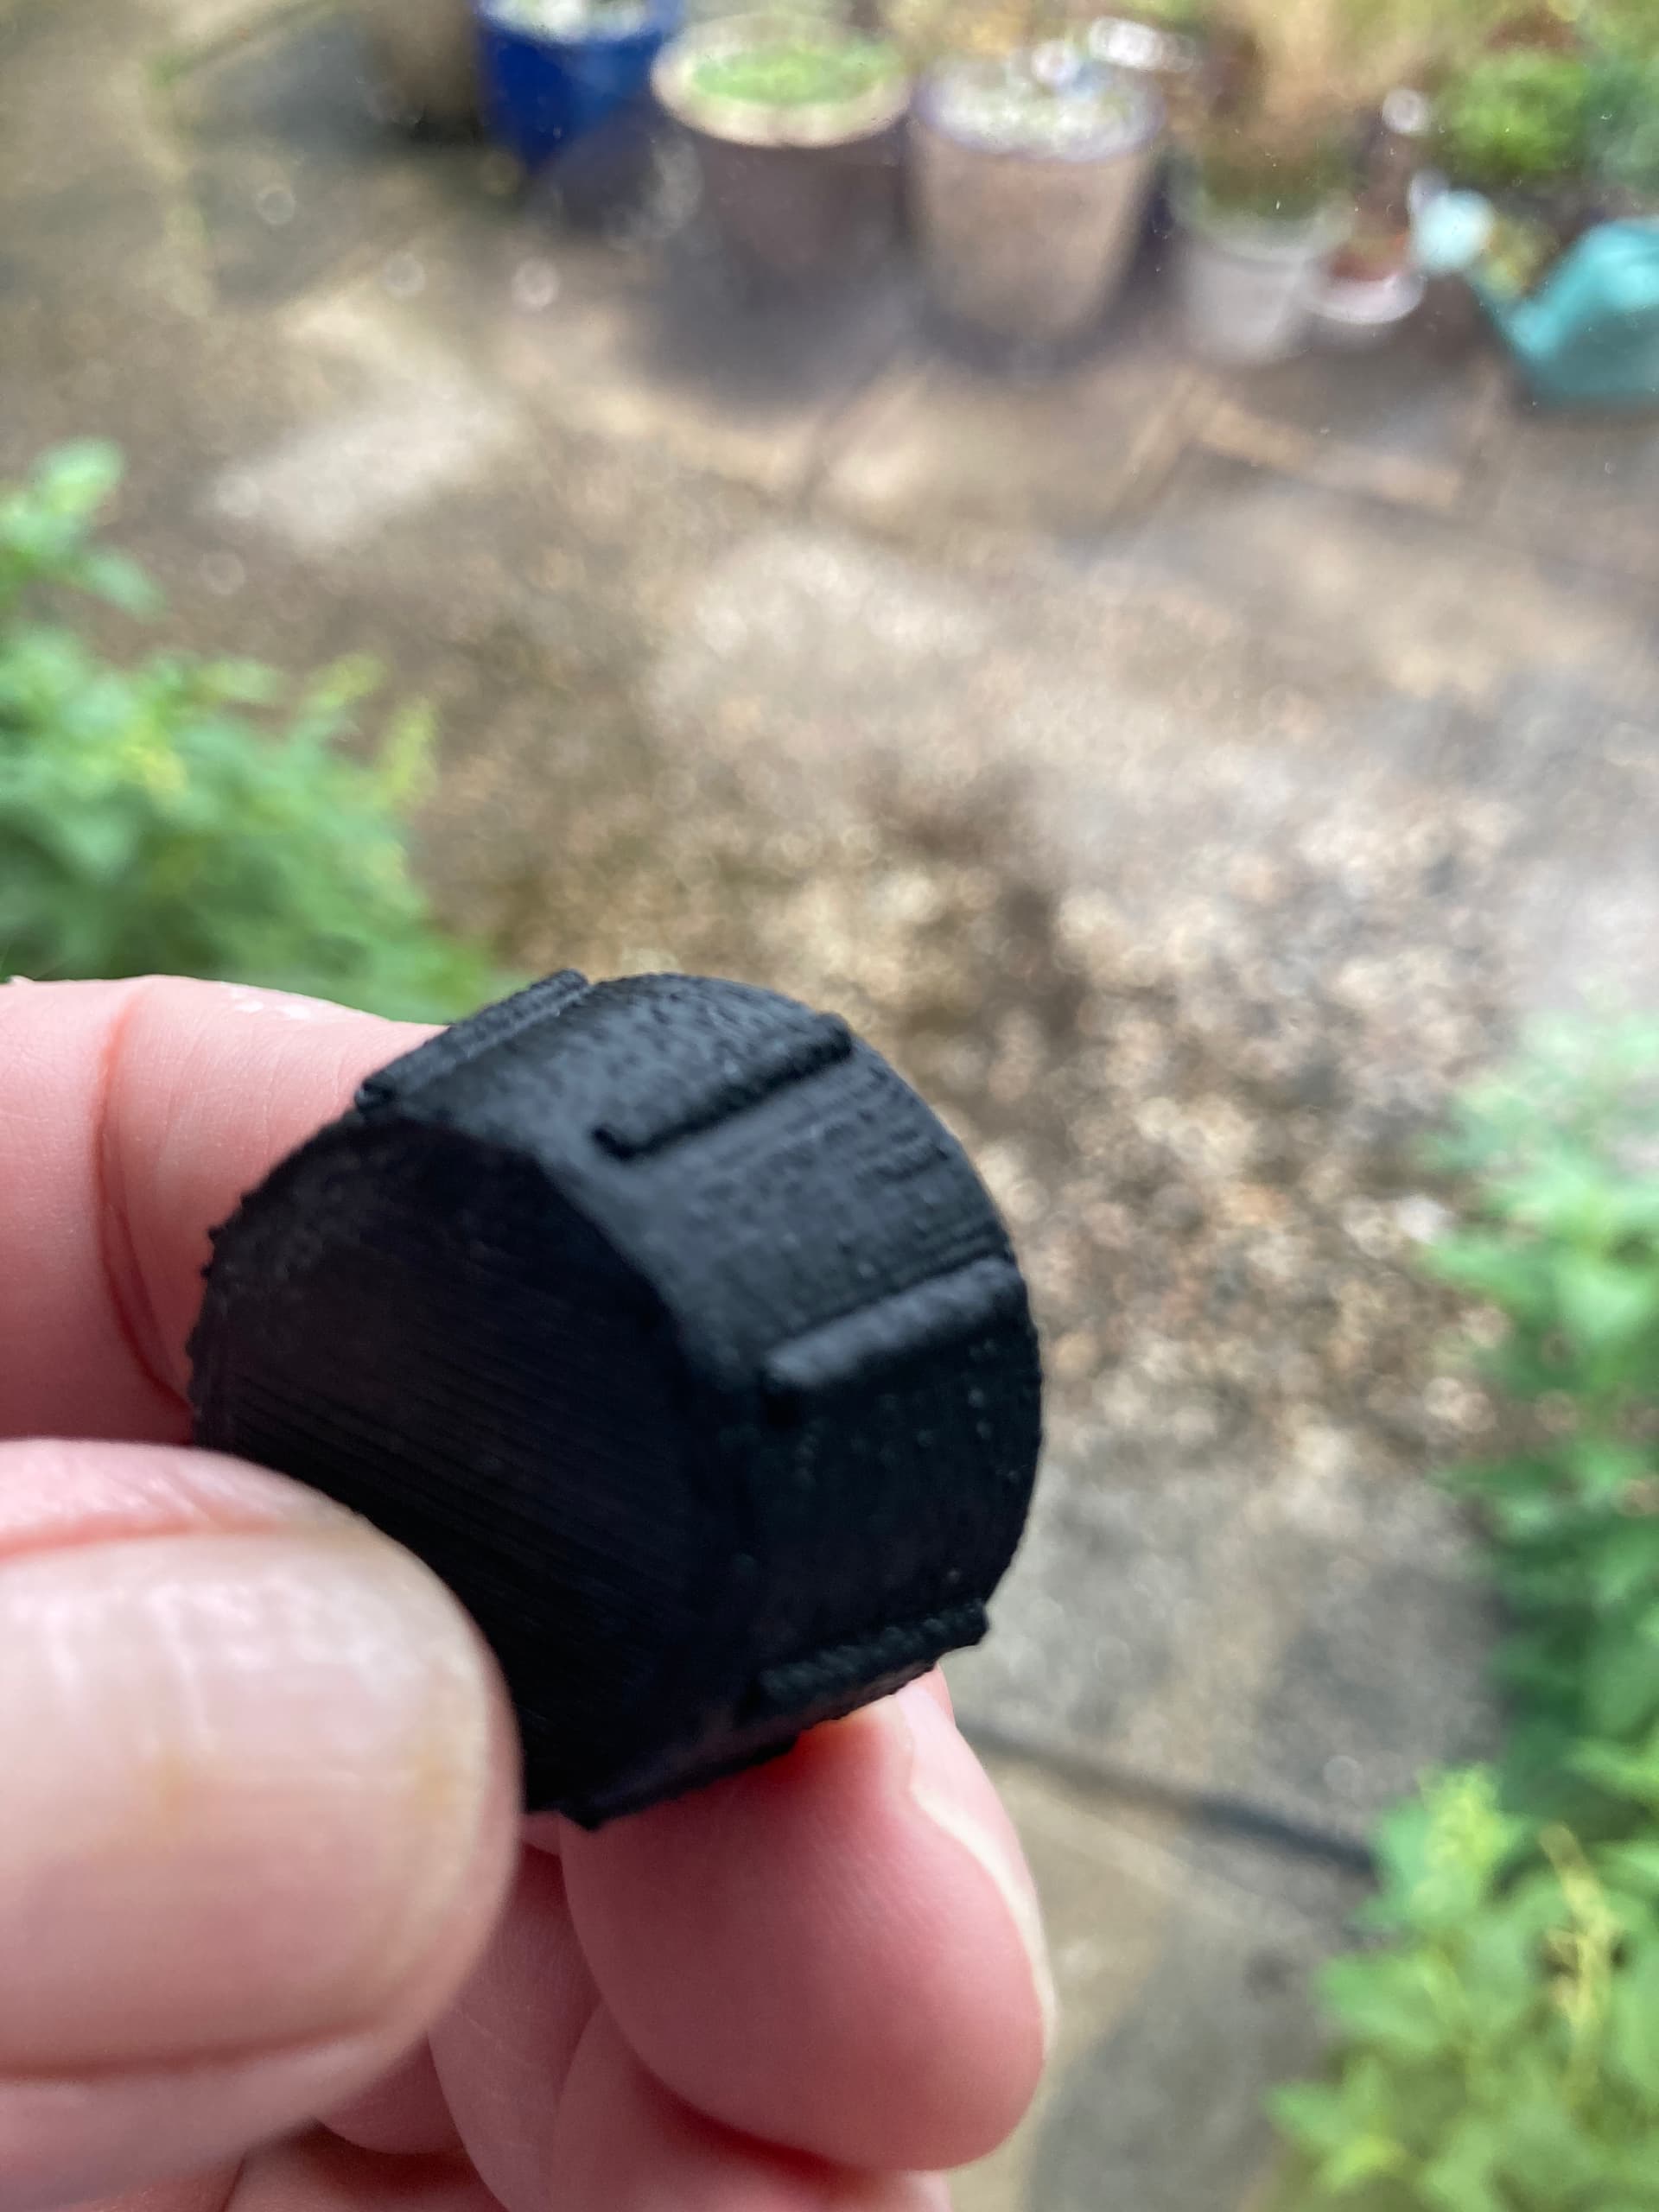
Hi, was the picture any help ?
I don't have any solution.
I believe this is caused by a lot of very short gcode commands. The commands are executed by the firmware faster than the serial port can deliver them causing pauses which lead to zits and blobs on the print.
One possible solution requires that the printer firmware supports G2-G3 commands. The plugin Arc-Welder will pre-process the gcode converting multiple G0-G1 commands into fewer G2-G3 commands which will let the serial port keep up with the firmware.
Another possible solution is to reduce the print speed in the slicer so that each command takes longer to process allowing the serial port to keep up.
The third solution is the one you already used, move the gcode file to the SD card on the printer. This eliminates the serial port completely.
Thank you all for your responses, particularly the comprehensive thoughts from b-morgan. Your explanation makes a lot of sense to me and at some time in the future will explore your first two solutions but as the solution I stumbled on empirically works, and being of the old "if it ain't broke, don't fix it" school I think I shall stick with the SD card solution. Thank you again for your thoughts and I shall make sure I disseminate this information to my friends who are new 3D printers like me !!!
This topic was automatically closed 90 days after the last reply. New replies are no longer allowed.