Setting up OctoPrint on TrueNAS 12 server inside iocage Jails

Setting up OctoPrint on FreeNAS 12 server inside iocage Jails

I have a FreeNAS server setup which I use to run a lot of services and use it to run my OctoPrint instances to save resources instead of using multiple small single-board computers that are so expensive these days since i already have the server running anyway.

UPDATED 17/02/2023.

Since I didn’t find any documentation regarding setting up and running OctoPrint on FreeBSD (much less FreeNAS), I thought it was a good idea to post a guide describing how I did it and save some time for anyone else trying to accomplish the same. I plan to update and correct this guide from time to time, i’m open to suggestions as this is my first guide.

I won’t cover how to install FreeNAS or setup iocage as it is already well covered in the FreeNAS User Guide.

Creating a Jail for OctoPrint

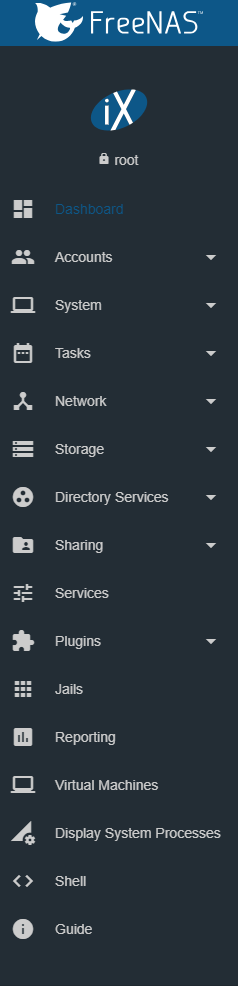
Open your FreeNAS server dashboard on your browser, select Jails in the left-side drop-down list:

The Jails menu will open, now select add in order to create a new Jail:

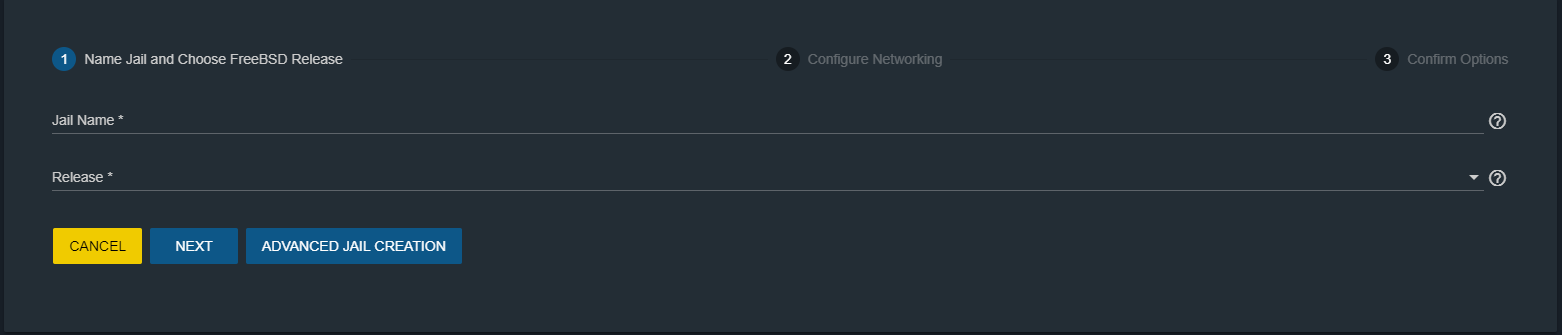
Select advanced Jail Creation :

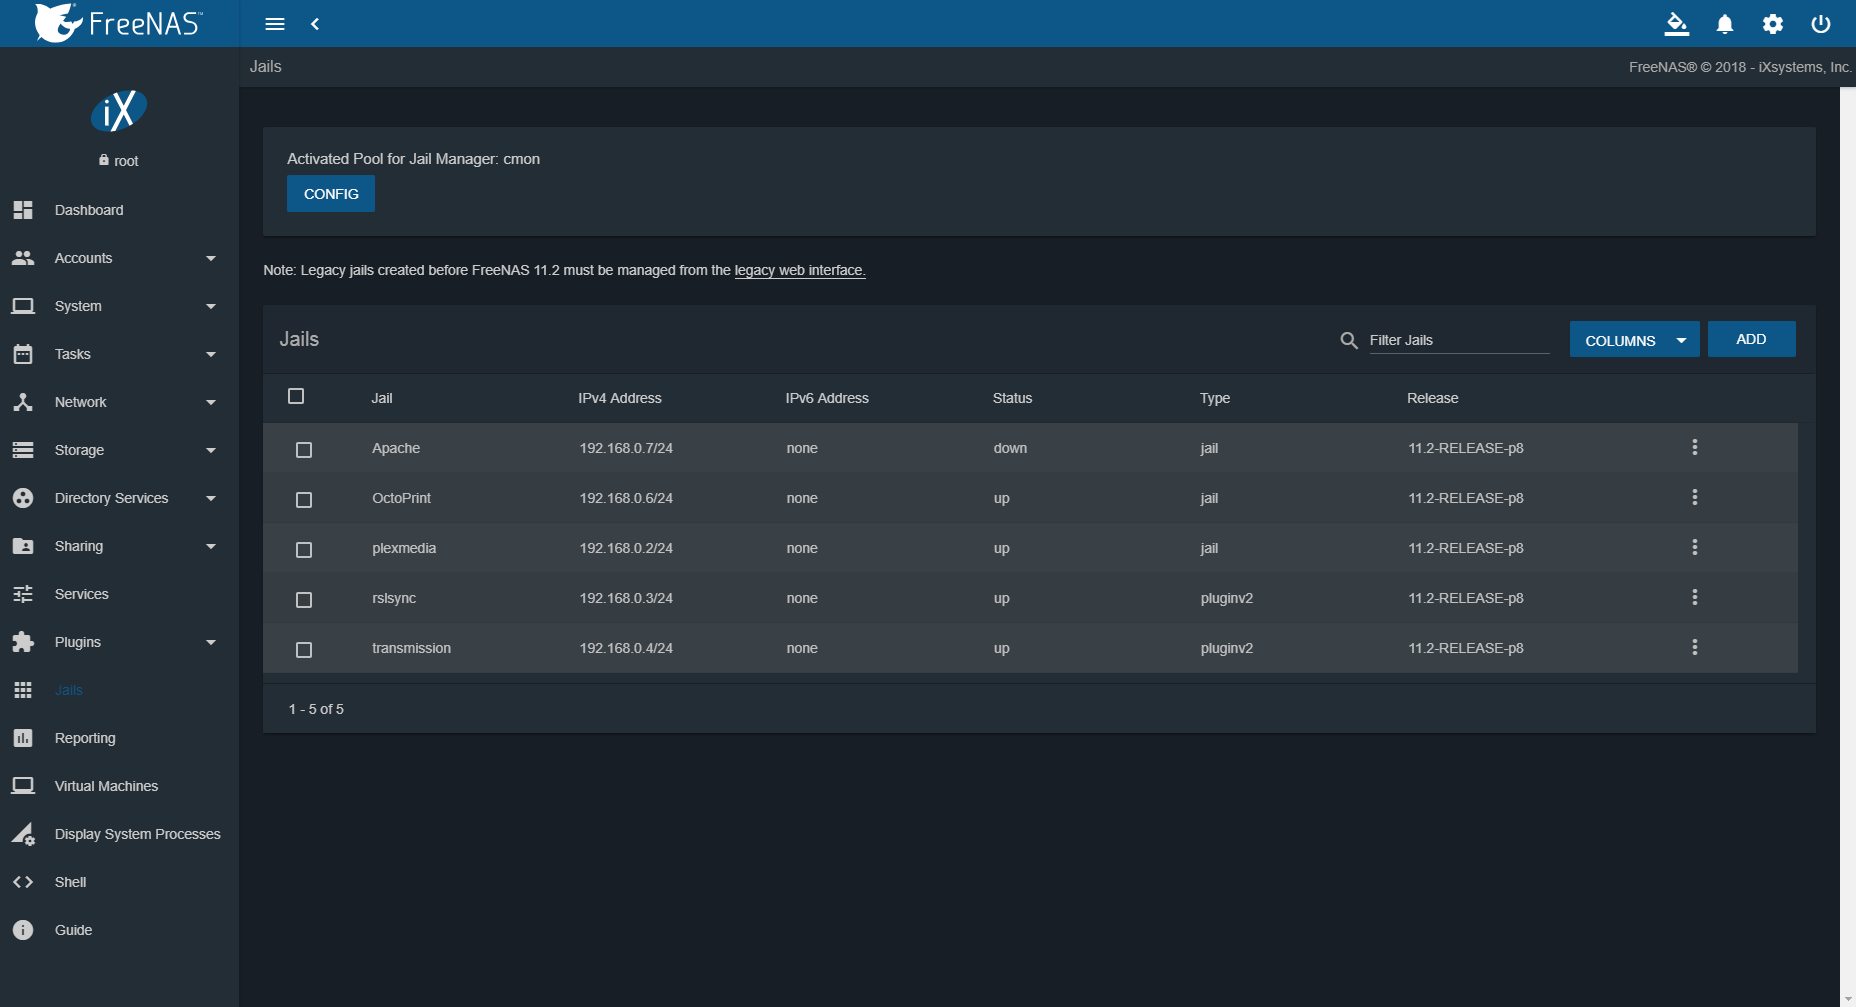
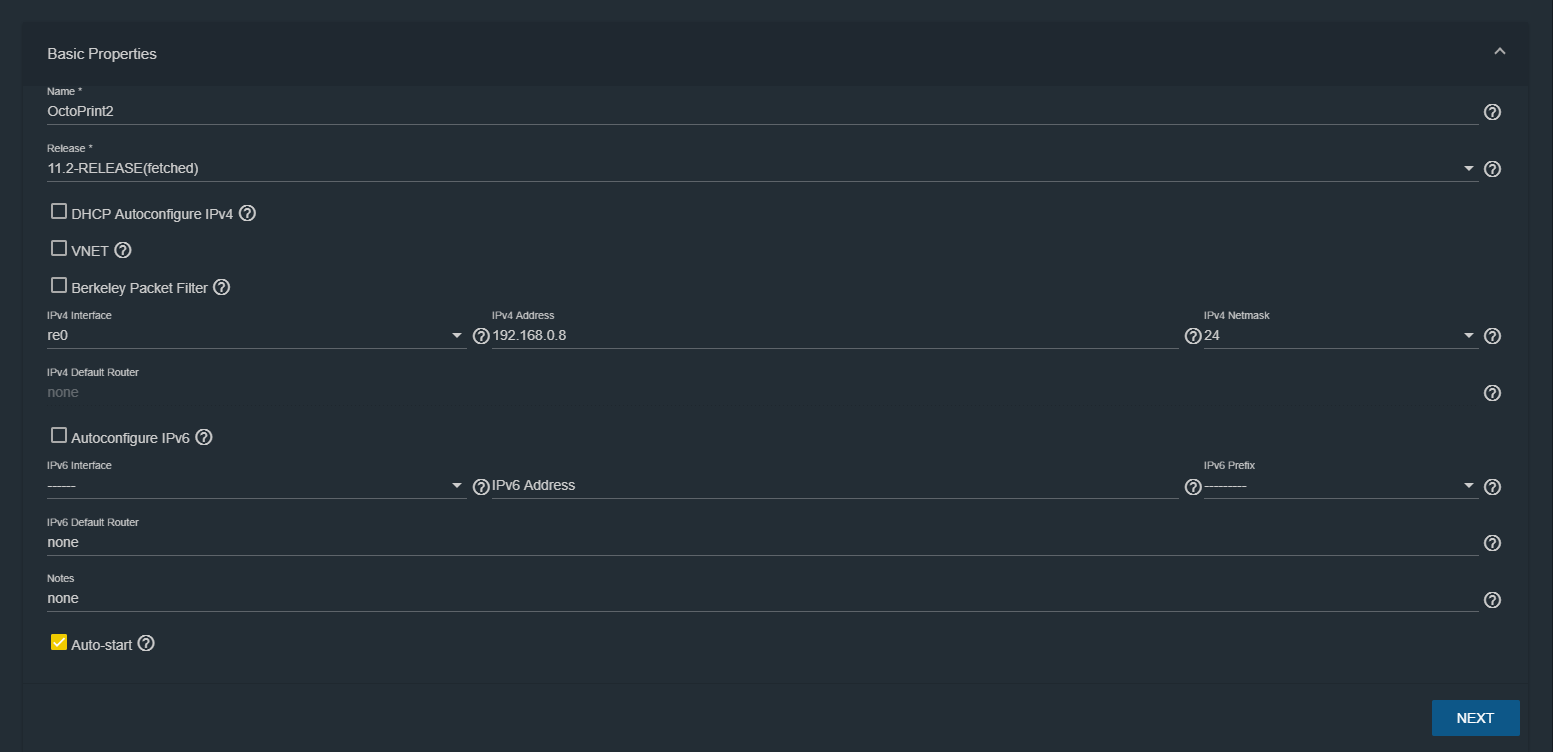
Give the Jail a recognizable name, select 12.3 (or the newest possible version) for Release, select your NIC in IPv4 Interface, give it an IP address(we’ll use it to access the OctoPrint interface later) and an according Netmask. Mark Auto-start then click NEXT:

Now in Jail properties, change devfs_ruleset to 3, this will allow the Jail to access the /dev folder and consequently talk to USB devices, that wouldn’t be possible if you left it as default (ruleset 4), and the Jail wouldn’t be able to talk to your 3D Printer.

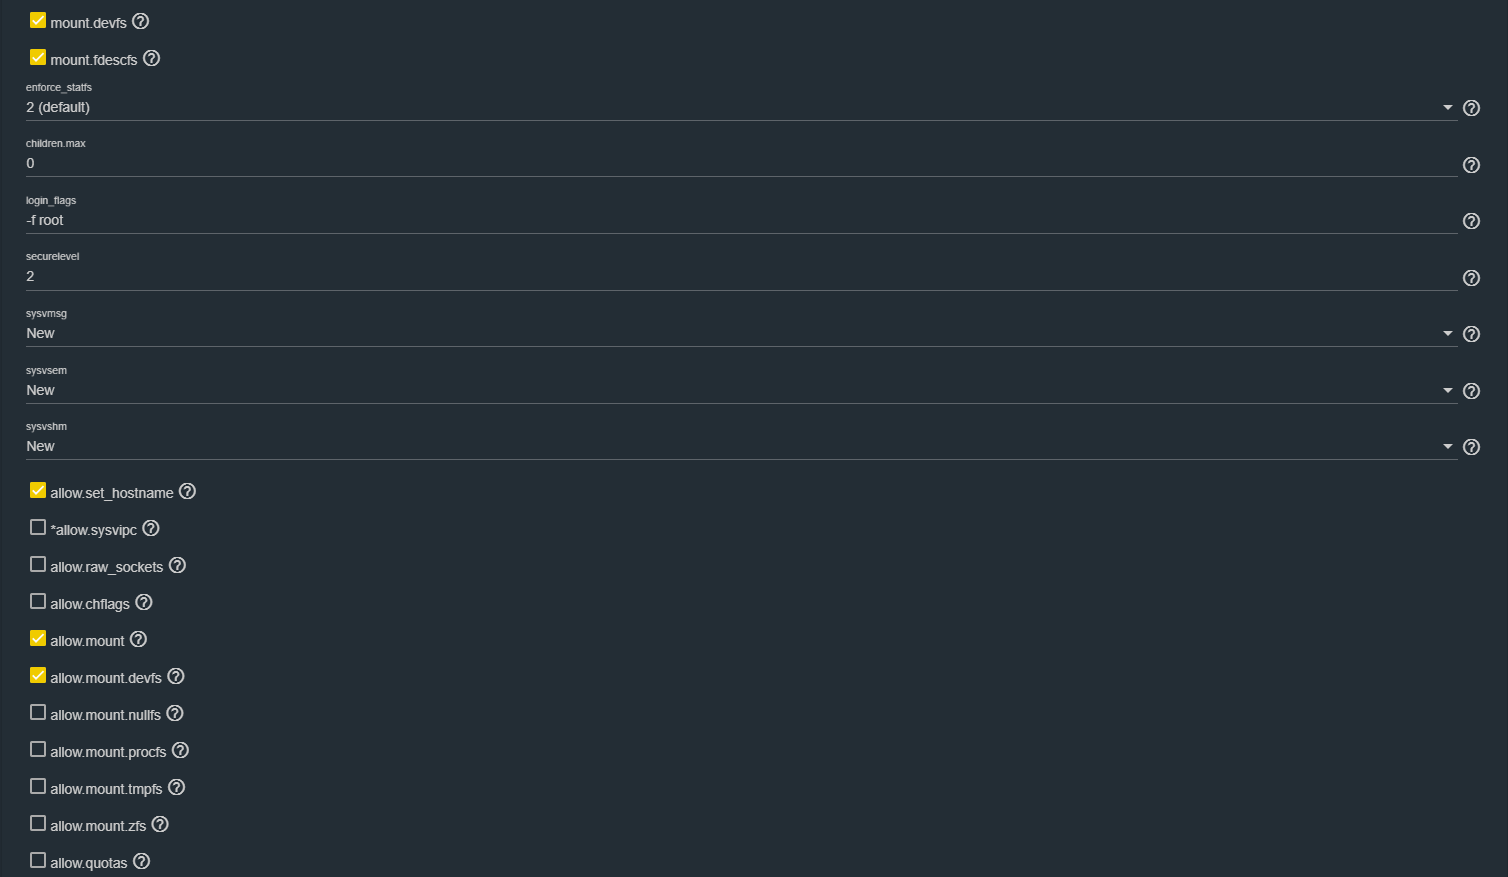
Mark mount.devfs, allow.mount and allow.mount.devfs

You don’t need to mess with anything else here, press SAVE, we’re done setting up the Jail.

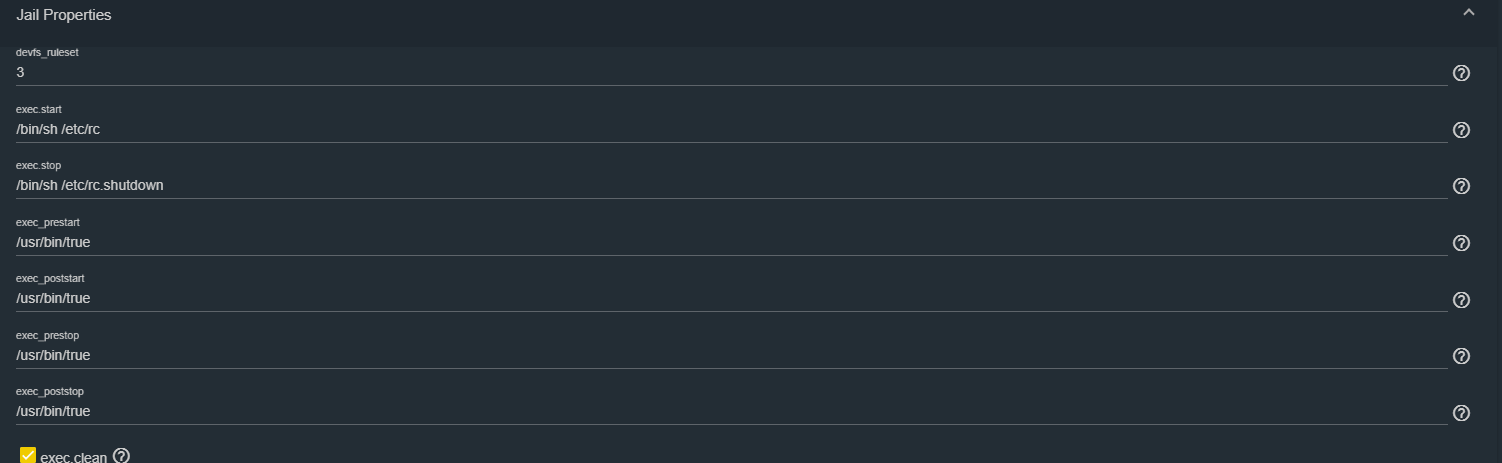
Installing necessary packages

You need to install python, pip and other packages for OctoPrint to run on the Jail, for that we need to start a shell inside the Jail. There’s 2 ways you can go about it:

You can just click the 3 dots and start a Shell from the WebUI:

Or you can SSH into your FreeNAS server (you have to enable and setup SSH beforehand for that) and only then start a Shell inside the Jail using the commands:

iocage list

will list active Jails, useful for seing the Jail ID and name

 root@freenas[~]# iocage list
 
 +-----+------------+-------+--------------+----------------+
 
 | JID | NAME | STATE | RELEASE | IP4 |
 
 +=====+============+=======+==============+================+
 
 | 8 | Octo1 | up | 12.3-RELEASE | 192.168.0.6/24 |
 
 +-----+------------+-------+--------------+----------------+
 
 | 2 | Octo2 | up | 12.3-RELEASE | 192.168.0.8 |
 
 +-----+------------+-------+--------------+----------------+
 
 | 9 | Octo3 | up | 12.3-RELEASE | 192.168.0.9 |
 
 +-----+------------+-------+--------------+----------------+
 
 | 3 | Reslilio | up | 12.3-RELEASE | 192.168.0.3 |
 
 +-----+------------+-------+--------------+----------------+
 
 | 4 | Trans | up | 12.3-RELEASE | 192.168.0.4 |
 
 +-----+------------+-------+--------------+----------------+
 
 | 5 | mineserver | up | 12.3-RELEASE | 192.168.0.12 |
 
 +-----+------------+-------+--------------+----------------+
 
 root@freenas[~]# iocage console Octo2

iocage is the default Jail manager used in FreeNAS 13, use this command with the respective name of your Jail.

root@freenas[~]# iocage console NameOfYourJail

...

root@OctoPrint2:~ #

Now that you have a shell as root inside the Jail, let’s install pkg, python, pip and everything else

root@OctoPrint2:~ #pkg install pkg nano python python3 git bash

now we can create a folder and download OctoPrint:

root@OctoPrint2:~ # python3 -m venv OctoPrint
root@OctoPrint2:~ # OctoPrint/bin/pip install OctoPrint
root@OctoPrint2:~Print # OctoPrint/bin/python3 -m pip install --upgrade pip

You should then be able to manually start the OctoPrint server, if you want to, if you followed all the steps correctly until now, you won’t need to:

[venv] root@OctoPrint2:~/OctoPrint # ./OctoPrint/bin/octoprint serve --iknowwhatimdoing

OctoPrint should start without issues, press Ctrl + c to close it.

USB Connectivity

Connect your 3D Printer to an USB port on your FreeNAS server and run usbconfig inside the Jail and note wich serial device is your 3D Printer:

[venv] root@OctoPrint2:~/OctoPrint # usbconfig 
ugen4.2: <FTDI FT232R USB UART> at usbus4, cfg=0 md=HOST spd=FULL (12Mbps) pwr=ON (90mA)
 
 ugen2.2: <Generic Mass Storage> at usbus2, cfg=0 md=HOST spd=HIGH (480Mbps) pwr=ON (200mA)

Here we can see that my 3D Printer is connected to usbus4 and is listed as ugen4.2 in FreeNAS.

Creating a Start script for OctoPrint in the Jail

Thanks to user James_Burnett for this rc.d init script, i take no credit for this script, i’m adding it as part of this guide to increase functionality for the users, i take no credit for this script.

Let’s create the script using nano:

[venv] root@OctoPrint2:~ # nano /etc/rc.d/octoprint

copy and paste this in the file and press Ctrl + o to save it:

#!bin/sh

# PROVIDE: octoprint
# REQUIRE: DEAMON NETWORKING

. /etc/rc.subr

base_path="/root/OctoPrint"

name="octoprint"
rcvar="octoprint_enable"
pidfile="${base_path}/octoprint.pid"

command="/usr/sbin/daemon"
command_args="-p ${pidfile} -f -c ${base_path}/bin/octoprint serve --iknowwhatimdoing"

procname="${base_path}/bin/octoprint"
command_interpreter="/root/OctoPrint/bin/python3"

run_rc_command "$1"

Add octoprint_enable="YES" to rc.conf and everything should just work.

Once you have the file saved, grant it running permissions:

[venv] root@OctoPrint2:~ # chmod +x /etc/rc.d/octoprint

Now we need to add octoprint_enable=”YES” to the rc.conf file.

root@OctoPrint2:~ # nano /etc/rc.conf

cron_flags="$cron_flags -J 15"

# Disable Sendmail by default

sendmail_enable="NO"

sendmail_submit_enable="NO"

sendmail_outbound_enable="NO"

sendmail_msp_queue_enable="NO"

# Run secure syslog

syslogd_flags="-c -ss"

# Enable IPv6

ipv6_activate_all_interfaces="YES"

hostname="OctoPrint2"

octoprint_enable="YES"

Don’t copy this and put into your file, just add the last line: octoprint_enable=”YES”

Press Ctrl + c to save, exit out of the jail and restart it:

root@OctoPrint2:~ # exit
root@freenas:~ # iocage restart OctoPrint2

Now check the Jail assigned IP using port 5000 in your browser to access octoprint, it should be running at this point. rc.d is a little sketchy on FreeNAS Jails, if you try using the normal “service octoprint start/restart” commands, it will error out, but somehow rc.d manages to run the script when the Jail boots, for that sole reason, put “service octoprint onerestart” in “Restart OctoPrint” on the “Commands” tab when you start setting it up.

6 Likes

Thanks for the guide, it saved me some time trying to figure out the devfs ruleset. There are probably better init scripts, but I cooked this up quick and it seems to work.

/etc/rc.d/octoprint

#!bin/sh

# PROVIDE: octoprint
# REQUIRE: DEAMON NETWORKING

. /etc/rc.subr

base_path="/root/OctoPrint"

name="octoprint"
rcvar="octoprint_enable"
pidfile="${base_path}/octoprint.pid"

command="/usr/sbin/daemon"
command_args="-p ${pidfile} -f -c ${base_path}/venv/bin/octoprint serve --iknowwhatimdoing"

procname="${base_path}/venv/bin/octoprint"
command_interpreter="/root/OctoPrint/venv/bin/python2.7"

run_rc_command "$1"

Add octoprint_enable="YES" to rc.conf and everything should just work.

2 Likes

I'm happy to see that this guide helped you.
For sure the devfs ruleset can be a pain in the ass since there isn't a lot of documentation about it.
Thank you for providing your rc.d init script, i plan to test it on one of my jails and give some feedback.
If it works out fine for me, i'll include it in the guide and give you the proper credit.

This is a great resource for people running FreeBSD! I use OctoPrint on FreeBSD 12.1 and it works perfectly! Just wanted to add I made an rc.d startup script that uses a non-privileged user so you can avoid using root with the "iknowhatiamdoing". Here's the link to the script: FreeBSD 12.1 Guide with rc.d script to start OctoPrint Automatically and as a Service

1 Like

Thank you for this guide. I followed the guide without issues until where I create the virtual environment:
root@OctoPrint2:~/OctoPrint # virtualenv venv

I am now getting: virtualenv command not found

I have tried to google a solution but have so far come up with nothing. Any ideas?

Thanks!

sudo apt-get update            # Upgrade the list of things which can be updated
sudo apt-get -y upgrade        # Upgrade them globally
sudo pip install --upgrade pip # Upgrade pip globally
sudo pip install virtualenv    # Install virtualenv globally

Thanks, I actually got it working by using the following line instead of the one in the guide:

python2.7 -m virtualenv venv

i'll update the guide in the near future, thank you for pointing out that some commands have changed.

I also had to use python2.7 -m virtualenv venv, virtualenv by itself was not a found command.

Additionally to use pip I had to install it via:
pkg install py27-pip

I just updated the guide, rc.d script included, i hope it's more helpful for you all now.
If there's any problems, let me know.

1 Like

Thanks a lot for this awesome tutorial !
I followed it and everything works !
Can you indicate me the path to the boot folder of Octoprint inside the jail ? I need to edit the octopi.txt file who is normally at /boot on a RaspberryPi but I can't find this inside the jail...

Good to know that it worked for you.
What exactly are you trying to accomplish editing that particular file?

I want to add a usb webcam, to watch the print and make timelapse. I saw that it needed to decomment some lines in this file to do that.
Sorry, I'm not an expert in FreeNAS and even less in Octoprint^^.
And sorry if my english is not so good, I'm french speaker ;).

Thank you very much for the great tutorial!
Unfortunately I fail at one point. When I run "pip install pip -upgrade" I get the following error message:


DEPRECATION: Python 2.7 reached the end of its life on January 1st, 2020. Please upgrade your Python as Python 2.7 is no longer maintained. pip 21.0 will drop support for Python 2.7 in January 2021. More details about Python 2 support in pip, can be found at https://pip.pypa.io/en/latest/development/release-process/#python-2-support
ERROR: Invalid requirement: '\xe2\x80\x93upgrade'

Maybe you have an idea how to troubleshoot this, google wasnt really helpfull for me.
Best regards
Mjeni

EDIT:
Ok never mind, i just solved the problem by myself, i had to update to the newer python version.

pkg install pkg nano python py37-virtualenv py37-pip git bash

python3.7 -m virtualenv venv

Someone achieved to use camera for timelapse with Octoprint installed in a jail ?

Thanks for a great guide, I managed to install it on TrueNAS 12 Core Beta1 fine, and octoprint is up and running and the services start fine on boot.

However, I am not able to open the serial port, has anyone else had issues with this ?

Connecting to: /dev/ugen3.3
Changing monitoring state from "Offline" to "Error: Connection error, see Terminal tab"
Unexpected error while connecting to serial port: /dev/ugen3.3 SerialException: 'Could not configure port: (25, 'Inappropriate ioctl for device')' @ comm.py:_openSerial:2691 (hook default)
ugen3.3: <vendor 0x1a86 USB Serial> at usbus3, cfg=0 md=HOST spd=FULL (12Mbps) pwr=ON (98mA)

root@octoprint:~ # ls -la /dev/ugen3.3
lrwxr-xr-x  1 root  wheel  9 Jul 29 10:39 /dev/ugen3.3 -> usb/3.3.0

ugen3.3: <vendor 0x1a86 USB Serial> at usbus3
uchcom0 on uhub1
uchcom0: <vendor 0x1a86 USB Serial, rev 1.10/2.64, addr 3> on usbus3
uchcom0: CH340 detected

Edit : well this is awkward, just letting it do auto worked fine :wink:

Hi,

Not sure what is happening, but I followed the guide for my Truenas setup. I can manually start the server, but it wont auto start the server.

I did have to install python3.8, but just unsure if its something I've missed or what it is. Any advice would be helpful thank you.

HI @victor76,

I'm running octoprint in a Truenas Jail - I used this script as a reference to have it start as a service at startup.

FreeBSD 12.1 Guide with rc.d script to start OctoPrint Automatically and as a Service

Cheers @jemison I’ll give that a try.

Edit: Nope, still not working on auto startup. Would be handy to have an up to date guide for TrueNas, but guess I’ll just stick with the Ubuntu VM.

Did you try service octoprint start ? And what do the octoprint logs say?

This is what my octoprint.sh script looks like, although I'm running it as root:

!/bin/sh

# PROVIDE: octoprint
# REQUIRE: NETWORKING
# KEYWORD: shutdown

# *******DESCRIPTION: FreeBSD 12.1 - rc.d script for the 3D Printer Software OctoPrint. This script takes advantage of FreeBSD's rc.subr framework to start OctoPrint automatically at startup and to allow it to be controlled as a FreeBSD service (eg. service octoprint start). This script assumes you are running OctoPrint as a virtual python environment (py27-virtualenv), but it can easily be changed if you want.

# *******HELP:
# 1. To increase security we want to avoid running it as root so create a user named "octoprint" (or any name you want but then change the script to reflect the change) and add the user to the "dialer" group so it can access the USB serial port that connects to the 3D Printer.
# 2. Add the line "octoprint_enable=yes" to the end of "etc/rc.conf" this will enable and start OctoPrint at boot time.
# 3. Place this rc.d script file in "usr/local/etc/rc.d/" (make sure this file is executable, if not run: "chmod +x /usr/local/etc/rc.d/octoprint")
# 4. Make sure the variables below such as, "command", "octoprint_basedir", "command_interpreter", etc..., reflect the correct paths to your octoprint executable, base directory, and virtual python executable (if you are using a virtual python environment like this script does).
# 5. After startup the service can be controlled like any other service "service octoprint {start,status,reset,stop,start}"

. /etc/rc.subr

name=octoprint
rcvar="octoprint_enable"

: ${octoprint_enable:=no}

octoprint_user=root
octoprint_group=operator
octoprint_user_path="/mypathtooctoprintinstall"

octoprint_basedir="${octoprint_user_path}/octoprint/.octoprint"
command_interpreter="${octoprint_user_path}/octoprint/venv/bin/python3.8"
command="${octoprint_user_path}/octoprint/venv/bin/${name}"

command_args="serve --basedir ${octoprint_basedir} > /dev/null 2>&1 &"
load_rc_config $name
run_rc_command "$1"