This guide is for creating timelapses with text overlays with OctoPrint's built-in timelapse functionality.
If you are using the OctoLapse plugin, you can create text overlays by creating a customized Rendering profile.

OctoLapse is an impressive plugin, but I've found myself just using the built-in timelapse function more. The only thing I wished the built-in timelapses had are a way to overlay the date/time info onto the timelapse.
Luckily this is fairly easy to do with OctoPrint events, and even easier with the new Event Manager in 1.7.0.
All that is needed is to setup an event subscription that will run a program (Image Magick) on each image after it's captured to add the appropriate text overlay. With this approach, the timelapse settings do not need to be modified, and an additional script is not needed.
Image Magick Installation
It is, however, necessary to install the Image Magick program:
- If you are using OctoPi or a similar Linux system, install imagemagick:
sudo apt install imagemagick. - If OctoPrint is running on a Windows or Mac system you'll need to install Image Magick yourself and make sure the binaries are accessible or use the full paths to the program in the
Commandbelow.- On Windows, all commands are exposed through the main program
magick (command), so instead ofmogrifyas explained below, you'd need to usemagick mogrify (arguments).
- On Windows, all commands are exposed through the main program
Event Subscription Setup
Next, create the event subscription. This method requires OctoPrint 1.7.0.
You can still do this prior to version 1.7.0, but you'll need to manually add the event subscription as described in the documenation, instead of the method below: Events — OctoPrint master documentation
-
Open the OctoPrint settings window and go to Event Manager
-
Click
+Addto create a new subscription -
Select
CaptureDonefor theEvent,systemfor theType, and verifyEnabledis checked. -
For
Commandenter a mogrify command. See below for details. You should have at least one-annotateswitch and the last argument should be"{file}".
For example:mogrify -pointsize 36 -fill white -gravity southwest -annotate 0 '{__filename}' -pointsize 36 -fill white -gravity southeast -annotate 0 '{__now}' -pointsize 24 -fill white -gravity northeast -annotate 0 'Z = {__currentZ}mm' "{file}" -
Click
Close. You should see something like:
-
Click
Saveon the settings window. -
Restart the OctoPrint server. OctoPrint won't pick up the new event subscription until it has been restarted!

Mogrify Command
Step 4 above mentioned a mogrify command. mogrify is a utility that comes with ImageMagick that modifies images in place. It can, among other things, add text overlays.
Multiple overlays can be added with -annotate and each overlay has properties specified before that switch.
For the example above there are 3 overlays:
- The file being printed:
-pointsize 36 -fill white -gravity southwest -annotate 0 '{__filename}' - The current timestamp:
-pointsize 36 -fill white -gravity southeast -annotate 0 '{__now}' - The current Z height:
-pointsize 24 -fill white -gravity northeast -annotate 0 'Z = {__currentZ}mm'
Each overlay has multiple switches:
- The font size (
-pointsize 36). The ideal font size will depend on the resolution of your camera stream. You will probably need to experiment to find the right size. - The color (
-fill white) - The position, which is calculated from:
- The anchor point:
-gravity southwest. In this case the overlay is anchored to the lower-left corner. Northeast corresponds to the upper-right, north is centered at the top, etc. - The offset: the 0 in
-annotate 0. You can also specify 2 numbers here instead. For example, to offset the overlay 10 pixels in both the x and y directions,-annotate +10+10
- The anchor point:
- The text to display in the overlay, which is the final option to
-annotateafter the offset. You can specify placeholders (ie.{__filename}) in the text and OctoPrint will replace them with the appropriate values. They are documented here: Events — OctoPrint master documentation
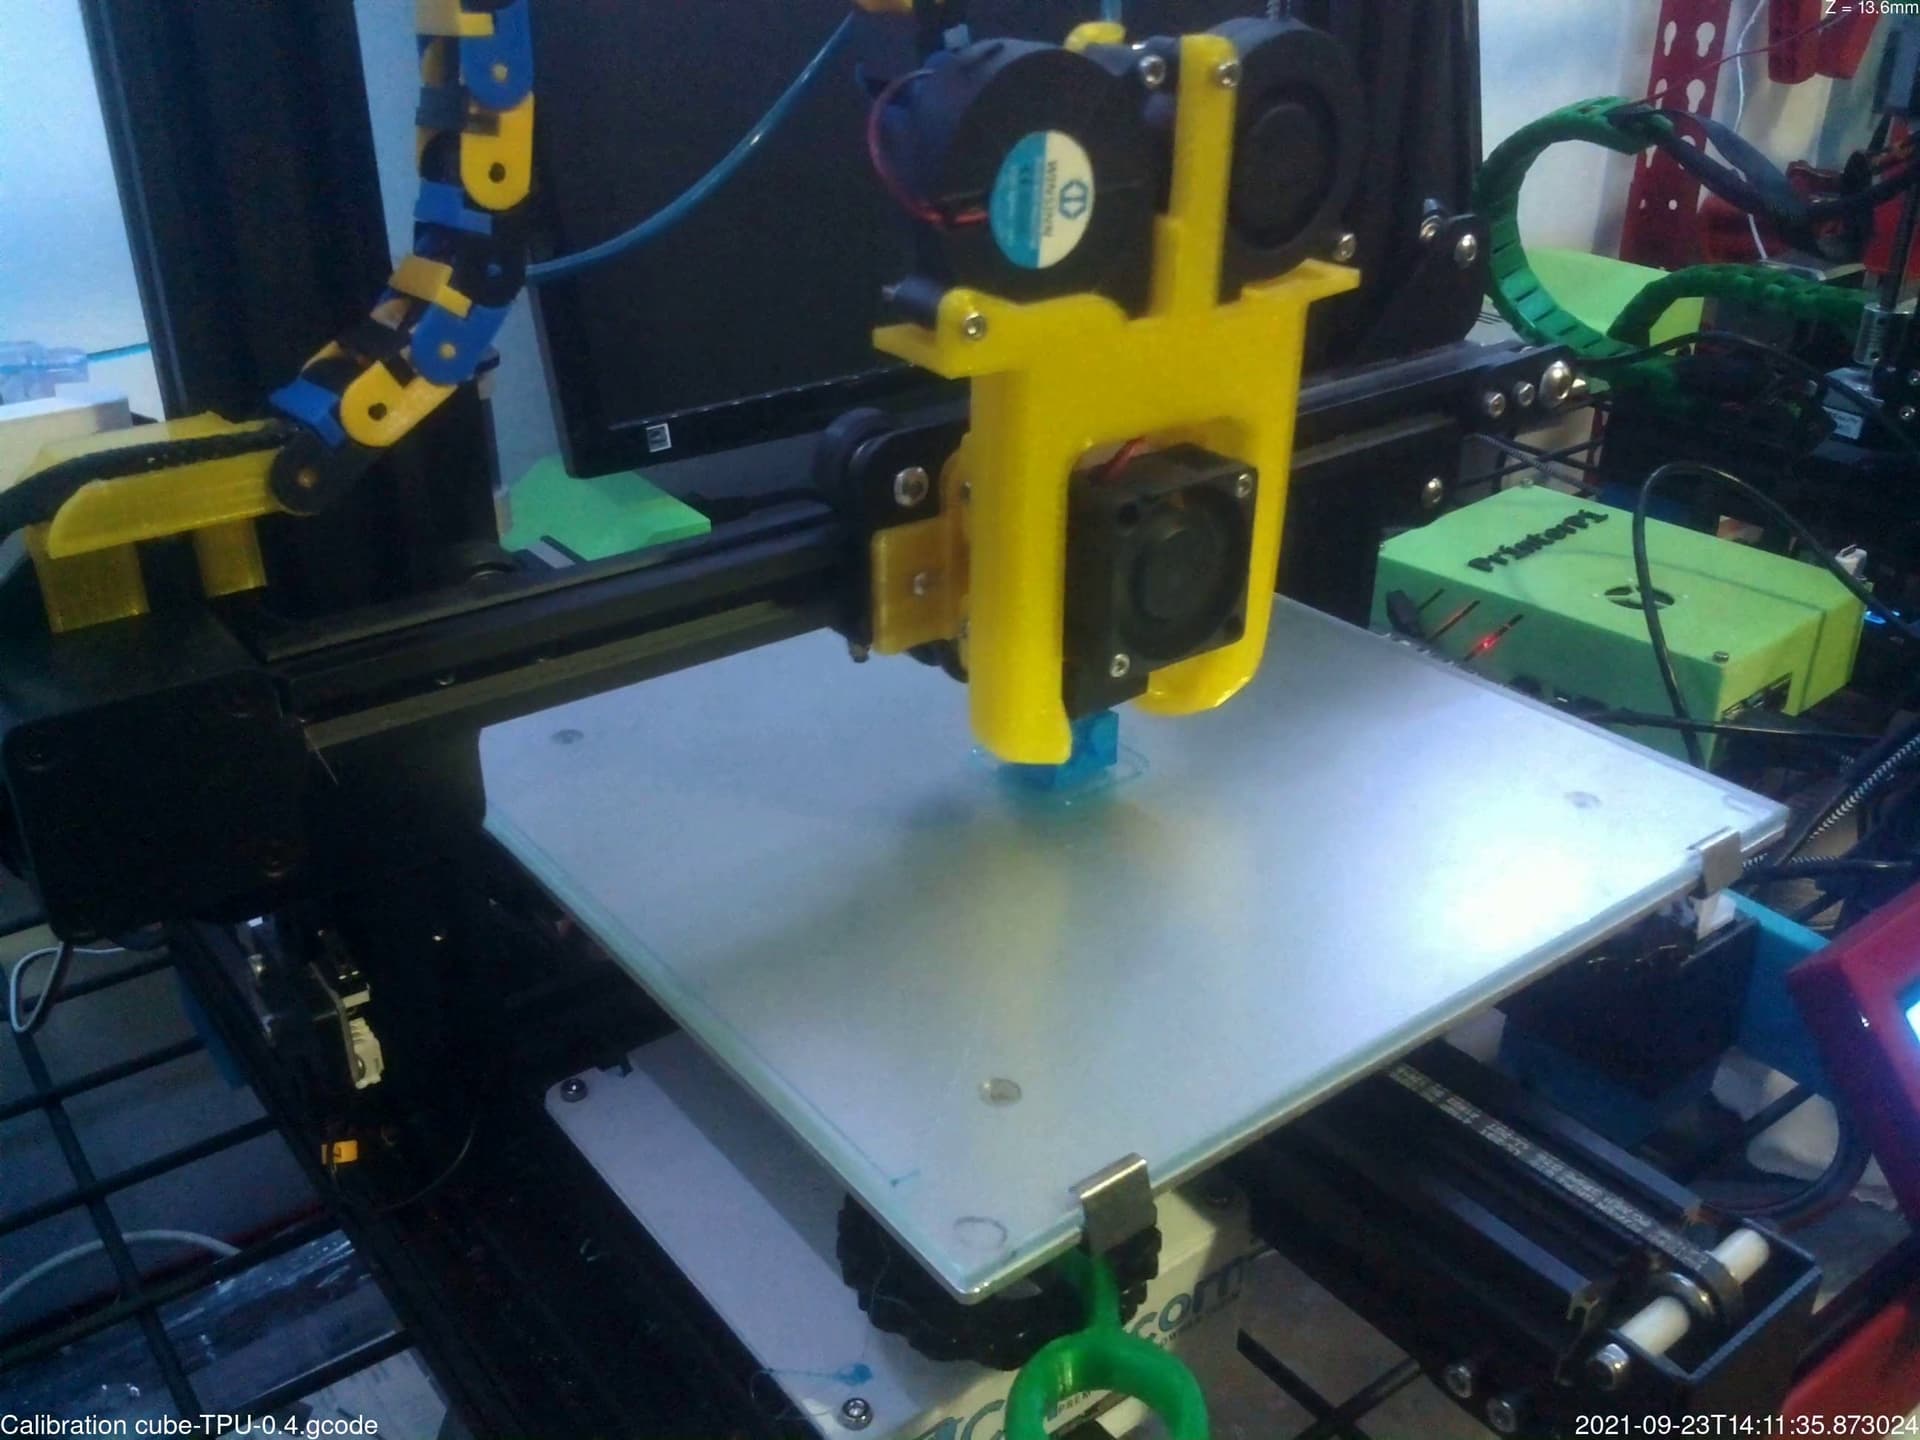
With the example mogrify command, your timelapses should look something like:
If you have Flip webcam vertically or Flip webcam horizontally enabled in OctoPrint, you'll need to tell ImageMagick to do the same thing, or your text will be mirrored/upside down.
You can do this by using -flip (vertical), -flop (horizontal) or both (upside down) on both sides of the -annotate switches.
The example above but for a webcam image that needs to be flipped vertically and horizontally:
mogrify -flip -flop -pointsize 36 -fill white -gravity southwest -annotate 0 '{__filename}' -pointsize 36 -fill white -gravity southeast -annotate 0 '{__now}' -pointsize 24 -fill white -gravity northeast -annotate 0 'Z = {__currentZ}mm' -flop -flip "{file}"
Things to keep in mind
The mogrify options mentioned above barely scratch the surface of what ImageMagick is capable of. There are mulitple font options, as well as other options such as -undercolor, which will draw a box of the given color (including transparency!) behind the text. The ImageMagick documentation also has multiple approaches for annotating.
This method will add the overlays as the print is happening. This is good as it doesn't require altering the timelapse ffmpeg command or creating a script that does the overlays and then the timelapse, but it does mean that something else ends up running during a print.
This shouldn't be an issue on a recent RPi (3B/4B), since the resources needed should be less than what was required to create and write the capture image in the first place, but it is adding something additional during printing.
The {__now} placeholder is the timestamp when the event is being triggered. It's not technically the exact timestamp of the image, but I feel like it's close enough. If you really want the exact timestamp of each image, or different date/time formats, etc, you can alter the command to call stat on the {file} and use it's output instead.