I made a big discovery this morning regarding part curling. It has everything to do with uneven temperatures inside the print volume and less to do with bed temperature.
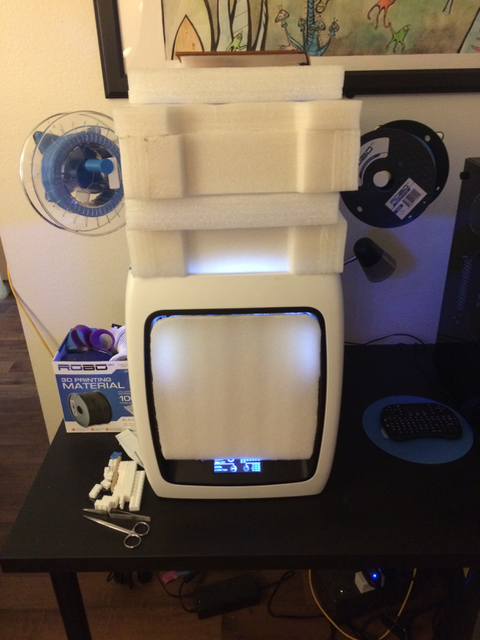
Basically, you're led to believe that a print bed should be heated for success. I've printed perhaps a thousand parts now on this printer with an unheated bed and a few of them curl at the bottom. What's different today is that I've tried to box in the print volume by using plastic and styrofoam at the front opening and it's just laid down a beautiful part and it's now high enough for me to know that it won't curl in the slightest by the time it's done.
So I'm going to work on enclosing the space with a custom door and then a hood at the top, later.
I'll eventually work on a digital heated bed design but this takes the pressure off that design work.
I'm guessing that a heated print bed will simply lower the temperature gradients in play. But managing the internal temperature to minimize gradients is quite possibly a simpler solution if you think about it.
It's reasonably an enclosed box of foam at the moment, just foam from the box the PC case came in. That book (Tesla's Inventions) applies a little pressure on top. It vents a little because of the shim in the front (to allow the PTFE tube some room to move around).
I just added a cheap pet store reptile heater pad at the bottom to add a little extra heat in the box to see if that changes things... but it's perfect now so I'll try this with ABS in a bit.
The bed temperature has NOTHING to do with the warping or curling of the model. It just ENHANCES or even ENABLES the stickyness of the plastic to the bed surface.
If you seriously want to print ABS models without all these problems you need a warm, air drag free build room . But JESUS ..do not use burnable FOAM on top of your printer for such. Only use not melting or burning materials for the housing and be sure your printer structure can stand running at 60 - 80 ° Celsius a long time without overheating..
Having recently worked as a consultant for Robo 3D and long-time participant in their online forum, I'm mostly indicating the fallacy that "print bed heating is the (only) prevention for part curling". I of course agree with you. In my first month printing I added Saran Wrap to the front of my printer and everybody thought that I was nuts. Now, some nine months later, I'm returning to that idea with much more confidence and I see that I was right all along.
Having tested many of their R2 printers, I'm not in love with heating the print bed, to be honest. It may assist with materials like ABS sticking to the bed initially but then it's a pain to remove the part when it's finished.
As a baker, I'm used to putting my hand inside the oven to test how hot it is. At no time does the print volume inside my printer reach temperatures hot enough to combust or to even warm a bagel. The heating pad is 5W only and it's made to increase the ambient temperature inside a glass lizard home, if you will.
Oh, and by the way, I used to run three of these at 700 degrees to rotomold HDPE:
Version 2 of this project is in-progress. I'm now designing/printing parts so that I can move the waste heat from the mining rig over in through the spool guide hole in the back of the printer.
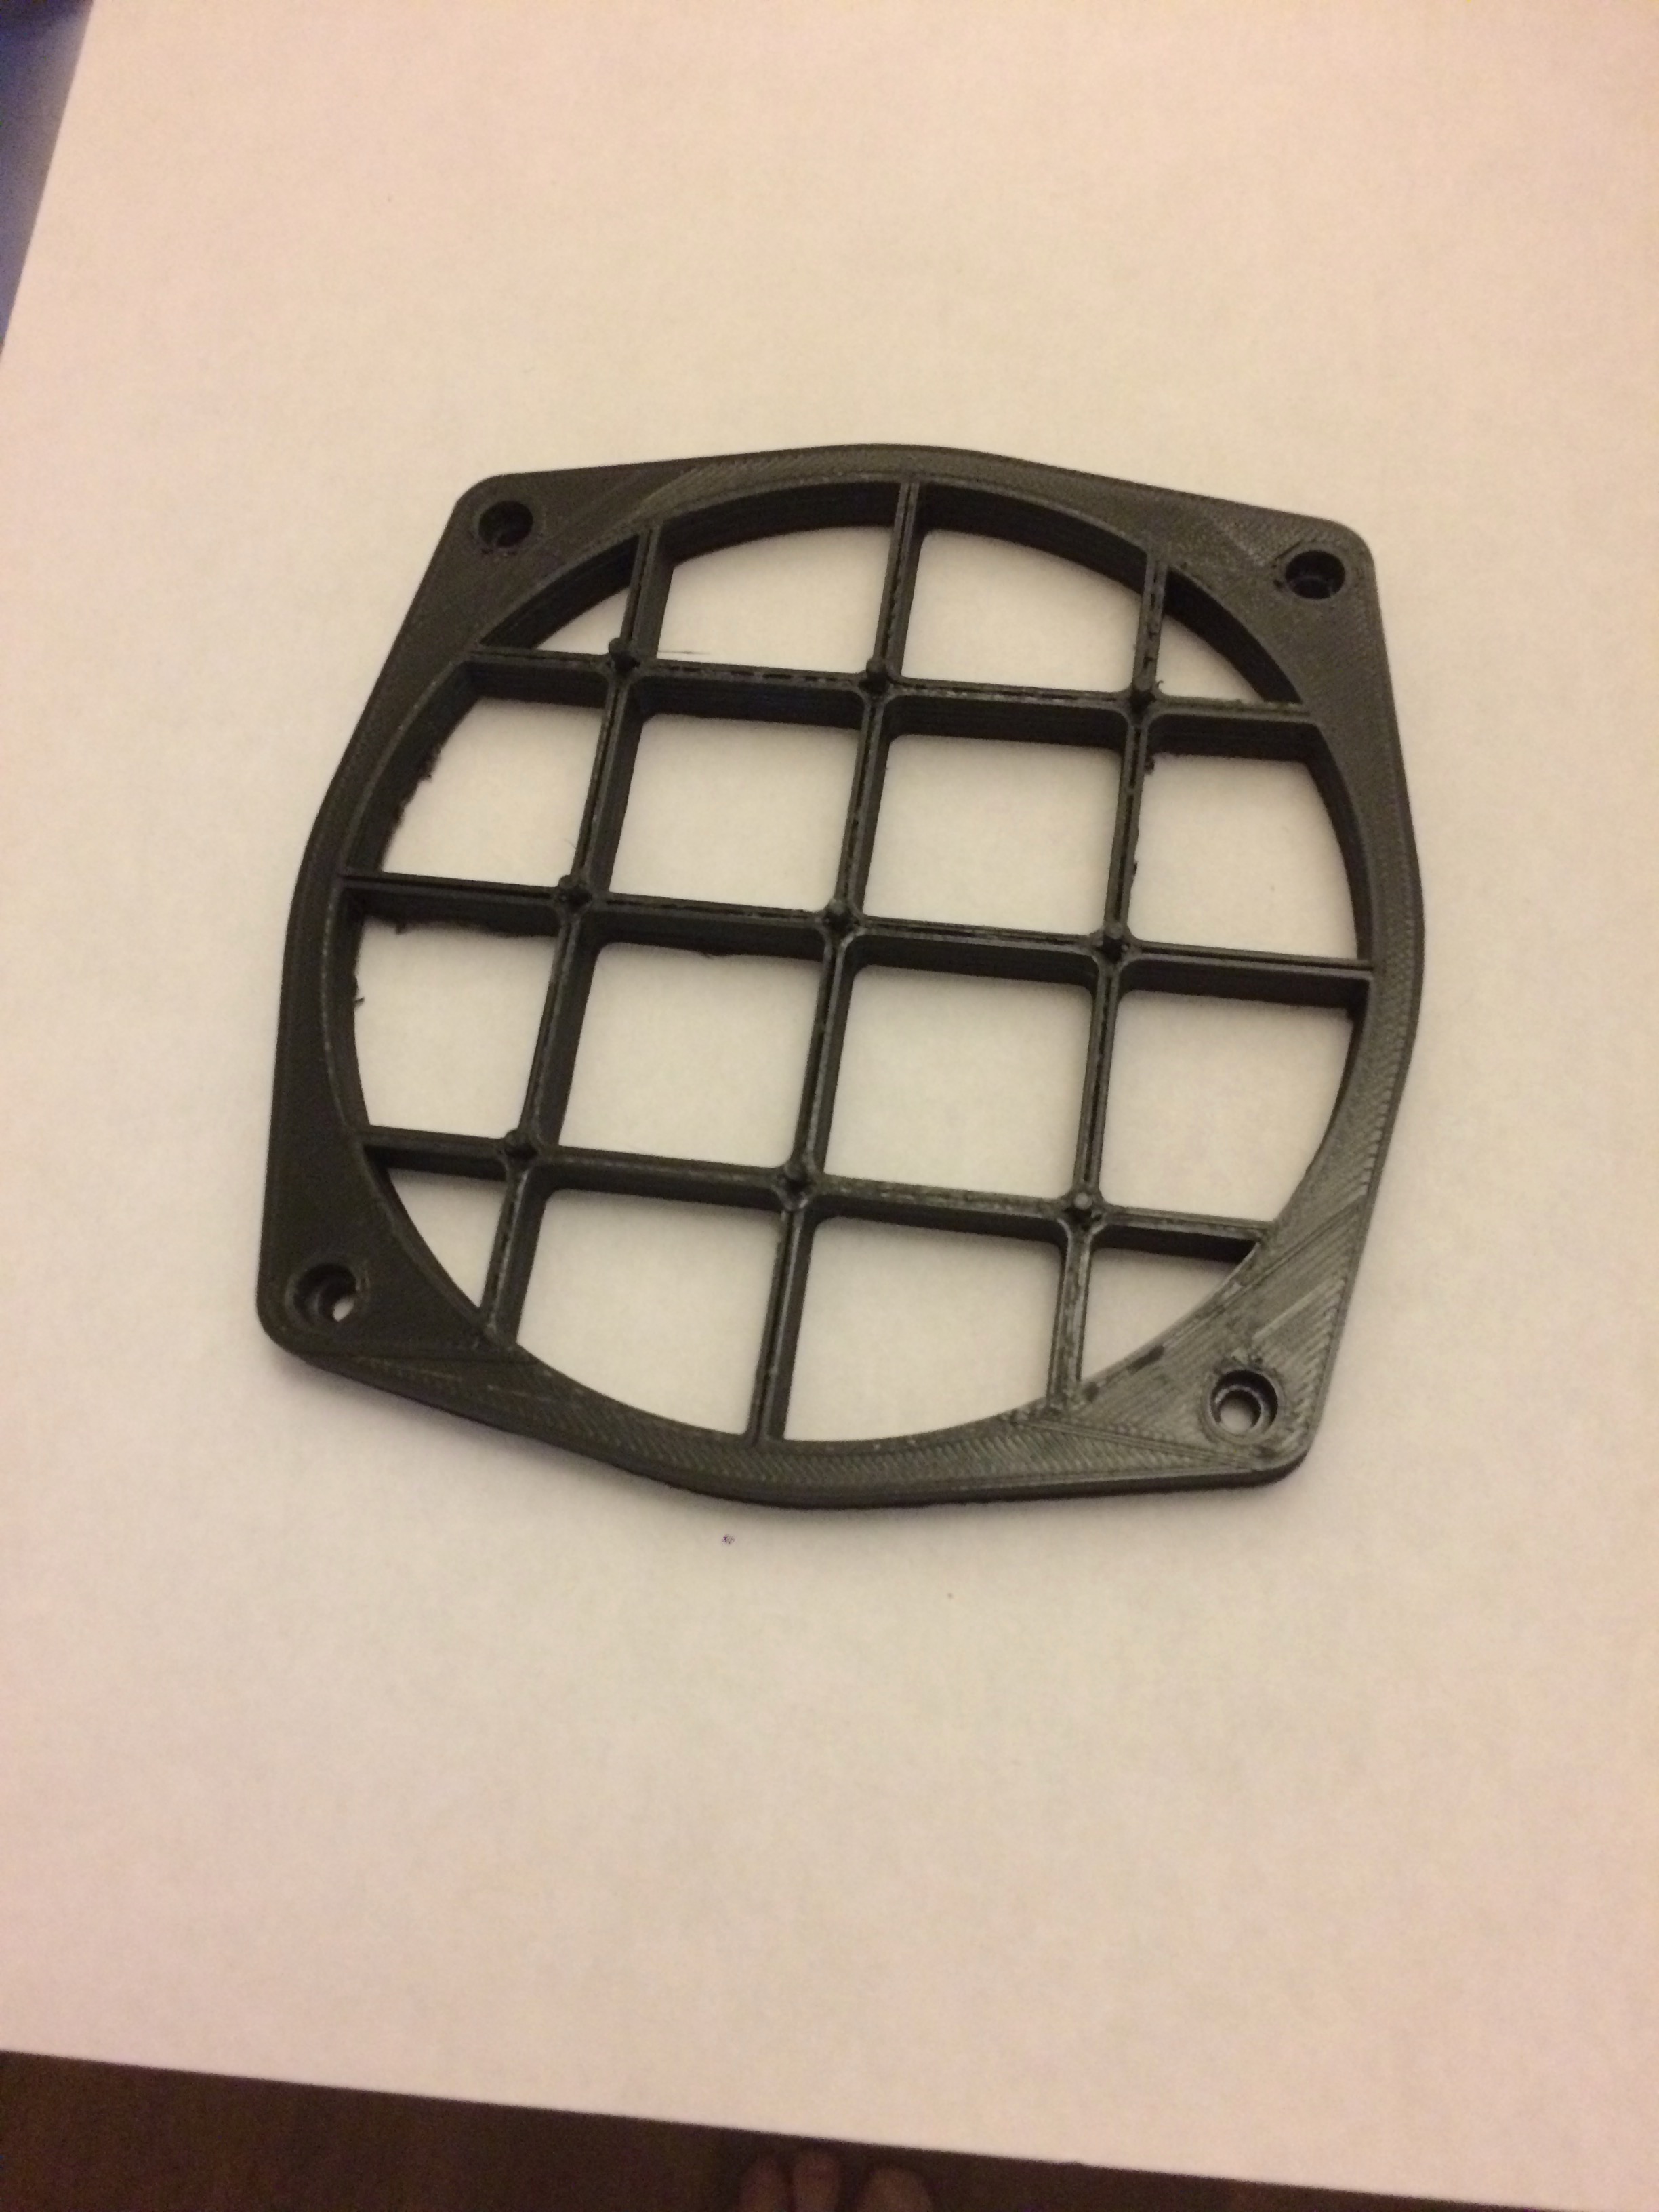
The first part hangs from the back of the mining rig's exhaust fan. I can't believe that I got the spacing of the nine hooks right the first time (they're 4mm x 2mm so you probably can't see them).
Next you could talk to the Robo people about this new invention. It's so new they've probably never heard of it yet
It's called "A DOOR"
Where will the intake from the heat be aimed at ?
How high a setting do you plan to use on that fan ?
Since there will be an intake, you won't be able to seal it up, which means that there will be a breeze SOMEPLACE, which means there will be a breeze where there wasn't one before.
Well, to be honest their $1600 printer does include a door but it's not really air-sealed. When I left them, they were working on methods of enclosing and filtering out airborne ABS bi-products, for example.
The intake will use the rectangular hole that's in the back of the C2 printer where the spool holder used to go. Of course, I pulled that a long time ago since it was poorly designed; I'm using the dual-spool holder in the other thread. That leaves a gaping hole in the back which I was going to use for the Bowden mount and pass-through but I think this is slightly higher priority and I'd rather not see the duct up front, to be honest.
The fan is the stock fan in the mining case's rear and seems to be the standard variety 12VDC type without adjustment. I could of course in-line a digital regular but I doubt if that will be necessary.
The current temporary version uses a cheap 5"x5" reptile warmer @ 5W/115VAC and it's just plugged into the wall. It warms the ambient air inside the hotbox a little. I couldn't tell you if it changes anything since I've done insufficient before/after testing.
The pass-through hole is below the print bed during perhaps the first 60mm of any print job so there wouldn't be a breeze, per se.
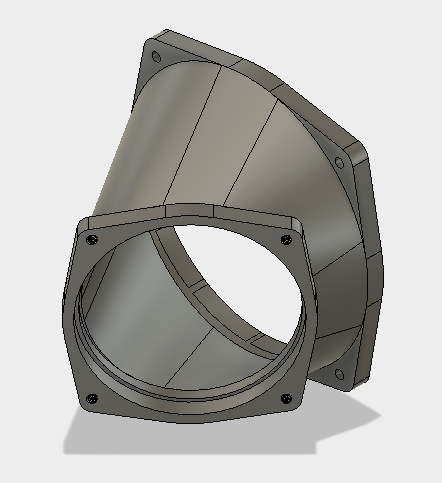
I'm going to re-work my existing pass-through design so that a tube can be affixed on the back. The tube will then run over to a collection of three constricting tubes, two of which make up a 90-degree angle. You saw the plate which clips to the back of the mining rig and here's the next part of the series which is printing now:
The door will be replaced with a printed frame and plexiglass insert. I just have to fetch some plexiglass that's a perfect size for this since I no longer have a place to CNC a sexy curved version of same.
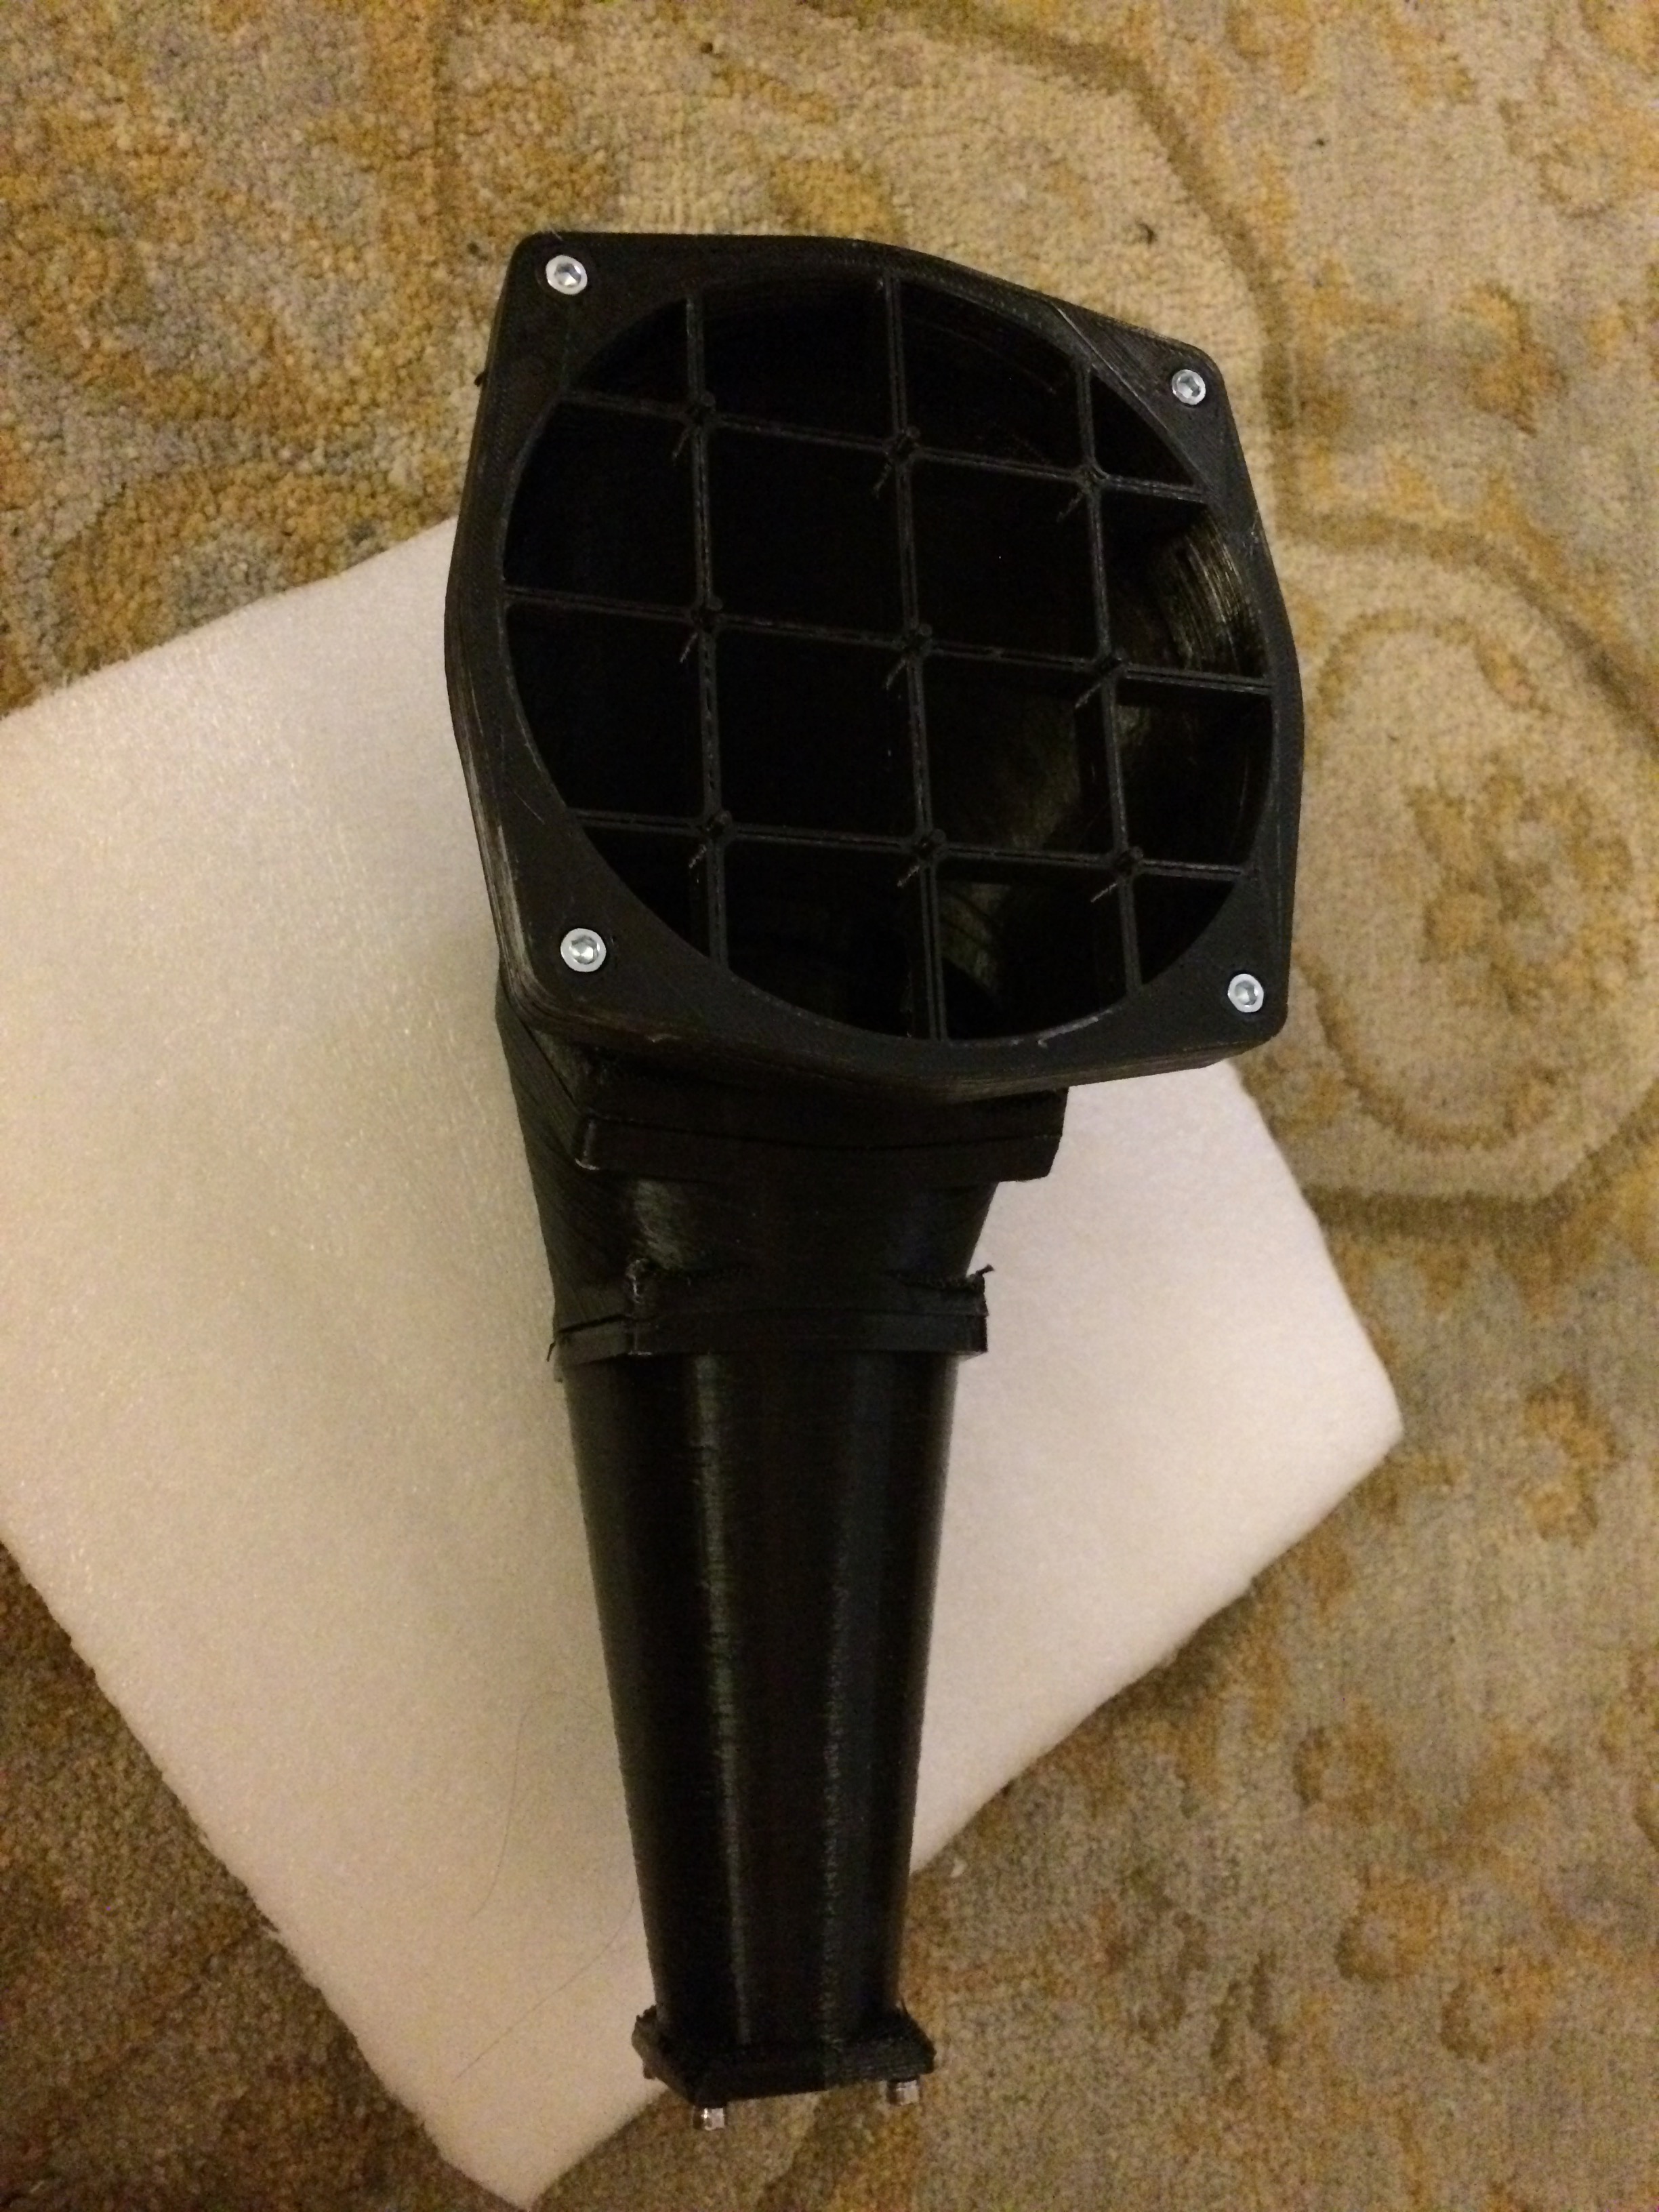
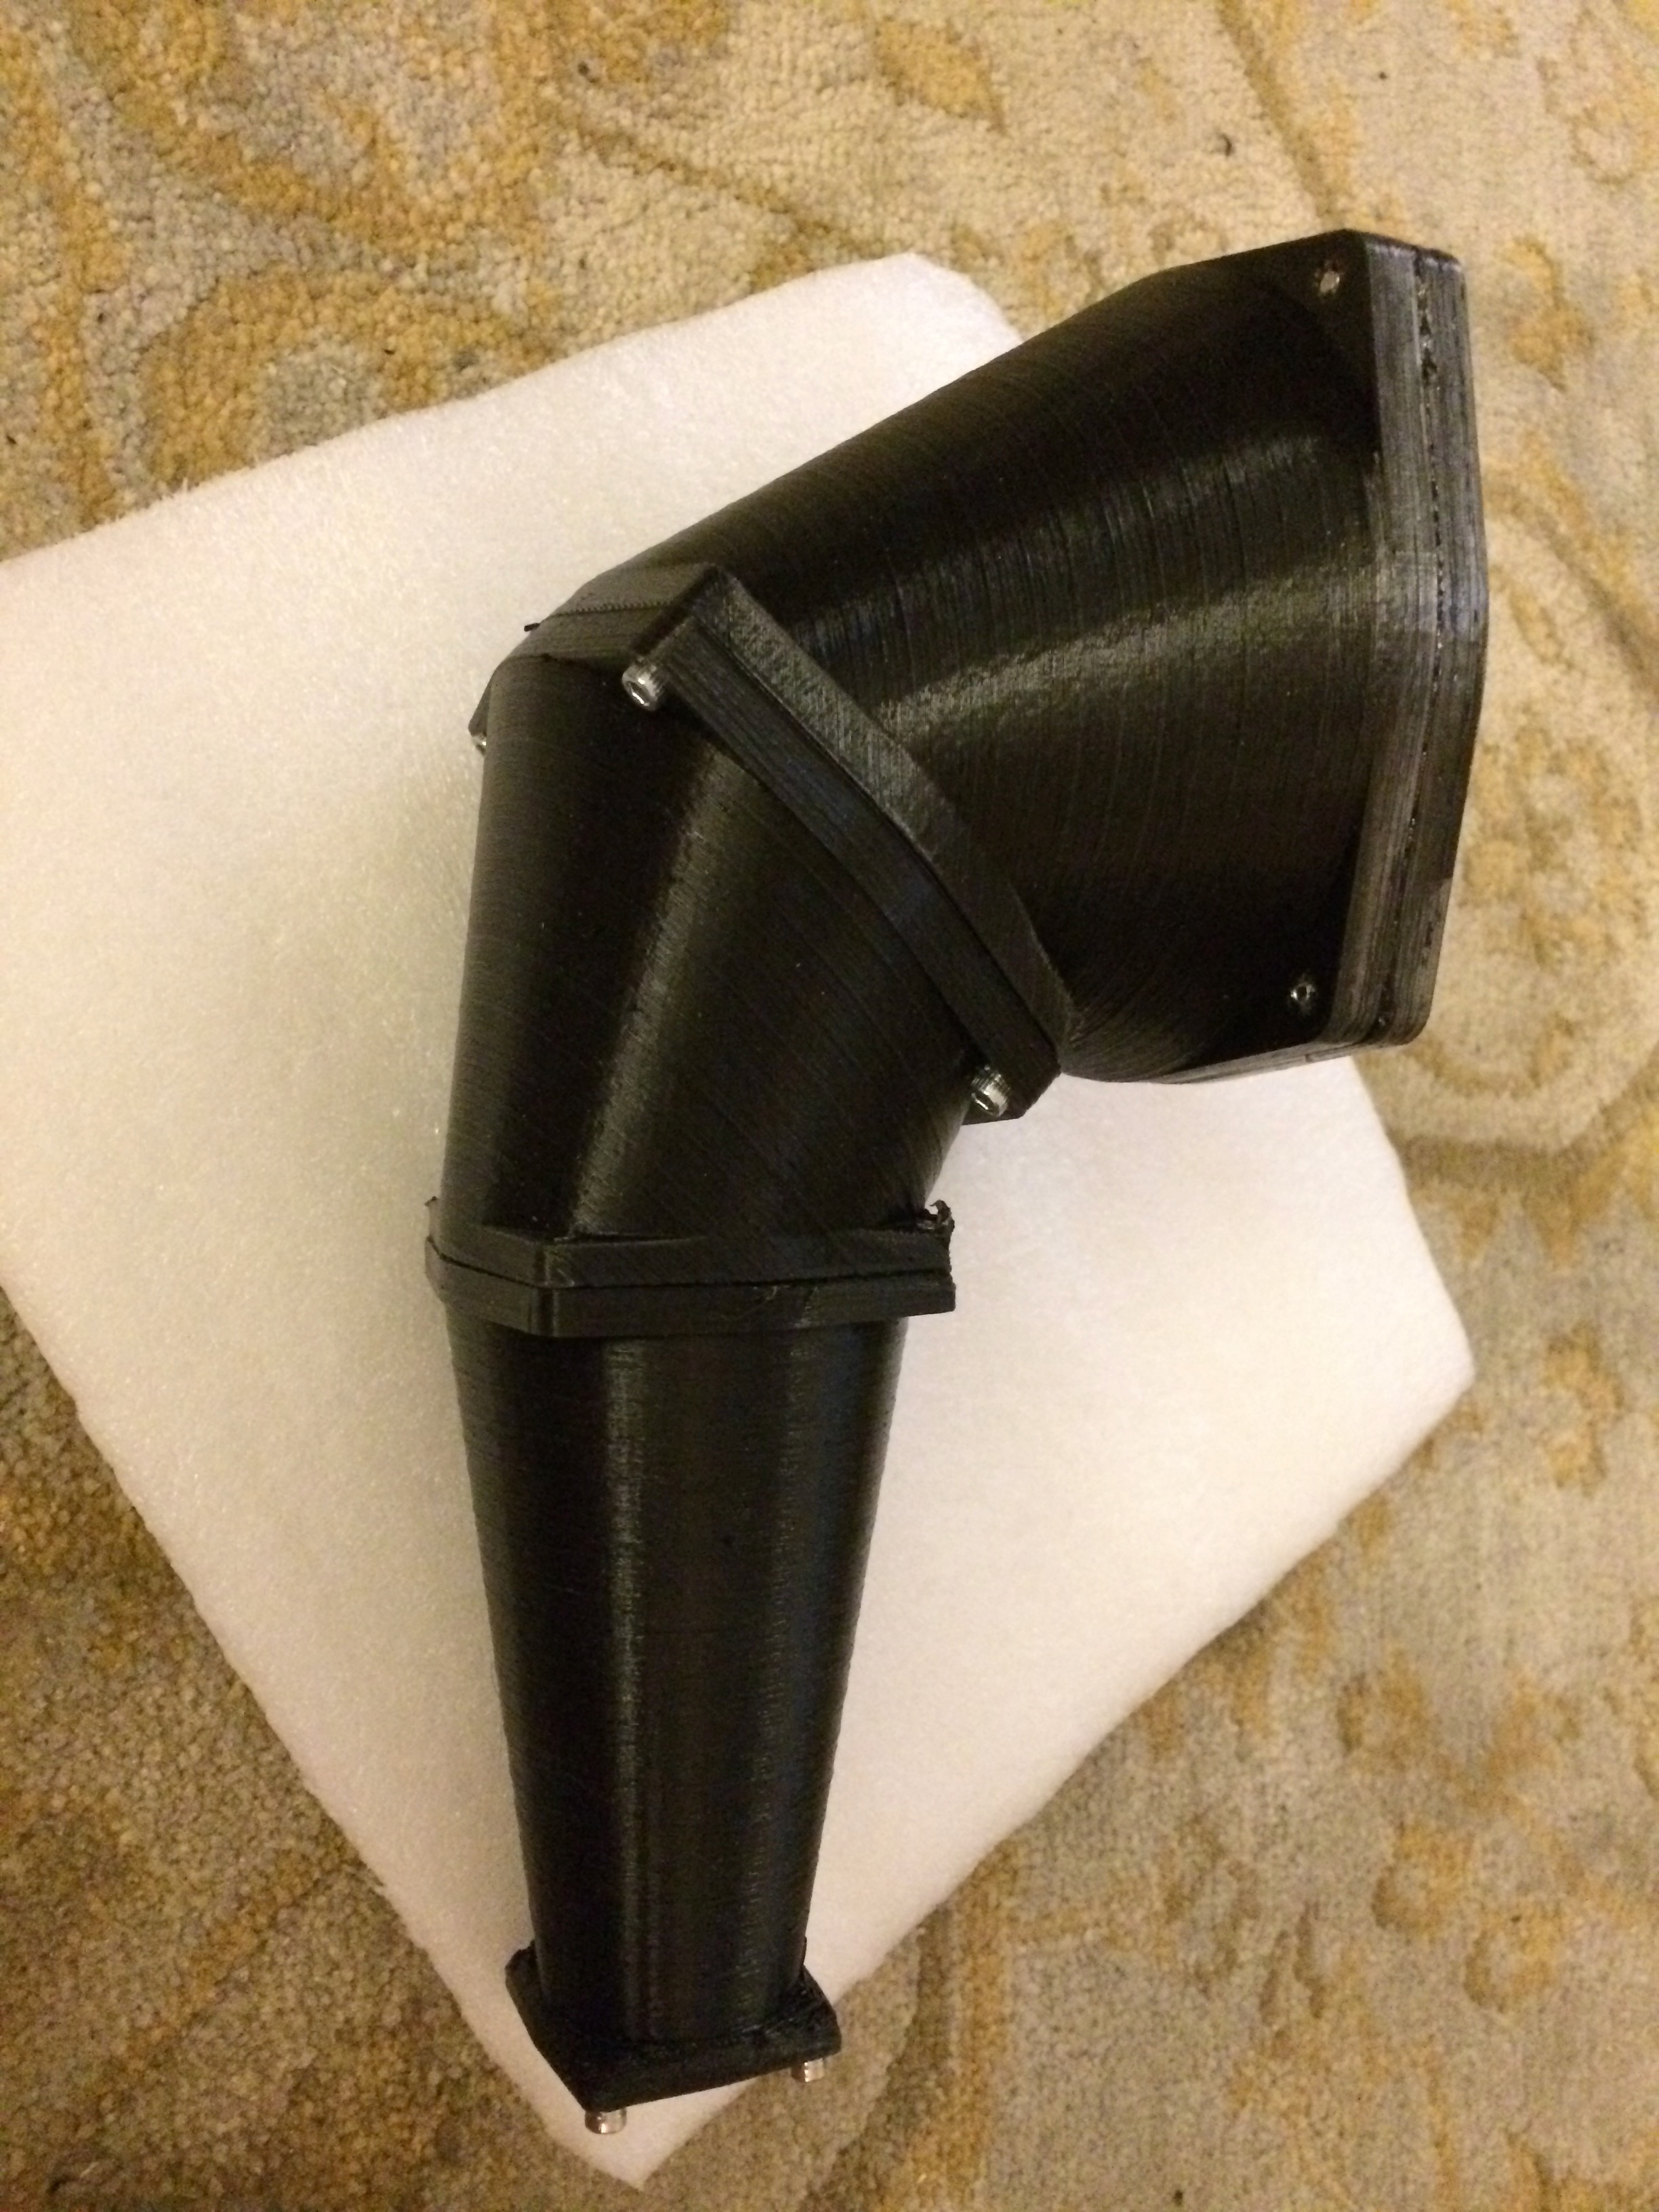
Here's the latest progress, it's coming along with three parts printed/assembled. I can reasonably use it when I get the next part designed/printed but it probably should have one more after that to make things cleaner. It will connect with some 15mm OD tubing that I have from an indoor AC unit.
Having printed the last three parts for the printer's pass-through and installing everything, I note that the mining rig was complaining about over-heating with all this setup. It looks like the constricting space is causing the exhaust fan to overwork itself, I'd guess. I could add another fan to the mining rig or re-engineer things but at the moment, I'm going to take a break from this one since I've been printing parts all week to get to this point. meh
That's interesting. When I saw the setup you were using, with the two inch gap at the top, I was thinking that you'd have too MUCH air flow, and the box wouldn't collect enough heat, cuz, ya know, heat rises and all that.
Apparently, even with that two inch gap, it's a restriction that I never would have guessed
Hmm, I just had a thought, maybe it's not the roof that's the problem. You made that funnel adapter, maybe THAT'S the restriction ? It goes from, what, four inches down to less than two ?
Well, yeah... it's the restriction of the 15mm ID tubing that's causing the rig exhaust to be unhappy. If I reoriented things on the table I could just inject the hot air without the tubing but I like the way they're sitting on the table now.
The problem you're running into is almost definitely the static pressure rating of a biscuit fan (PC case fan). It's incredibly low. All you need to do (probably) is add a blower (aka squirrel cage fan) to your original intake adapter and let it handle increasing the flow rate and most of the reduction. Then model and print an adapter that fits the rectangular exhaust aperture of the fan and your 15mm ID tubing. Keep the tubing as short as possible, as the longer the air path, the higher the static pressure.
I'd also suggest you use a beefier blower than the one that's probably cooling your nozzle(s). By a lot. You probably want a 12v blower with a 60 to 80mm diameter housing, by about 40mm thick. That said, even two fans of the same size, voltage, and wattage can have wildly different static pressure ratings. Virtually every fan manufacturer will give you the static pressure rating of any fan you buy/inquire about, even if it's not listed in the specs. Most small (<1A) 12v fans don't list static pressure ratings, but you can usually find out via an email or even posting a question on an Amazon listing, if the manufacturer or seller are attentive.
You also don't want your adapter to use a funnel shape internally, as that increases pressure. Instead, you want it to transition from rectangular to round, and then hit a flat wall inside, with the appropriate diameter aperture inside of it, as that will increase your flow rate, instead of increasing your flow pressure, thus reducing the restriction while removing a similar amount of heat as your unrestricted biscuit fan did before.
Finally, while there's lots of fluid dynamics simulation you could do to optimize the exact length of the adapter before you hit the reducing aperture, IIRC there's a rule of thumb to use, or you can just assume that you want a fairly short chamber, that allows enough space for a fairly static air mass to form around the aperture, with a smooth laminar flow from the wall where it becomes round to the aperture where the high speed flow exits, and then experiment a bit. I'm thinking the golden ratio relative to the reduction in radius is probably a good place to start, but I really don't recall offhand, and that could be wildly off.
I have plenty of parts here, lots of spares, fans, power supplies and such. I'll work something up but I'm going to park this project for the moment because I'm in a time crunch on another project which competes for my time.
when reprap story started we were printing ABS on the cold bed and were dealing with warping by trying different things (better bed adhesion, printing on double sided tape etc..).
the major problem with curling is that part cools off too fast and difference in shrinkage between layers pulls the corners up as the part cools down. even if you manage to get the part to not lift/curl/warp by sticking it to bed properly, your part can warp or break on it's own, sitting on a shelf 10 days after the print because of the huge amount of stress built into the part. I figured out that if you bake such the part after printing in the oven that can relieve stress and part will be very strong and usable
then nophed suggested heated bed, this way you slow down cooling of the part and as part cools more evenly there's less inbuilt stress so less warping. that's also why any draft will warp the part as draft will help quickly cool the part and that will cause warping. printing a skirt around the part will trap heat so part will cool slower and again warp less, this also work on cool bed with abs .. depending on the part you often have to have heated chamber in order to not allow part to cool fast enough to not warp ...
it's a very basic physics .. abs shrinks, different shrinkage at different levels stacked trough time creates the stress... you can read lot more about this inbuilt stress in books about extrusion (pipes, profiles... of different materials) as the turbulence inside the nozzle already pushes out the plastic that is "stressed" to begin with
My approach will continue to be heat-the-print-volume for a bit to see what I can accomplish on this. I had grand designs for a digital heated bed but I believe that this current approach can also work, just differently. It's like putting the bed in an oven instead of the bed itself being a hotplate.

 Well, that made me laugh.