Are you running version 0.3.5 of the TasmotaMQTT plugin? I'm going to do some testing later tonight, but that's the version necessary for the Cura plugin to work.
I sure am. Updated it today and definately running 0.3.5.
So just did a test and I think the issue might be not having a relay number entered. Try turning on SetOption26 on your Tasmota device and then add the number 1 to your relay number field. Restart OctoPrint once you've changed these settings so the subscriptions get re-initiated correctly. Then you should see the option in Cura.
@fieldOfView, there does seem to be something weird with the MQTT plugin that I haven't debugged yet, but I've attached the log for your reference. It doesn't seem to be triggering the power on at all. And the autostart of the ufp uploaded file (if the UFP plugin is enabled in OctoPrint) doesn't seem to autostart. Disabling the UFP plugin and restarting Cura seems to work when just a gcode is transferred to OctoPrint. I assume it's related to the file getting extracted into a gcode and the Cura plugin doesn't account for that.
cura.log (205.7 KB)
Did some additional testing and the API endpoint is definitely functional. The below jQuery ajax call does work to power on the tasmota device with the MQTT plugin.
$.ajax({
                url: API_BASEURL + "plugin/tasmota_mqtt",
                type: "POST",
                dataType: "json",
                data: JSON.stringify({
                    command: "turnOn",
                    topic: "sonoff",
                    relayN: "1"
                }),
                contentType: "application/json; charset=UTF-8"
            });
The cura.log seems to indicate that it is sending the command to the correct endpoint but doesn't show the data being submitted. Are you submitting with post or get in your api call? Because if I change my ajax call to the below it doesn't work either so that's my assumption the reason it's not working.
$.ajax({
                url: API_BASEURL + "plugin/tasmota_mqtt",
                type: "GET",
                dataType: "json",
                data: JSON.stringify({
                    command: "turnOn",
                    topic: "sonoff",
                    relayN: "1"
                }),
                contentType: "application/json; charset=UTF-8"
            });
I'm about to start testing the regular Tasmota web based plugin now and might get to testing Wemo and Domoticz tomorrow.
With the regular Tasmota plugin there aren't enough variables being passed to the command based on the current logic. The below is a functioning jQuery call.
$.ajax({
                url: API_BASEURL + "plugin/tasmota",
                type: "POST",
                dataType: "json",
                data: JSON.stringify({
                    command: "turnOn",
                    ip: "192.168.0.126",
                    idx: "1",
                    username: "admin",
                    password: "",
                    backlog_delay: 0
                }),
                contentType: "application/json; charset=UTF-8"
            });
The Tasmota (non-MQTT) plugin will work without username/password being sent and the device isn't configured to require a password, but the backlog_delay does have to be sent as it's not getting tested for in my plugin. I would either have to refactor my code to work more like tplink and loop through the configured plugs and find those values based on ip/idx versus the Tasmota plugin sending those parameters from the web interface side, or make it a truly optional parameter the same as username/password (which I'm doing now for speed).
Edit: Looks like this is going to take some major refactoring in code making it more in line with the TPLink plugin logic. Running system commands and connecting to printer after power on is still being done from the javascript side instead of the python side, so the auto-connect option doesn't get triggered. I'll add that to my todo list. After making the backlog_delay parameter optional the Cura plugin was triggering the on command, however I still think the username/password fields need to be incorporated into the Cura plugin long-term.
The Domoticz plugin works the same way with username/password as optional parameters. Haven't yet tested it's functionality from the Cura plugin.
The Wemo switch plugin just requires the ip. I'm not even sure if those devices have the option to set a username/password, haven't messed with the one I have much. Cura plugin integration functionality for it is fully functional.
Thanks for trying the development snapshots. I don't have most of the smart plugs, so I rely on your feedback. I also sometimes make assumptions that might not be correct.
One of the aforementioned assumptions for the Tasmota MQTT is that both the topic and the relay number need to be not empty. If they are, I assume that the plugin is not yet configured, and it does not show up in the interface. Please correct me if this assumption is wrong (eg if it should be possible to use the plugin without a relay number, or without an MQTT topic).
For most of the other smart plug plugins I make a similar assumption that the IP and label fields have to be entered. Again, please correct me if this is not correct.
This has been an issue with UFP file support from the start; The plugin sent the .ufp file to OctoPrint with the option to "select" and "print" the file after uploading. But the .ufp file cannot be selected, let alone be printed directly; instead the extracted .ufp.gcode file needs to be selected and printed.
I have fixed this (this week) here and a new development snapshot also fixes some other issues.
For the sake of keeping this thread more "accessible", shall we continue the discussion on the different power plug plugins on github? Eg here: https://github.com/fieldOfView/Cura-OctoPrintPlugin/issues/141
Thanks Guys for looking into this. The relay number doesn't need to be set for a single relay device. Empty is valid. The only time, from my understanding that a relay number has to be set is in the case of a multi-relay device.
Not necessarily...it is also required (and actually recommended from my point of view) if SetOption26 is enabled in Tasmota. In that situation the relay number would be 1. The only reason I mention that is because there have been issues posted to the plugin's repositories where gcode commands won't function properly if it's not set that way.
A trigger-happy person at Ultimaker pushed the wrong button, removing the OctoPrint Connection plugin from the Marketplace. I have looked sternly at my computer screen while explaining calmly what happened, and the person responsible feels appropriately sad.
I've been promised the new version of the plugin will be available shortly, with many goodies.
2 Likes
I hate it when that happens...
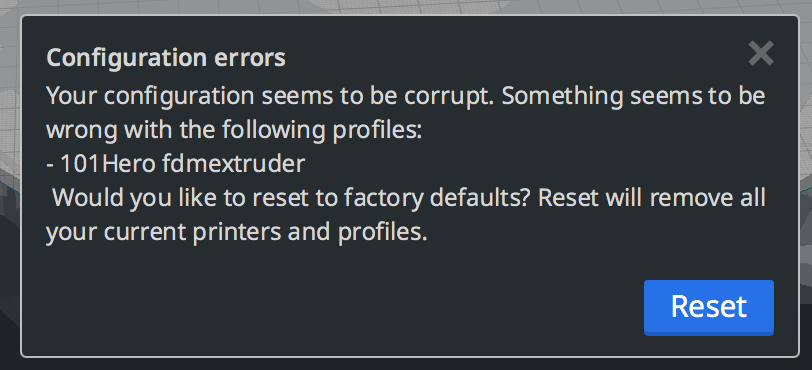
I only learned about this plugin yesterday and rushed home from work to install it. Not the smoothest of experiences. I have a post in the works over in the Utilimaker forum about how I cloned the repository into the plugins folder of my 4.4.1 installation (Mac), got the connect to Octoprint button and (long story short) ended up with no active connection to Octoprint and a corrupted Cura configuration.
Cura still slices and prints (at least one thing) but has forgotten some settings.
I think ultimately I will need to start from scratch as I don't think I was using profiles in Cura correctly anyway.
Let us know when we can install from the Marketplace again, yes?
As replied in the UM forum, sorry this happened to you and if you send me your configuration folder I'll do my best to uncorrupt your configuration for you.
2 Likes
Thank you for your kind offer!
And what is the best way to do that?
Despite decades as an engineer, I am new to this corner of technology...
Handling this through the Ultimaker community forum.
1 Like
The plugin is back in the Marketplace. The new version is a fairly major update, with many new features:
- Add support for TP-Link, Tasmota, Wemo and other smart-plug plugins
- Show message while waiting for the printer to come online after turning on the power
- Wait until gcode analysis is complete before starting a print if PrintTimeGenius is installed
- Fix connections over HTTPS and IPv6
- Fix starting print uploaded as UFP file when @jneilliii's Ultimaker Package Format plugin is installed
- Add timeout to API key checks so it is clearer what is going on when entering an API key
- Add button to open OctoPrint in print monitor
- Include updated zeroconf discovery library
4 Likes
awesome 
Thanks
Hello all,
just digging in the first time in the plugin and have some quesitions.
hopefully I have not overread it in the history of this blog, if yes appollogize for that.
If not,
I have installed in cura 4.5 the octoprint addin and in octoprint this plugin.
Established the connection to the printer and i can send files with " print to octoprint", where it appears.
but I dont get the preview icon even if the plugin is enabled.
using octoprint and pi Versions 1.3.12 and 0.15.1
In the installation text on github is said if you have to enabled the icon in settings ??
I cannot access the plugin, in installed plugins, and it does not appar in the pluginslist itself as a configurable entry
so could sombody tell me where the setting is where i can enable the icon?
Naming,
when I upload a sliced file it automatically get .gcode at the end,
but
I understood that an ufp should be send,
If yes I dont find any settings to switch from gcode to ufp!?
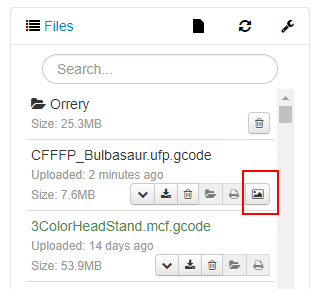
on the otherside, if I look at the shown picture in githup where I can see the the example with the icon, then name of the
file is CFFFP_Bulbasaur.ufp.gcode.
so what is that for a file:? a renamed ufp file or a gcode file renamed with ufp in the name
If I do so and I try to upload the ufp.gcode file I get an error.
Please clarify
Thank you in advance for helping
I'm not quite sure what preview icon you mean, but I think you mean a thumbnail image of the file to be printed. For that to work, a plugin on the OctoPrint side of things is needed (written by @jneilliii) :
If the Cura OctoPrint Connection plugin detects that the UltimakerFormatPackage plugin is installed on the OctoPrint instance, it will automatically upload .ufp files instead of .gcode files.
To clarify: an ufp file is basically a zip file that includes the gcode and a thumbnail image. The plugin on the OctoPrint instance provides the capability to receive such files and show the included image in the interface. The plugin in Cura sees if the OctoPrint instance can accept ufp files and creates them instead of standard .gcode files. As an added bonus to the thumbnail image, the file transfer from Cura to OctoPrint should be somewhat quicker because the file is compressed.
Hello,
thanks for the fast replay
I assumed that the little icon automatically appears as soon as both the cura Plugin and the octopi plugin are installed on ether side .
I hav done so but the little icon is missing after uploading a .gcode file from cura ofer the octo connection
!
do not wonder, I put the .ufp. by hand in the name but this does not bring up the Icon.
the Ultimaker plugin ist installed and active
Octoprint Connection is installed in cura and working
as I said it uploads a gcode file but the little icon is not shown, do I assume wrong that it automatically
should appear if a ufp file is uploaded?
Did investigate the uploaded file : YES it is a zip file with .gcode ending
So it seems to upload right the ufp file !!
What am i missing where is the secret setting to switch it on 
Thanks in advance