HI Gina HG I just had to find a way of thanking you for Getting my Qidi X plus printer working on Octoprint So a big Thank you
If some Kind soul could find a way/plugin of making the bed lower after I cancel a print it would be perfect.
With my best regards Daren Ward from Brexit Land
1 Like
I moved your post to a new thread - that wasn't the right place for that question 
Feel free to change the title.
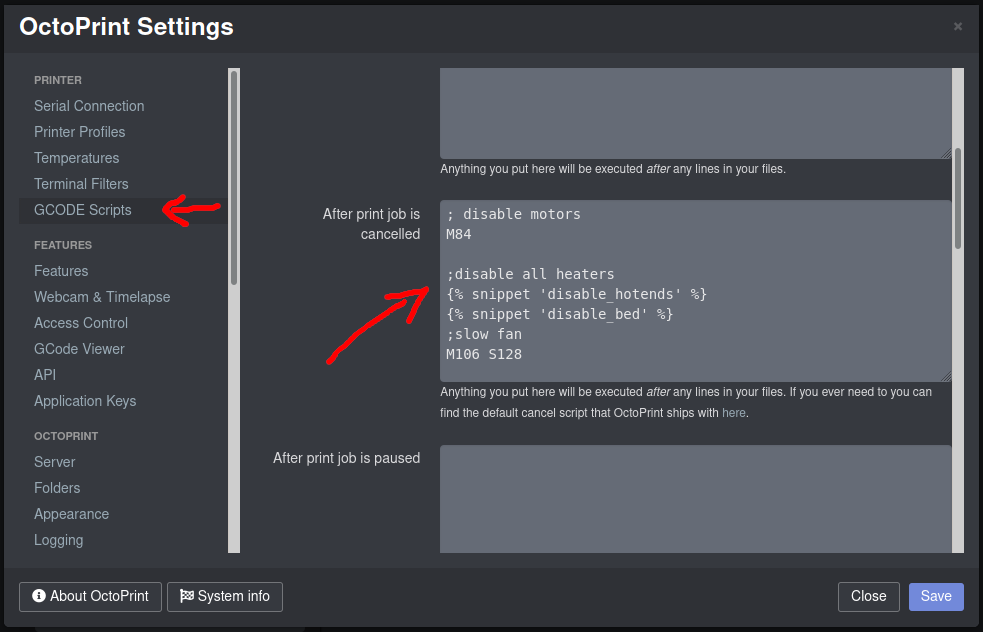
You can do that with a cancel gcode 
You could use this one for example
G91 ;Relative positioning
G1 E-2 F2700 ;Retract a bit
G1 E-2 Z0.2 F2400 ;Retract and raise Z
G1 X5 Y5 F3000 ;Wipe out
G1 Z10 ;Raise Z more
G90 ;Absolute positionning

G1 X0 Y150 ;Present print
M107 ;Turn-off fan
M104 S0 ;Turn-off hotend
M140 S0 ;Turn-off bed

M84 X Y E ;Disable all steppers but Z
I was not expecting the problem to be solved I just wanted to thank Gina for getting my X plus working on octoprint for none code monkey people like myself.
Hi and thank you I have copied and pasted that script in to the Gina editor lol I hope.
Now thank God The X plus mostly only has user error's like not cleaning the fellable plate off nice and clean and just using some of the cheapest hair spray I can find. I hope I will never have to use it but if that script works it will be great I had to start a another file to get the plate to lower lol I was looking at making a tool to wind the bed screws down by hand but that may not be needed now cheers
1 Like
HI That cancel code sent the whole Pi into a crash so would not recommend that code for Qidi Xplus unless you are an expert on the code and have someone at the printer to switch it off manually which I had arranged for the test, so it did not do any damage. The pi needed to be rebooted twice before it would work and i could log in remotely. the X plus did do a perfect print after as normal so all is well. cheers my best Daren/
Whoops forgot tho change a line
That's my end gcode from cura and I missed this part when I copied it
G1 X0 Y{machine_depth}
Change it to something like G1 X0 Y150
I'm really sorry
Don;t know if it helps but I had a red message saying ?? line was not ending kind of going round in circles I was to bussy getting on the phone to say kill the machine power as the remote end had died the pause and start worked ok had to reload a model before we could get it down may be we should get a few people to check it out just to be safe. I have enabled all the error tick boxes now I had most ticked any way but one more needed to be ticked some one must be able to see the code I guess at your HQ
HI This code seemed cancel the Print and lower the bed about 25mm /1" which is much better but as I have No idea at all about G code and as Gina HG has pointed out Qidi G code seems different so I still have to start a new print job to get the bed to lower to the bottom. Maybe some part of the finish/end of job G code could be used as the bed lowers fine after the job has finished. Or I may not be pasting it right.
; disable motors
M84
G91 ;Relative positioning
G1 E-2 F2700 ;Retract a bit
G1 E-2 Z0.2 F2400 ;Retract and raise Z
G1 X5 Y5 F3000 ;Wipe out
G1 Z10 ;Raise Z more
G90 ;Absolute positionning
G1 G1 X0 Y200 ;Present print
M107 ;Turn-off fan
M104 S0 ;Turn-off hotend
M140 S0 ;Turn-off bed
Increase the Z value. Z10 means 10 mm. You could try 100 instead.
There are two things I would change in the gcode you posted.
I would put M84 at the end - it makes no sense to disable the steppers and use them again right after.
Then you got two G1 here
A quick look at pictures of the Qidi printers shows that the bed moves up and down as opposed to the extruder moving up and down.
With that being the case, you are probably better off changing the Z movement from relative to absolute and just moving Z to whatever the "maximum" value is.
In the example gcode above, move the G1 Z10 ;Raise Z more after the G90 ;Absolute positioning and use a value for Z which represents the limit of the printer.
The line G1 G1 X0 Y200 (remove extra G1) could be changed to G1 X0 Y200 Zxxx and just delete the G1 Z10 line.