I know a lot of people have been asking for this, and i have not seen a full post about how to do this, but i finally got it working after about ~2 hours. Mostly with only using the built in options for octoprint.
(if you want to quickly switch, you will need to download a single plugin "MultiCam", but it does work without it)
First i need to mention this wouldnt be possible without the help of @Charlie_Powell, @foosel, or @Wit4r7 .
As a quick pre requisite,
Running mulitple USB cameras off of a single Pi, puts a lot of stress on the internal voltage regulator for the USB ports. I highly recommend that you only use multiple cameras when they are plugged into a compatible, externally powered, USB hub.
Additionally, Each camera can add anywhere from 3-6% background CPU usage when accessing the web UI. I did have this working on my Raspi 3 B+, but i mainly use a Raspi 4. YMMV.
Most USB cameras consume around 600ma of current draw, but this is just an estimate.
| Model | Max power output of USB ports |
|---|---|
| Raspberry Pi Zero, 1 | 500mA per port1 |
| Raspberry Pi 2, 3, 4 | 1200mA total across all ports |
| Raspberry Pi 5 | 600mA if using a 3A supply, 1600mA if using a 5A supply |
Also, you shouldnt really be powering your printer with the USB cable either, you can follow the tutorial outlined here by @PrintedWeezl
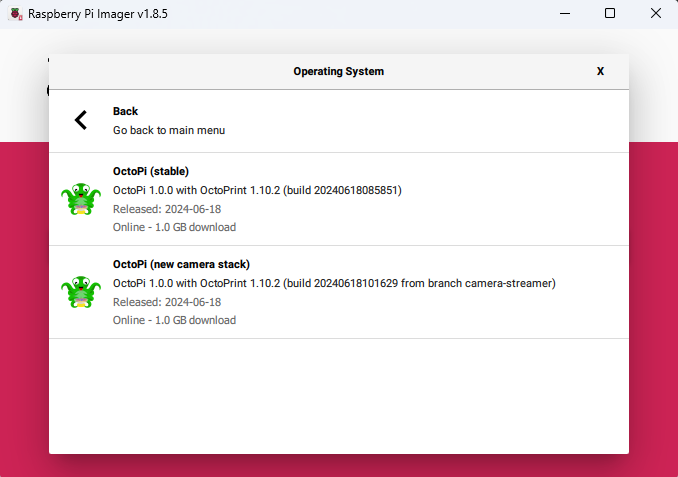
So to start off, you need the newest build of OctoPi (New Camera Stack)
Theres a great introduction on this by @foosel here
So lets get started.
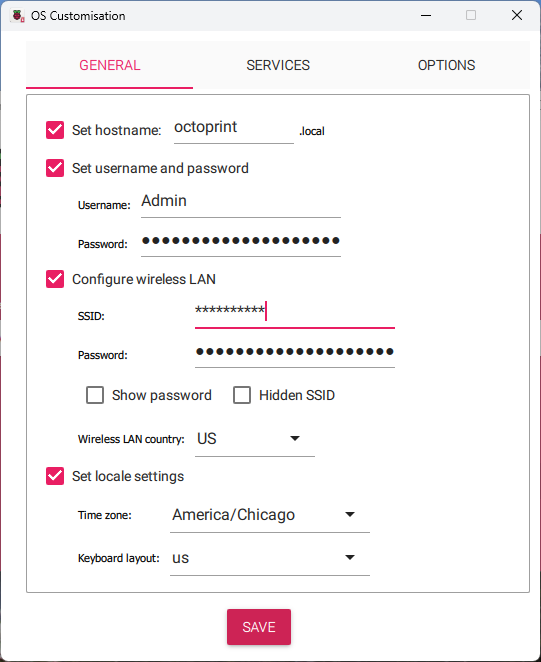
- Flash OctoPi (new camera stack) using Raspberry Pi Imager.
(I recommend setting the advanced options by pressing CTRL+SHIFT+X, and setting the username and password for SSH under the General tab, as we will be using it later. otherwise the default is pi/raspberry)
- Once that is done, Setup Octoprint as you normally would, or restore a backup.
Were going to remove the default camera, and then add our own cameras. That way we can configure our camera's settings individually.
Lucky for us @foosel provided us with instructions.
The configuration shipped on the image will support running either a libcamera device or a USB camera device. To support multiple cameras (one libcamera and/or one or more USB cameras), you'll need to add configuration files to tell the camera setup what to start up.
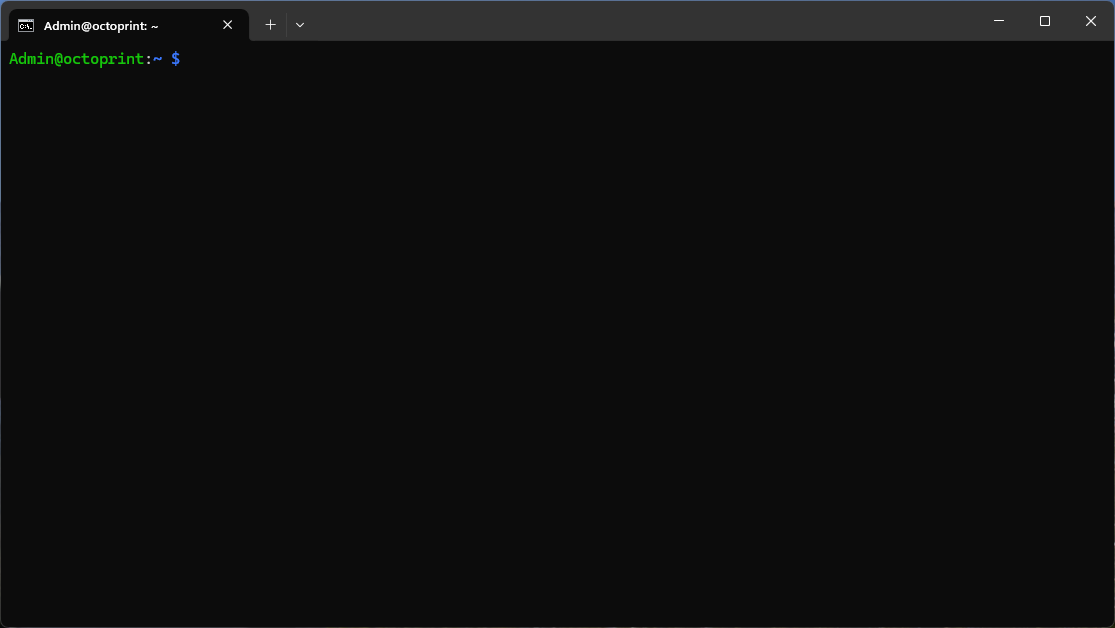
The image ships with some helper scripts to assist in the initial multicam setup. You'll need to log into your Pi via SSH or with a display and keyboard to use these.
- With all cameras unplugged, Lets SSH into your Pi.
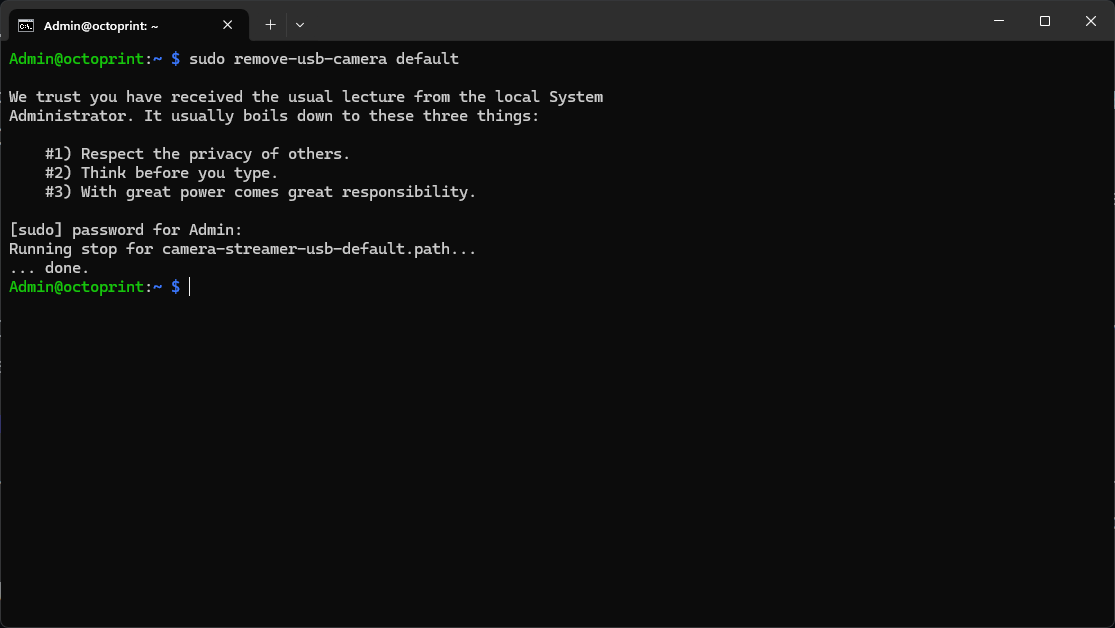
- Lets start by running
sudo remove-usb-camera default
-
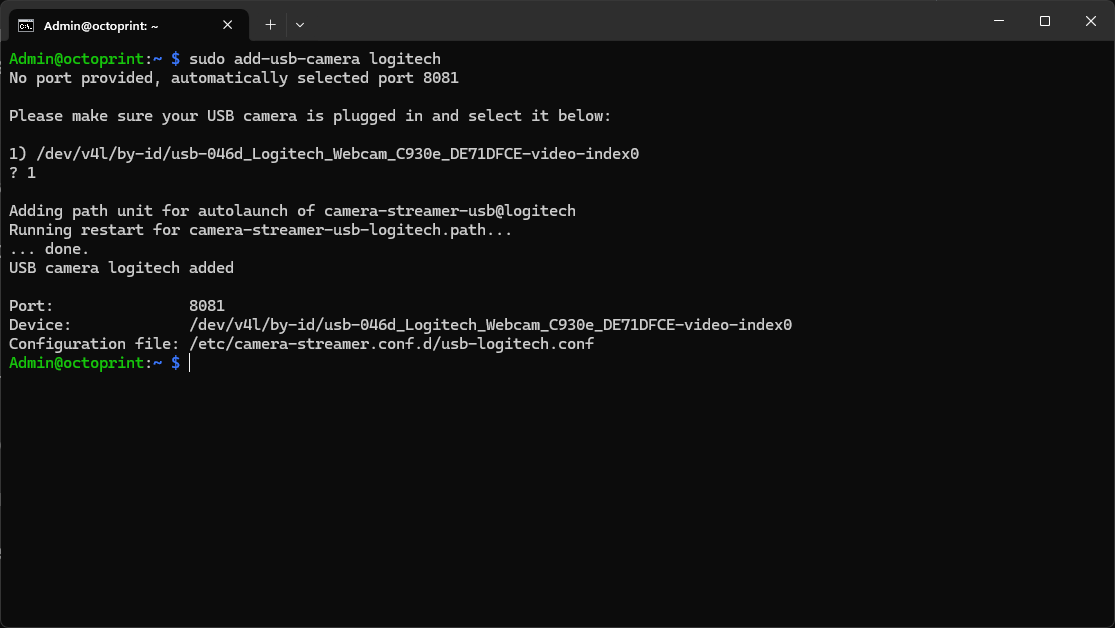
Plug in your first USB camera.
-
Then run
sudo add-usb-camera <camera name>Replacing<camera name>with the name of your first camera.
-
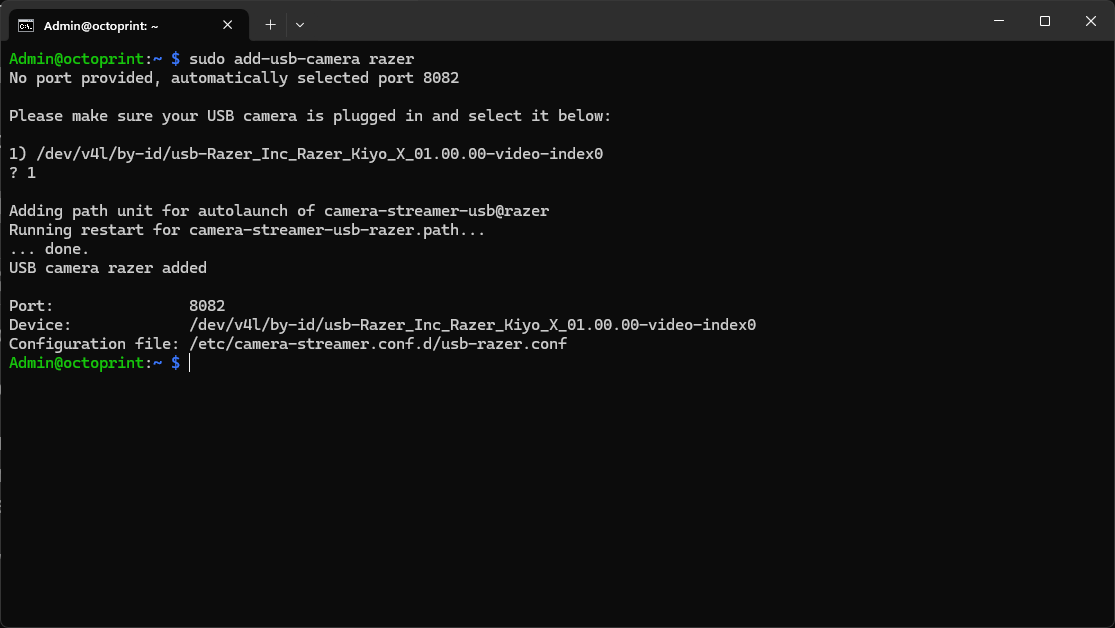
Unplug your first camera, and plug in your second one.
-
run
sudo add-usb-camera <camera name>Replacing<camera name>with the name of your second camera. -
rinse and repeat for as many as you like.
Now we need to configure the settings for each camera individually, by navigating to the camera streamer config folder.
- Lets type
cd /etc/camera-streamer.conf.d
We need to edit all files in this directory.
For camera 1, we need to change the port to 8080 (octoprints default camera),
and for camera 2, we need to change the port to 8081,
and for libcamera we need to change the port to 8082.
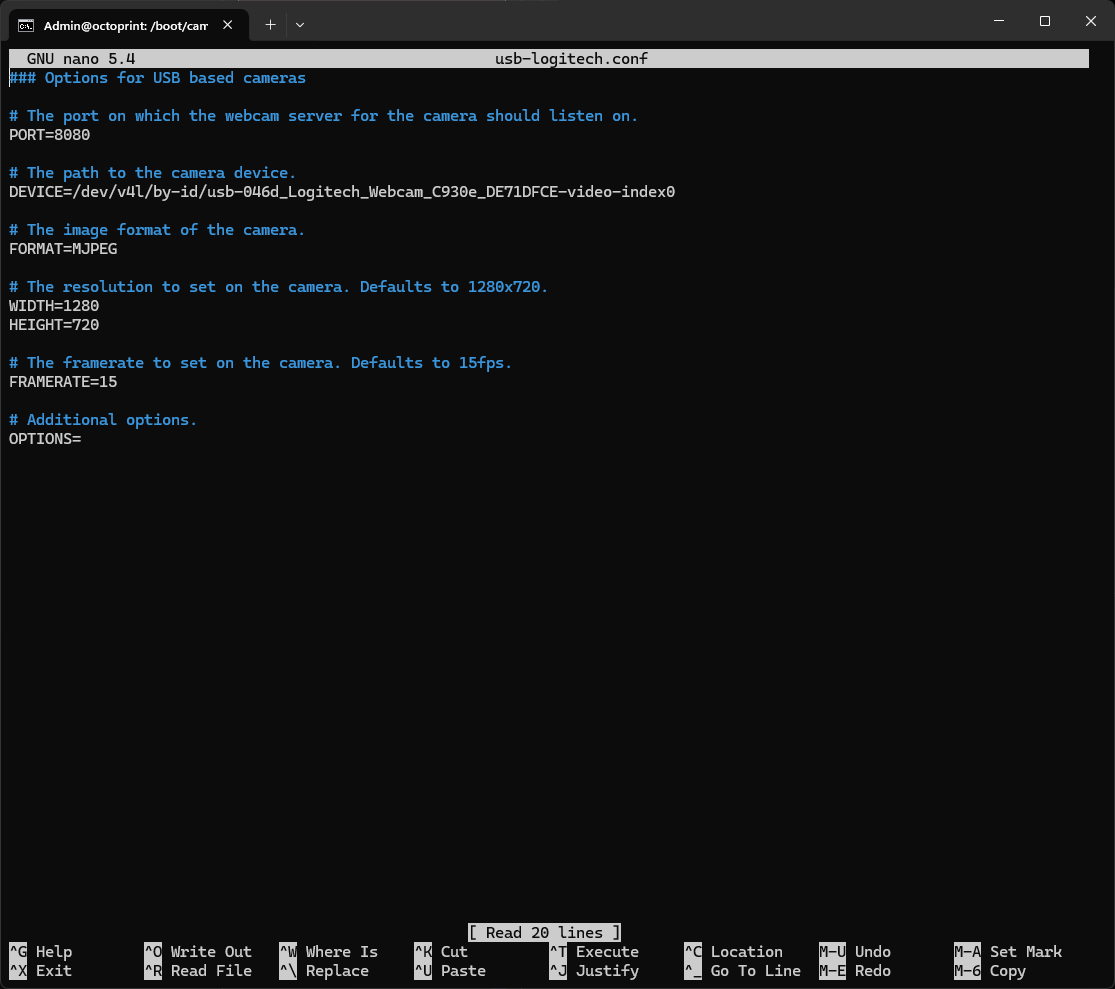
We will be editing the usb-<camera name>.conf files using nano.
Replace <camera name> with the names of your cameras.
In my case, its by running
sudo nano usb-logitech.confChanging the port to 8080.
(I also Chnaged the format here to MJPEG because Octoprint was not displaying my second camera with them both being YUYV, as mentioned here by @Wit4r7)
andsudo nano usb-razer.confchanging the port to 8081
make sure to change the libcamera to a higher port than your highest camera.
sudo nano libcamera.confchanging the port to 8082
You can find a description on the additonal camera options here

Now that we have all the ports configured, we need to forward the second camera, and any additional cameras to the haproxy service, so octoprint can see it.
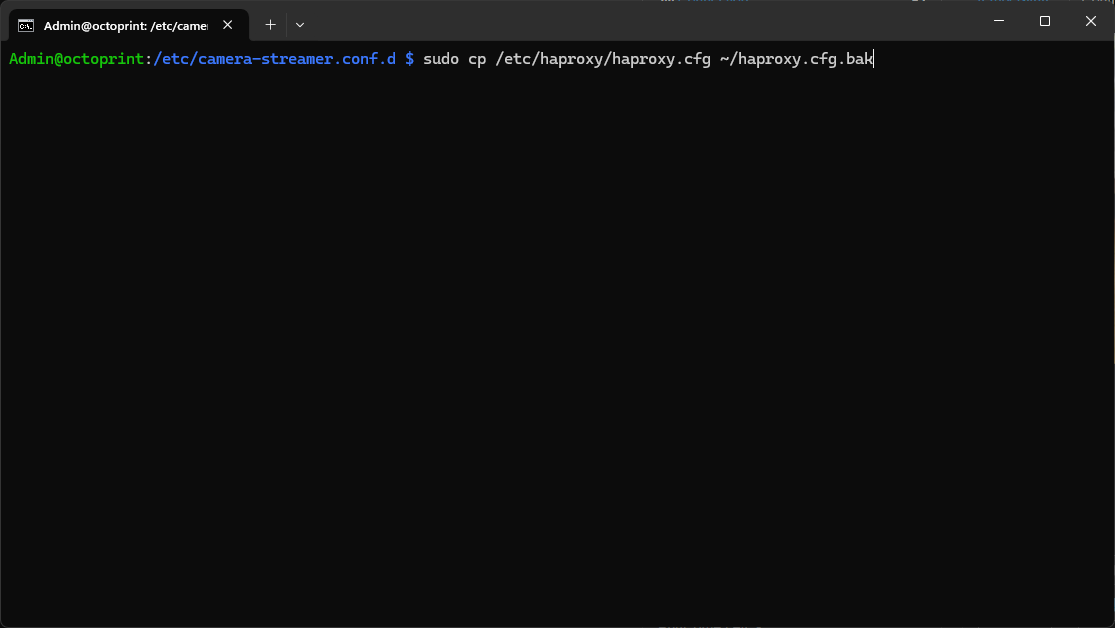
First lets backup the haproxy configuration
(Just in case it goes wrong and you have to revert later, you can easily copy it back)
- run
sudo cp /etc/haproxy/haproxy.cfg ~/haproxy.cfg.bak
Open the haproxy configuration.
sudo nano /etc/haproxy/haproxy.cfg
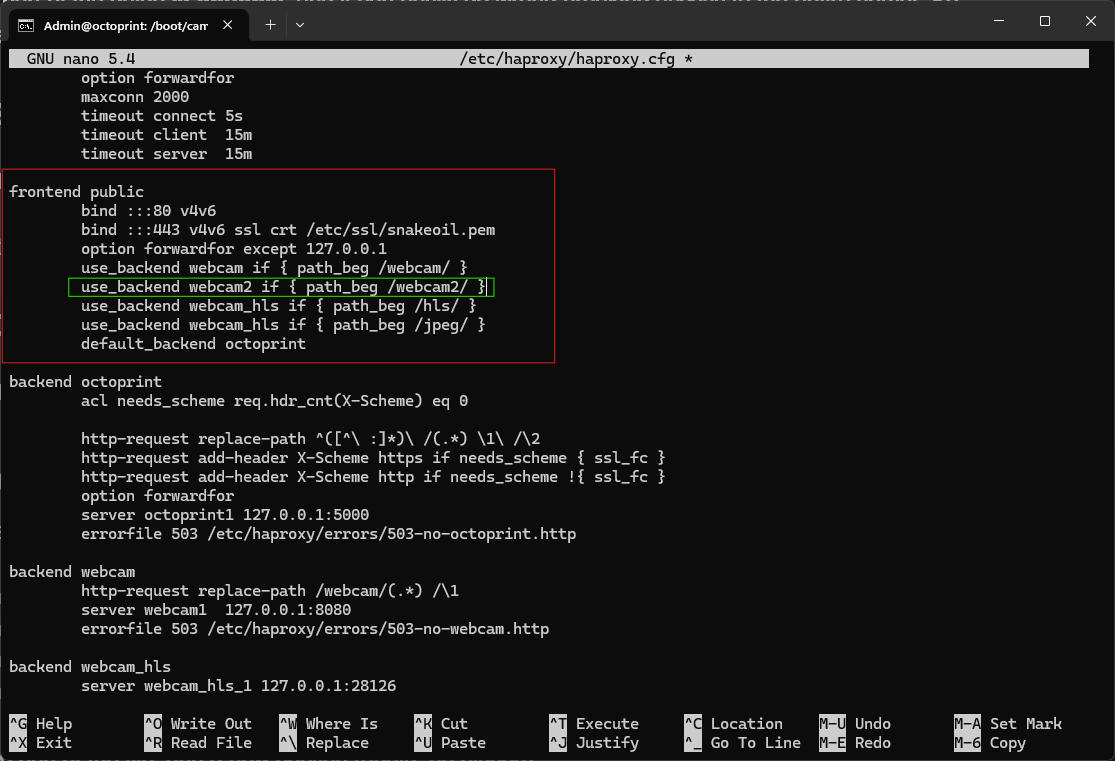
Add the required sections to this file
Under the frontend public section, add the following line in (without the + symbol!):
  use_backend webcam if { path_beg /webcam/ }
+ use_backend webcam2 if { path_beg /webcam2/ }
  use_backend webcam_hls if { path_beg /hls/ }
  use_backend webcam_hls if { path_beg /jpeg/ }
(add any additional lines for more cameras)
+ use_backend webcam2 if { path_beg /webcam2/ }
+ use_backend webcam3 if { path_beg /webcam3/ }
+ use_backend webcam4 if { path_beg /webcam4/ }
+ use_backend webcam5 if { path_beg /webcam5/ }
  use_backend webcam_hls if { path_beg /hls/ }
  use_backend webcam_hls if { path_beg /jpeg/ }
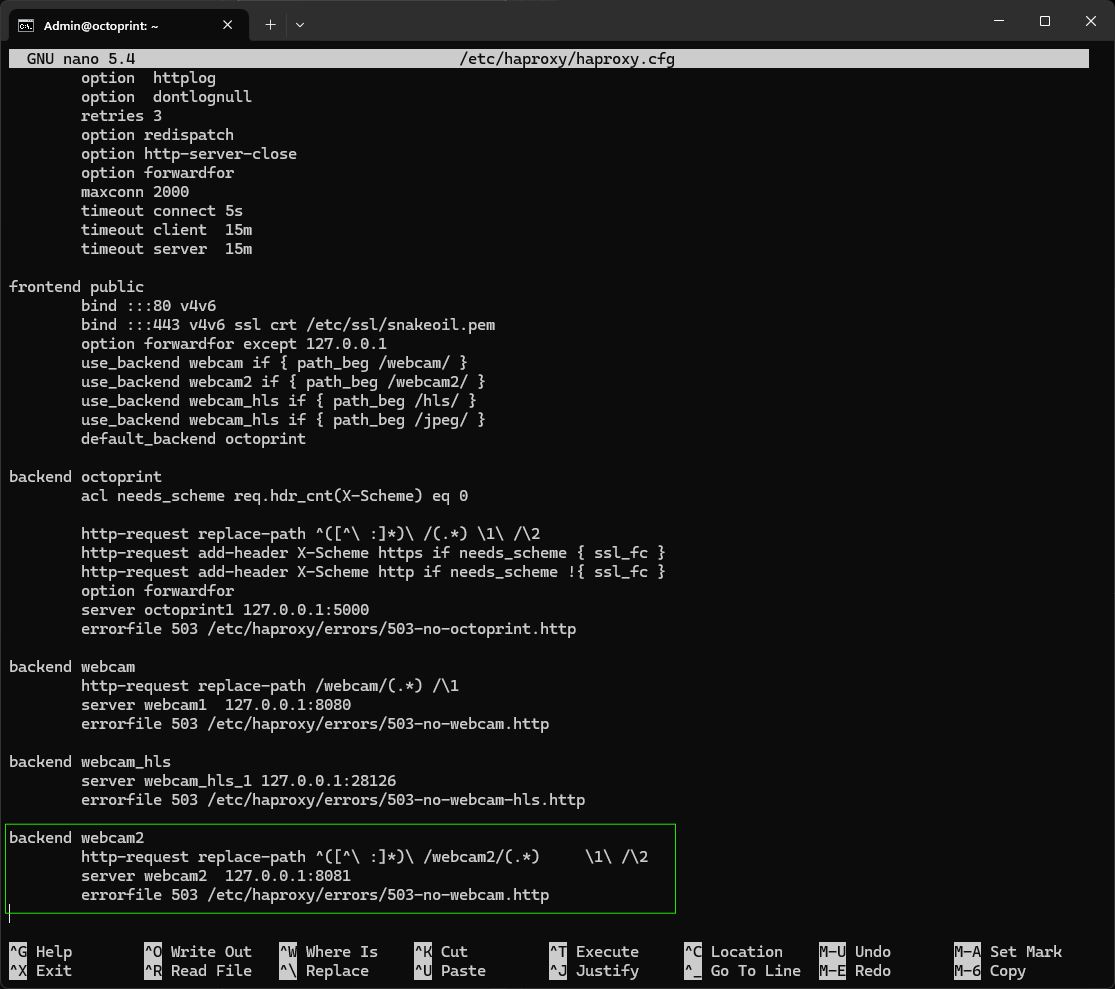
At the end of the file, add a new section backend webcam2 (again, no pluses):
+backend webcam2
+       http-request replace-path ^([^\ :]*)\ /webcam2/(.*)     \1\ /\2
+       server webcam2  127.0.0.1:8081
+       errorfile 503 /etc/haproxy/errors/503-no-webcam.http
(add any additional sections for more cameras)
+backend webcam2
+       http-request replace-path ^([^\ :]*)\ /webcam2/(.*)     \1\ /\2
+       server webcam2  127.0.0.1:8081
+       errorfile 503 /etc/haproxy/errors/503-no-webcam.http
+backend webcam3
+       http-request replace-path ^([^\ :]*)\ /webcam3/(.*)     \1\ /\2
+       server webcam2  127.0.0.1:8083
+       errorfile 503 /etc/haproxy/errors/503-no-webcam.http
+backend webcam4
+       http-request replace-path ^([^\ :]*)\ /webcam4/(.*)     \1\ /\2
+       server webcam2  127.0.0.1:8084
+       errorfile 503 /etc/haproxy/errors/503-no-webcam.http
+backend webcam5
+       http-request replace-path ^([^\ :]*)\ /webcam5/(.*)     \1\ /\2
+       server webcam2  127.0.0.1:8085
+       errorfile 503 /etc/haproxy/errors/503-no-webcam.http
- ctrl+o, then Enter, then ctrl+x
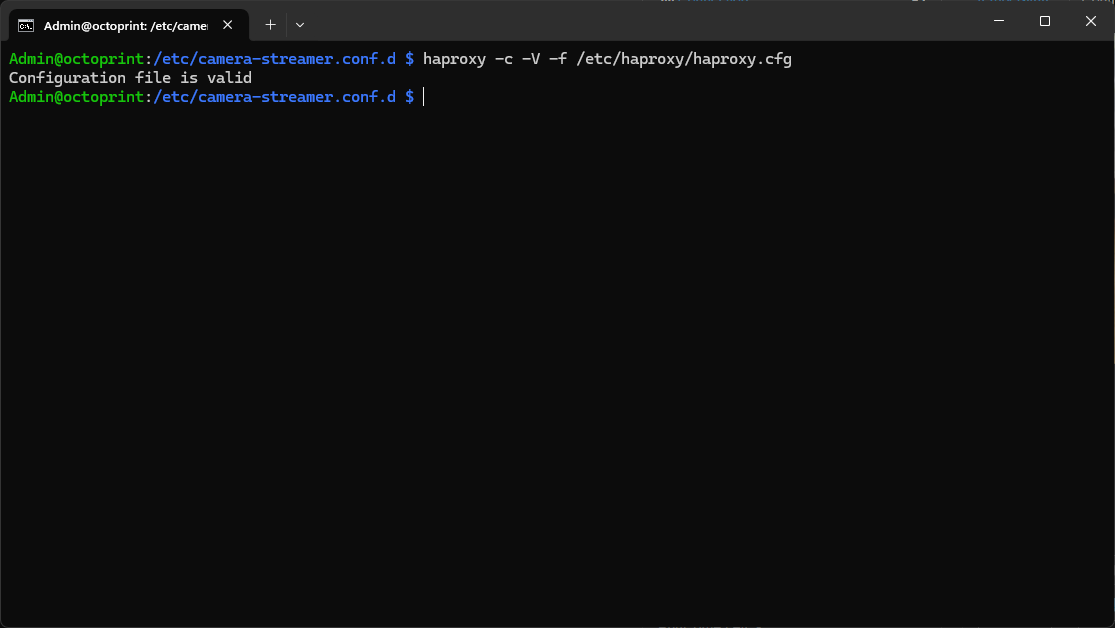
Lets validate the configuration
Run the command
haproxy -c -V -f /etc/haproxy/haproxy.cfg
It should reply with 'Configuration file is valid', or with the errors that need fixing.
If all is good, restart haproxy using
-
sudo service haproxy restart. -
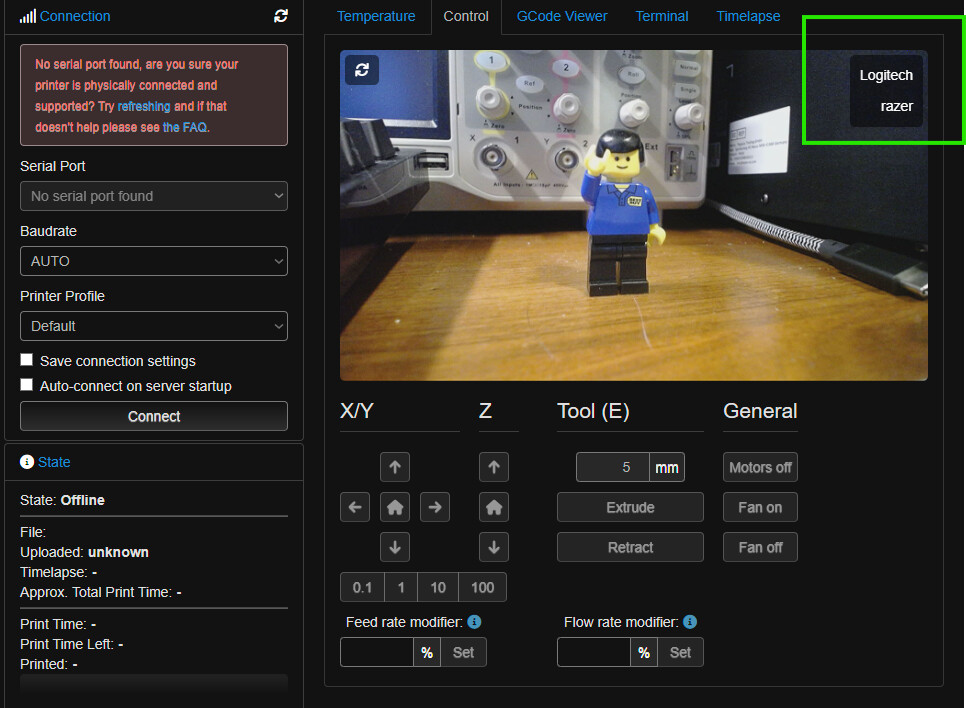
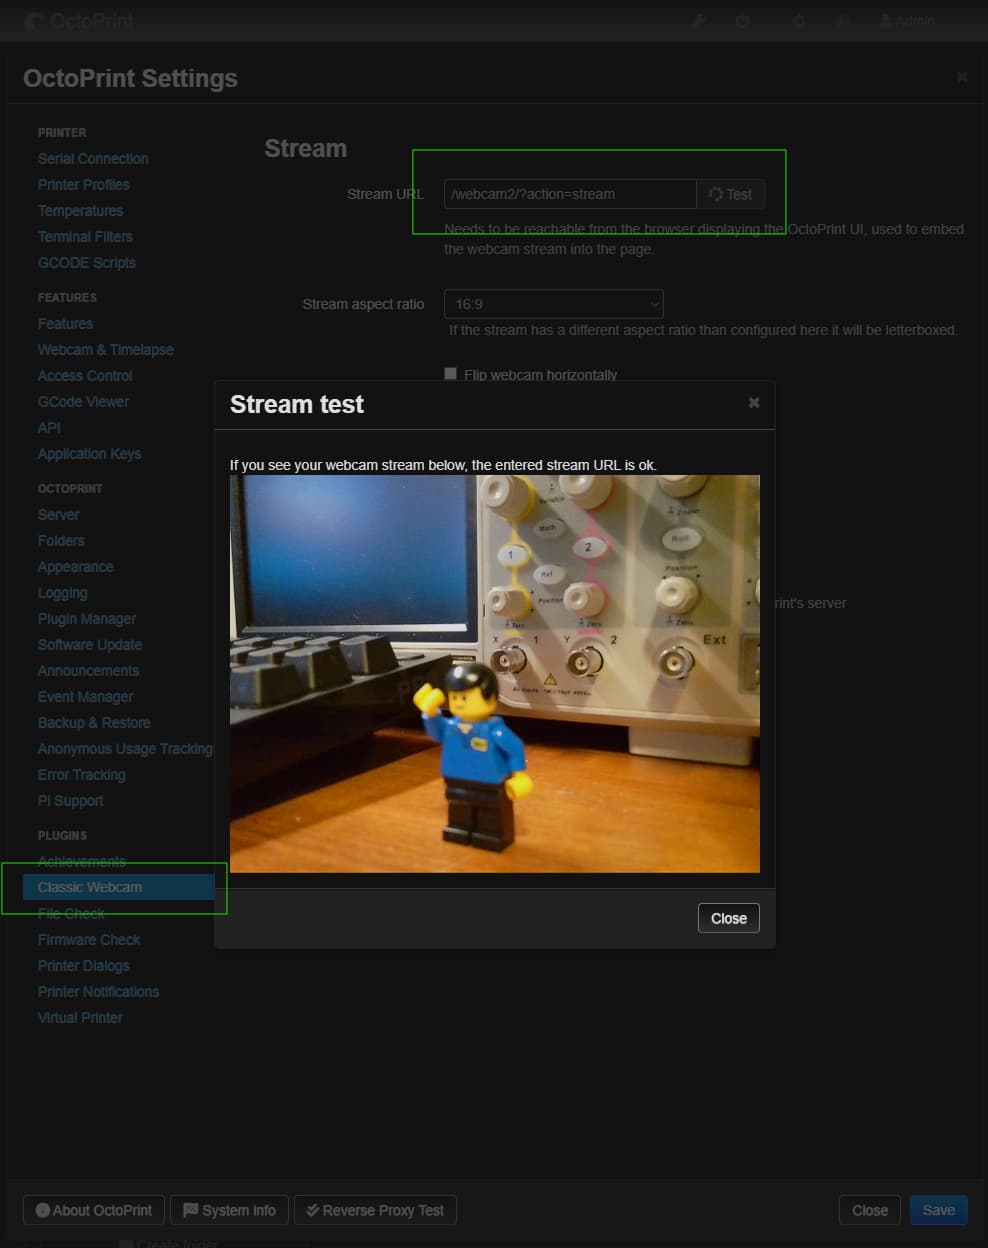
Test and use
You can test if this works by going to /webcam/?action=stream or /webcam2/?action=stream, within the classic webcam plugin, and hopefully see your webcams coming up! If not, you may need to reboot your Pi.
Webcam 1

Webcam 2
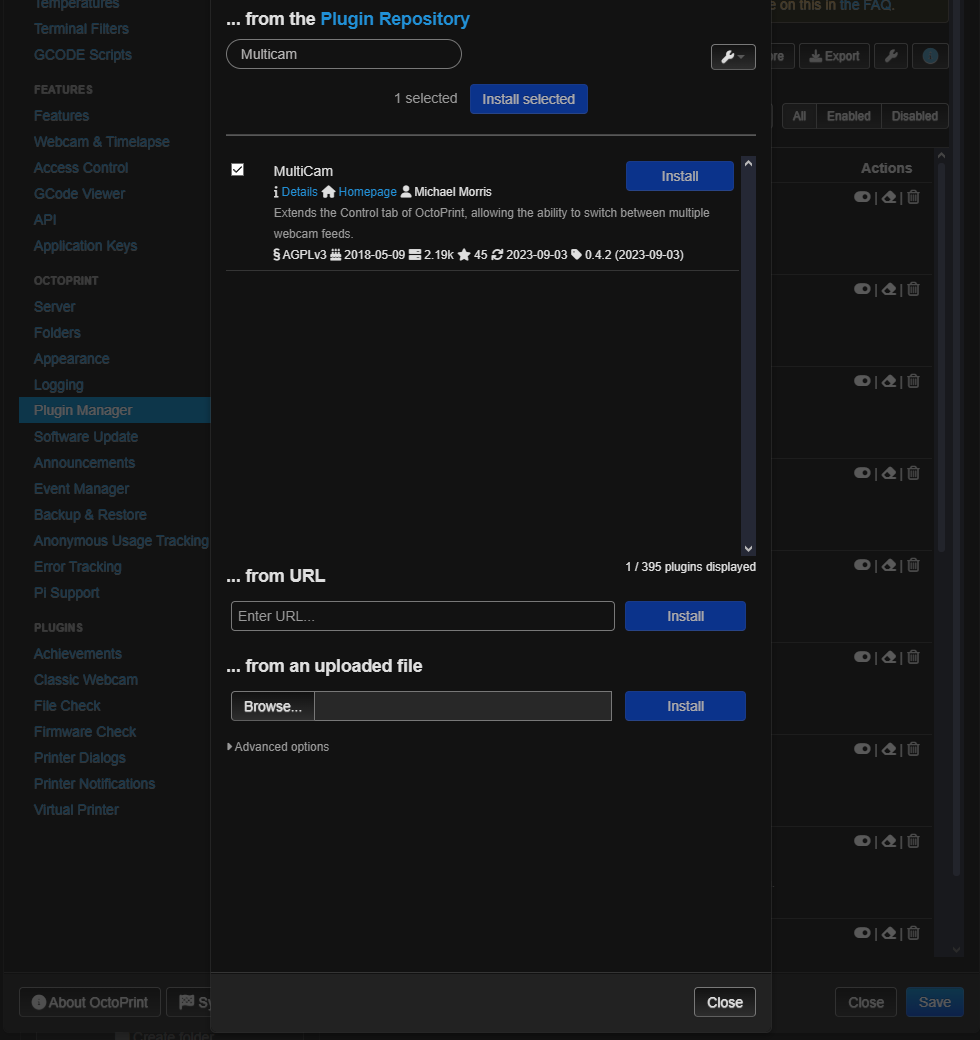
- Switching webcams - Download the plugin
MultiCamfrom the repository.
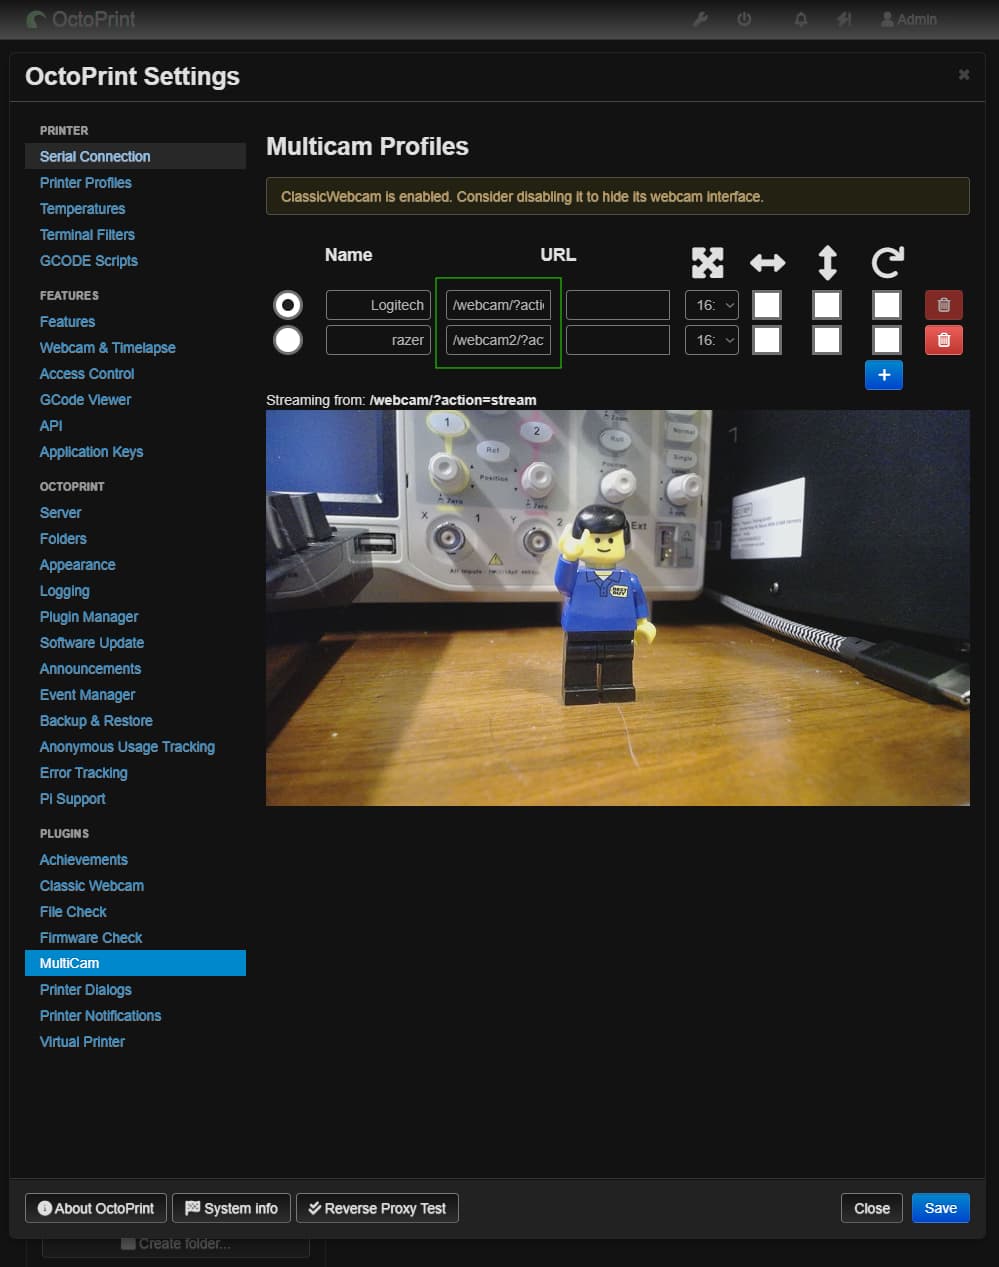
- Add your streams to MultiCam!
/webcam/?action=stream
/webcam2/?action=stream
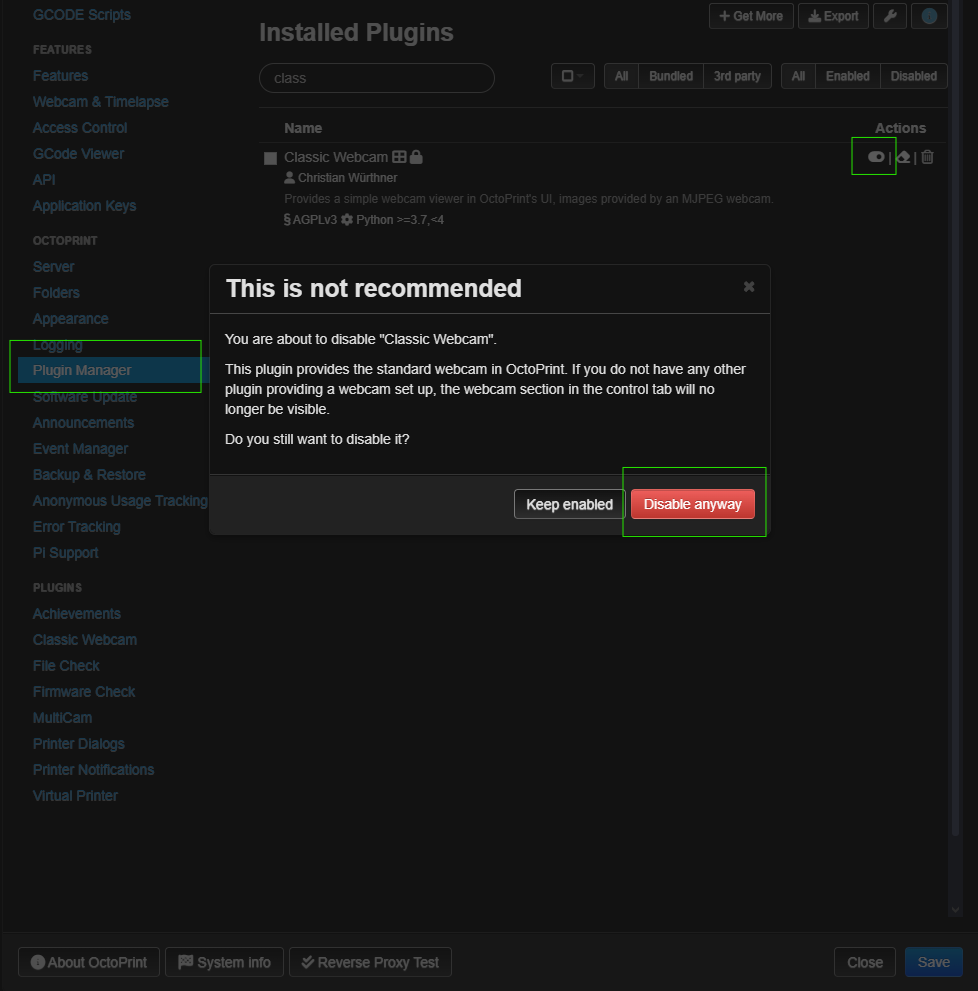
- (Optional) Disable classic Webcam plugin from the plugin manager.
- Profit! You can now choose which webcam you want, Happy Printing!!