If you want to run OctoPrint behind a reverse proxy such as Nginx, HAProxy, Apache's mod_proxy, Caddy or traefik, you can find some configuration examples below.
On top of making sure that websocket forwarding works properly through your proxy, please pay special attention to the forwarding options and additional headers. In order for OctoPrint to properly and securely work behind one or more reverse proxies, it is of utmost importance you make sure the following headers are correctly configured:
X-Forwarded-For: Needs to contain the connecting client's IP, otherwise OctoPrint will think your reverse proxy is the client and possibly not behave properly or even bypass some of the security checks if you have "autologin local" configured.X-Forwarded-Hostor alternativelyX-Forwarded-ServerandX-Forwarded-Port: Needs to contain the originalHostheader used for the request, so server name and optionally the port number used by the connecting client to make the request. Without this configured correctly, OctoPrint might generate wrong external links and cookies and thus not work properly.X-Forwarded-ProtoorX-Scheme: If your reverse proxy is used to access OctoPrint throughhttps, this needs to contain that, otherwise OctoPrint won't be able to correctly generate external links and cookies and thus not work properly.X-Script-Name: If your reverse proxy makes OctoPrint accessible on a subpath (e.g.http://example.com/octoprint), this needs to be set to said subpath (e.g./octoprint). Otherwise OctoPrint won't be able to correctly generate external links and cookies, and thus not work properly.
Failure to correctly configure your reverse proxy will lead to issues, including a possible inability to login or undermining your security!
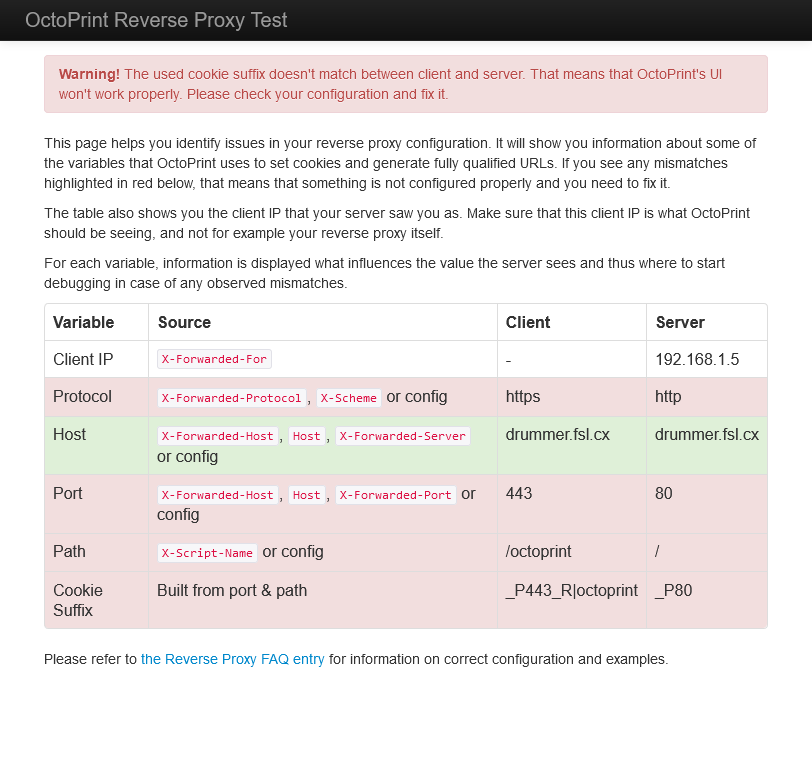
Starting with OctoPrint 1.8.4, OctoPrint also ships with a handy test page that you can use to verify and/or debug your configuration. You can find it under /reverse_proxy_test/ on your instance, e.g. http://octopi.local/reverse_proxy_test/:
Reverse proxies and Autologin
Especially if you have Autologin configured so OctoPrint will log you in automatically when accessing it from a trusted client IP, it is critical to make sure your reverse proxy is configured to correctly forward the client's IP. If you have multiple reverse proxies in front of OctoPrint, every single one should add an X-Forwarded-For header with the client IP.
If set and sent by a trusted proxy (defined in server.reverseProxy.trustedDownstream in config.yaml, or server.reverseProxy.trustedProxies for OctoPrint 1.11.0+) OctoPrint will retrieve the client IP used for determining whether to automatically login the client from that header, ignoring any other configured trusted proxies.
So, in order to ensure that OctoPrint sees the actual client IP and not one of your reverse proxies, ensure both of the following:
- configured all your reverse proxies to properly add/extend
X-Forwarded-For- most reverse proxies should have an option for this or even do it automatically already - add all your reverse proxies to
server.reverseProxy.trustedDownstream(orserver.reverseProxy.trustedProxiesfor OctoPrint 1.11.0+)
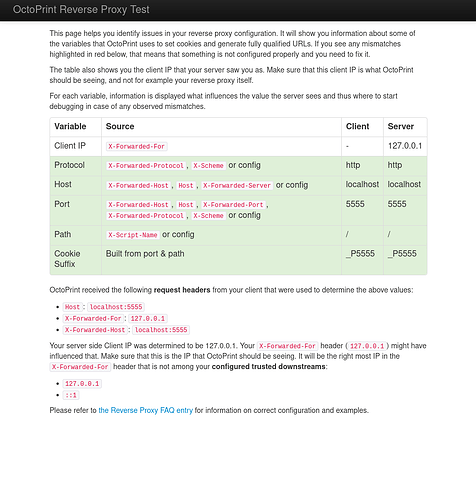
To help you validate your reverse proxy configuration, the aforementioned reverse proxy test page also displays the received headers including X-Forwarded-For and the configured trusted proxies in the authenticated view, added in OctoPrint 1.10.1. You can access it through a link on the reverse proxy page, or by appending ?authenticated to the reverse proxy url, so /reverse_proxy_test/?authenticated:
Configuration Examples
config.yaml
OctoPrint up to and including 1.10.x
config.yaml contains much more than this. You will probably need to find server and create reverseProxy and trustedDownstream under it. You can specify individual IPs and CIDR ranges.
server:
  reverseProxy:
    trustedDownstream:
      - "127.0.0.0/8"
      - "::1"
      - "192.168.1.1"
      - "::ffff:192.168.1.1"
OctoPrint 1.11.0+
config.yaml contains much more than this. You will probably need to find server and create reverseProxy and trustedProxies under it. You can specify individual IPs and CIDR ranges.
server:
  reverseProxy:
    trustedProxies:
      - "192.168.1.1"
      - "::ffff:192.168.1.1"
      - "192.168.12.0/24"
OctoPrint 1.11.0+ will include 127.0.0.0/8 and ::1 automatically, unless you have set server.reverseProxy.trustLocalhostProxies to false.
Nginx
For Nginx the basic forwarding configuration is something like this:
    worker_processes  1;

    events {
        worker_connections  1024;
    }

    http {
        include            mime.types;
        default_type       application/octet-stream;
        sendfile           on;
        keepalive_timeout  65;

        map $http_upgrade $connection_upgrade {
            default upgrade;
            '' close;
        }

        upstream "octoprint" {
            server 127.0.0.1:5000;
        }

        upstream "mjpg-streamer" {
            server 127.0.0.1:8080;
        }

        server {
            listen       80;
            server_name  localhost;

            location / {
                proxy_pass http://octoprint/;
                proxy_set_header Host $http_host;
                proxy_set_header Upgrade $http_upgrade;
                proxy_set_header Connection "upgrade";
                proxy_set_header X-Real-IP $remote_addr;
                proxy_set_header X-Forwarded-For $proxy_add_x_forwarded_for;
                proxy_set_header X-Scheme $scheme;
                proxy_http_version 1.1;

                client_max_body_size 0;
            }

            location /webcam/ {
                proxy_pass http://mjpg-streamer/;
            }

            # redirect server error pages to the static page /50x.html
            error_page   500 502 503 504  /50x.html;
            location = /50x.html {
                root   html;
            }
        }
    }
Warning
Be extra sure to include
proxy_http_version 1.1or the web socket connection will fail.
If you want to serve OctoPrint on a different base URL than / (e.g. /octoprint/), you'll need to adjust its location definition slightly by changing the location path itself, the proxy_pass target and adding the X-Script-Name header:
    location /octoprint/ {
        proxy_pass http://octoprint/; # make sure to add trailing slash here!
        proxy_set_header Host $http_host;
        proxy_set_header Upgrade $http_upgrade;
        proxy_set_header Connection "upgrade";
        proxy_set_header X-Real-IP $remote_addr;
        proxy_set_header X-Forwarded-For $proxy_add_x_forwarded_for;
        proxy_set_header X-Scheme $scheme;
        proxy_set_header X-Script-Name /octoprint;
        proxy_http_version 1.1;

        client_max_body_size 0;
    }
HAProxy 2.x
If you just want to run OctoPrint on the server root of the reverse proxy with mjpg-streamer running under /webcam, the following configuration is sufficient:
global
        maxconn 4096
        user haproxy
        group haproxy
        daemon
        log 127.0.0.1 local0 debug

defaults
        log     global
        mode    http
        option  httplog
        option  dontlognull
        retries 3
        option redispatch
        option http-server-close
        option forwardfor
        maxconn 2000
        timeout connect 5s
        timeout client  15min
        timeout server  15min

frontend public
        bind *:80
        use_backend webcam if { path_beg /webcam/ }
        default_backend octoprint

backend octoprint
        option forwardfor
        server octoprint1 127.0.0.1:5000

backend webcam
        http-request replace-path /webcam/(.*)   /\1
        server webcam1  127.0.0.1:8080
If you want to make it run on a different base URL, you'll need to instruct HAProxy to send a X-Script-Name header with each forwarded request to make OctoPrint generate correct URLs on its pages:
backend octoprint
        http-request replace-path /octoprint/(.*)   /\1
        http-request set-header X-Script-Name /octoprint
        option forwardfor
        server octoprint1 127.0.0.1:5000
If you also want to run it SSL encrypted with HAProxy being the SSL terminator, you should also send a header of X-Forwarded-Proto with each forwarded request to indicate https requests. You can configure this in the backend section like this:
backend octoprint
        # ...
        http-request set-header X-Forwarded-Proto https if { ssl_fc }
        # ...
Caddy
For a basic reverse proxy on port 80 use the following:
:80 {
        handle_path /webcam/* {
                reverse_proxy localhost:8080
        }
        reverse_proxy localhost:5000
}
For a managed domain example.com, this is how to run OctoPrint on a subdomain with https termination:
octoprint.example.com {
        handle_path /webcam/* {
                reverse_proxy localhost:8080
        }
        reverse_proxy localhost:5000 {
                header_up X-Forwarded-Proto {scheme}
        }
}
If you want to add a path, here's how you'd go about this, assuming you want OctoPrint to be accessible under https://example.com/octoprint/:
example.com {
        handle_path /octoprint/* {
                handle_path /webcam/* {
                        reverse_proxy localhost:8080
                }
                reverse_proxy localhost:5000 {
                        header_up X-Forwarded-Proto {scheme}
                        header_up X-Script-Name /octoprint
                }
        }
}
Traefik
Assuming a managed domain example.com and an https entrypoint websecure, this is how to run OctoPrint on a subdomain with https termination:
http:
    routers:
      octoprint:
        rule: Host(`octoprint.example.com`)
        entrypoints:
          - websecure
        service: octoprint
    services:
      octoprint:
        loadBalancer:
          servers:
            - url: "http://octopi:80"
If you want to add a path, here's how you'd go about this, assuming you want OctoPrint to be accessible under example.com/octoprint/:
http:
    routers:
      octoprint:
        rule: Host(`example.com`) && PathPrefix(`/octoprint`)
        entrypoints:
          - websecure
        middlewares:
          - add-trailing-slash
          - octoprint-strip-prefix
          - octoprint-script-name
        service: octoprint

    middlewares:
      add-trailing-slash:
        redirectRegex:
          regex: "^(https?://[^/]+/[a-z0-9_-]+)$"
          replacement: "${1}/"
          permanent: true

      octoprint_stripprefix:
        stripPrefix:
          prefixes:
            - "/octoprint"

      octoprint_scriptname:
        headers:
          customRequestHeaders:
            X-Script-Name: "/octoprint"

    services:
      octoprint:
        loadBalancer:
          servers:
            - url: "http://octopi:80"
Apache
Not recommended
Apache is somewhat heavy weighted compared to other options, and the configuration is also a bit messy. If possible it's highly recommended to rather use another option.
For Apache (with mod_proxy, mod_proxy_http, mod_proxy_wstunnel and mod_headers enabled) the basic configuration is something among these lines:
<Location />
  ProxyPass http://<myOctoPrintHost>:5000/
  ProxyPassReverse http://<myOctoPrintHost>:5000/

  RewriteEngine on
  RewriteCond %{HTTP:UPGRADE} =websocket [NC]
  RewriteRule .* ws://<myOctoPrintHost>%{REQUEST_URI} [P,L]
</Location>
or with https:
<Location />
  RequestHeader set X-SCHEME https
  ProxyPass http://<myOctoPrintHost>:5000/
  ProxyPassReverse http://<myOctoPrintHost>:5000/

  RewriteEngine on
  RewriteCond %{HTTP:UPGRADE} =websocket [NC]
  RewriteRule .* ws://<myOctoPrintHost>%{REQUEST_URI} [P,L]
</Location>
If you want to use a different base URL, the configuration will be slightly different:
<Location /octoprint/>
  RequestHeader set X-SCRIPT-NAME /octoprint/
  ProxyPassReverse http://<myOctoPrintHost>:5000/

  RewriteEngine on
  RewriteCond %{HTTP:UPGRADE} =websocket [NC]
  RewriteRule /octoprint/(.*) ws://<myOctoPrintHost>/$1 [P,L]
  RewriteCond %{HTTP:UPGRADE} !=websocket [NC]
  RewriteRule /octoprint/(.*) http://<myOctoPrintHost>/$1 [P,L]
</Location>
If you also want to use https:
<Location /octoprint/>
  RequestHeader set X-SCRIPT-NAME /octoprint/
  RequestHeader set X-SCHEME https
  ProxyPassReverse http://<myOctoPrintHost>:5000/

  RewriteEngine on
  RewriteCond %{HTTP:UPGRADE} =websocket [NC]
  RewriteRule /octoprint/(.*) ws://<myOctoPrintHost>/$1 [P,L]
  RewriteCond %{HTTP:UPGRADE} !=websocket [NC]
  RewriteRule /octoprint/(.*) http://<myOctoPrintHost>/$1 [P,L]
</Location>
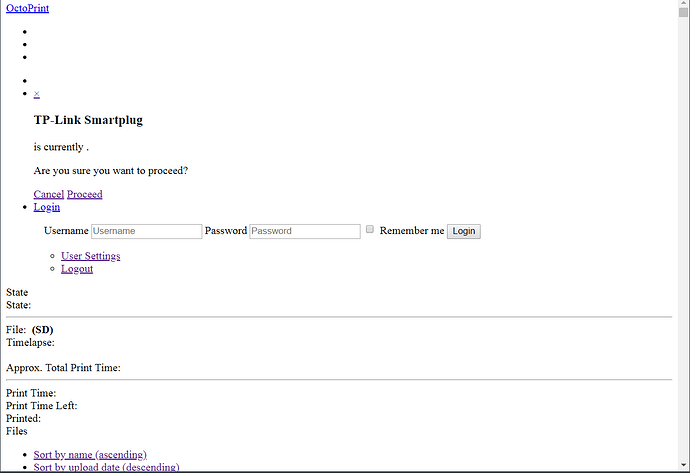
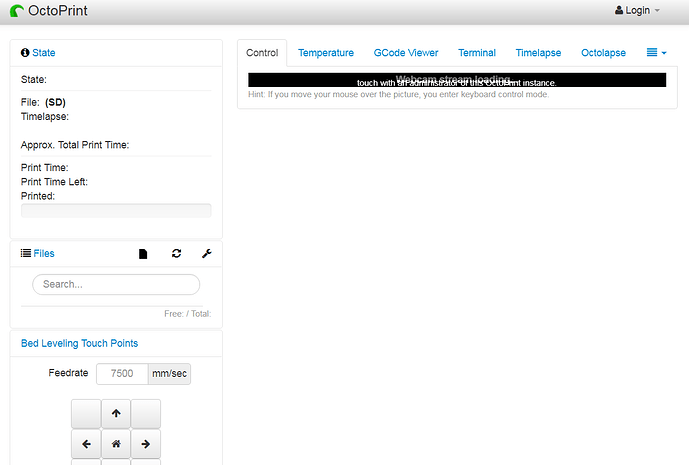

 and a failed attempt to use the
